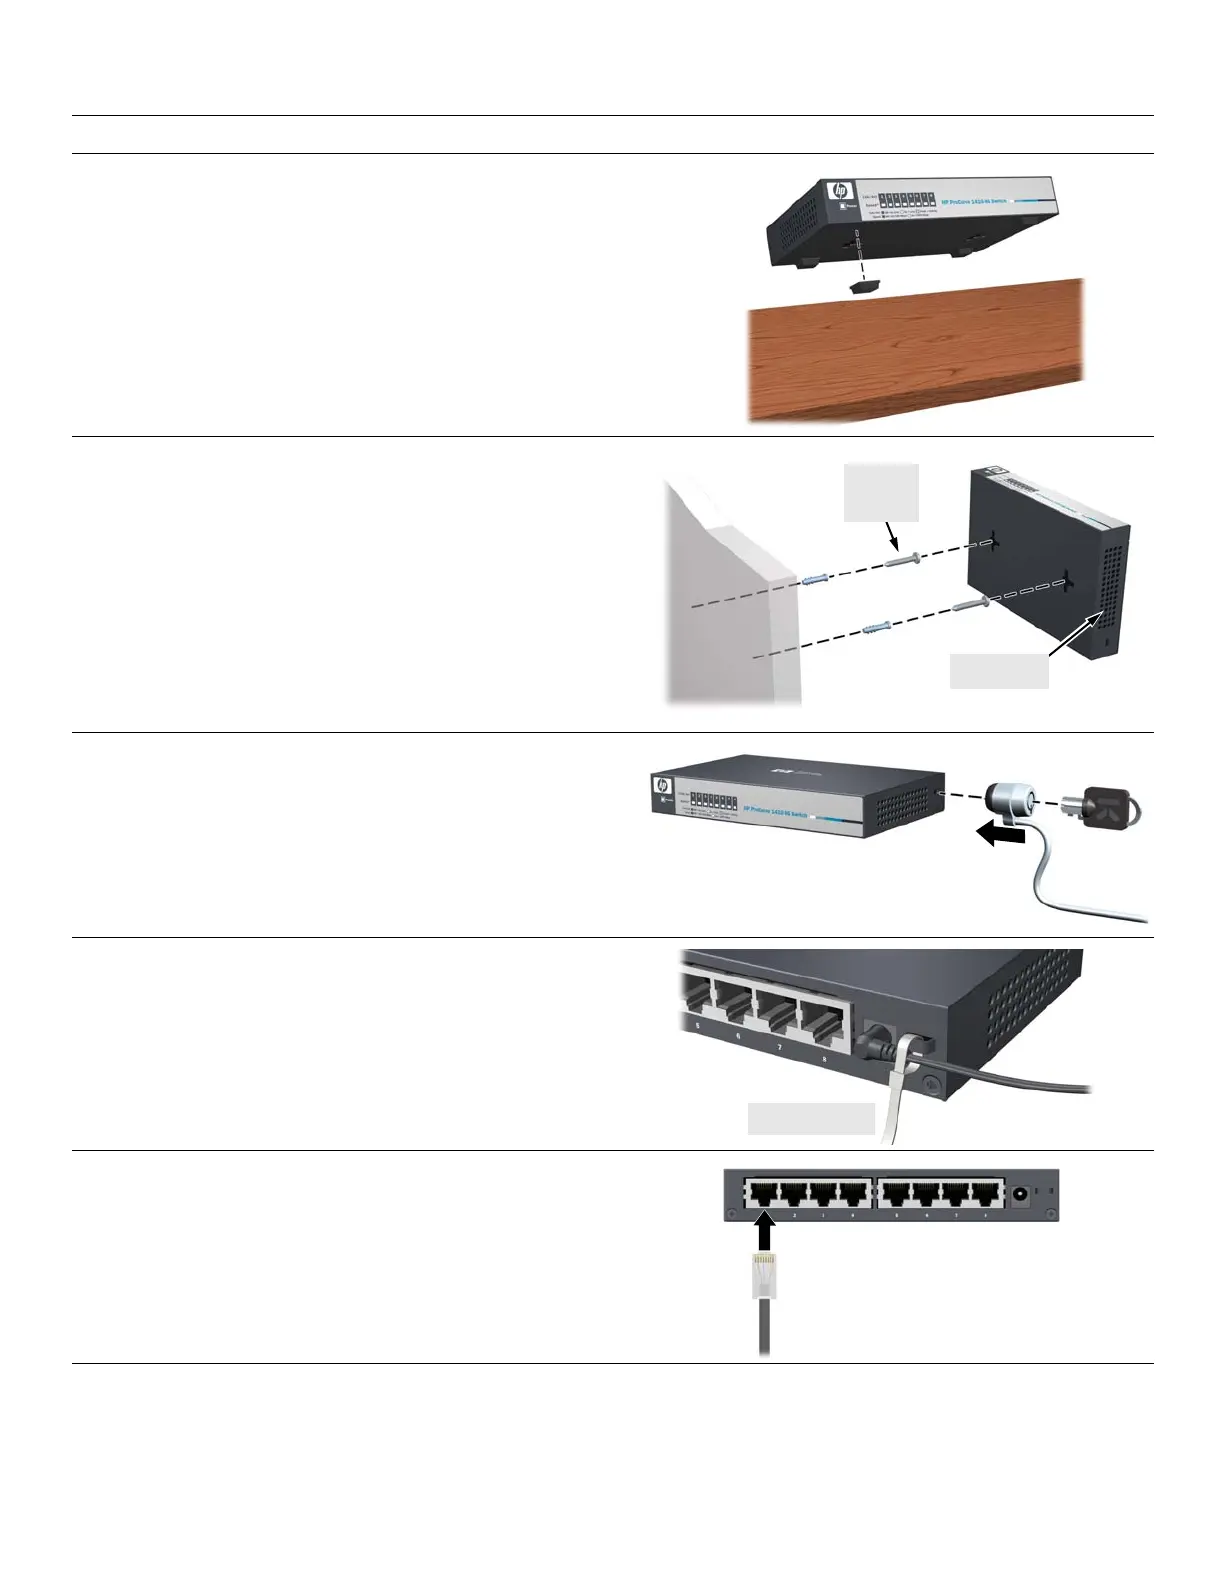
4. Install the Switch Hardware. Turn off the switch before installing the switch hardware.
Table or Desktop: At
tach the four self-adhesive pads
(included in the accessory kit) to the bottom corners of the
switch.
Wall (or Under-Table): For wall or under-table mounting,
use a #1 Phillips (cross-head) screwdriver and the 20-mm M4
tap screws (included). For screw positions, see the mounting
template on page 4. (Under-Table: After installation, a third
screw may be used to prevent switch movement.)
For wall-mounting, the network ports may face up or down.
Do not m
ount the switch with ventilation ducts facing up or
down. (See “Safety Precautions” on page 3.)
M-4 tap
screws
Ventilation
5. (Optional) Lock the Switch. Use a Kensington lock or
similar device (not included) to physically secure the switch.
6. Power On the Switch.
Use the cable tie strap to secure the connection.
7. Connect Network Cables.
2
QSG-1410-8G.fm Page 2 Monday, January 11, 2010 6:32 PM
 Loading...