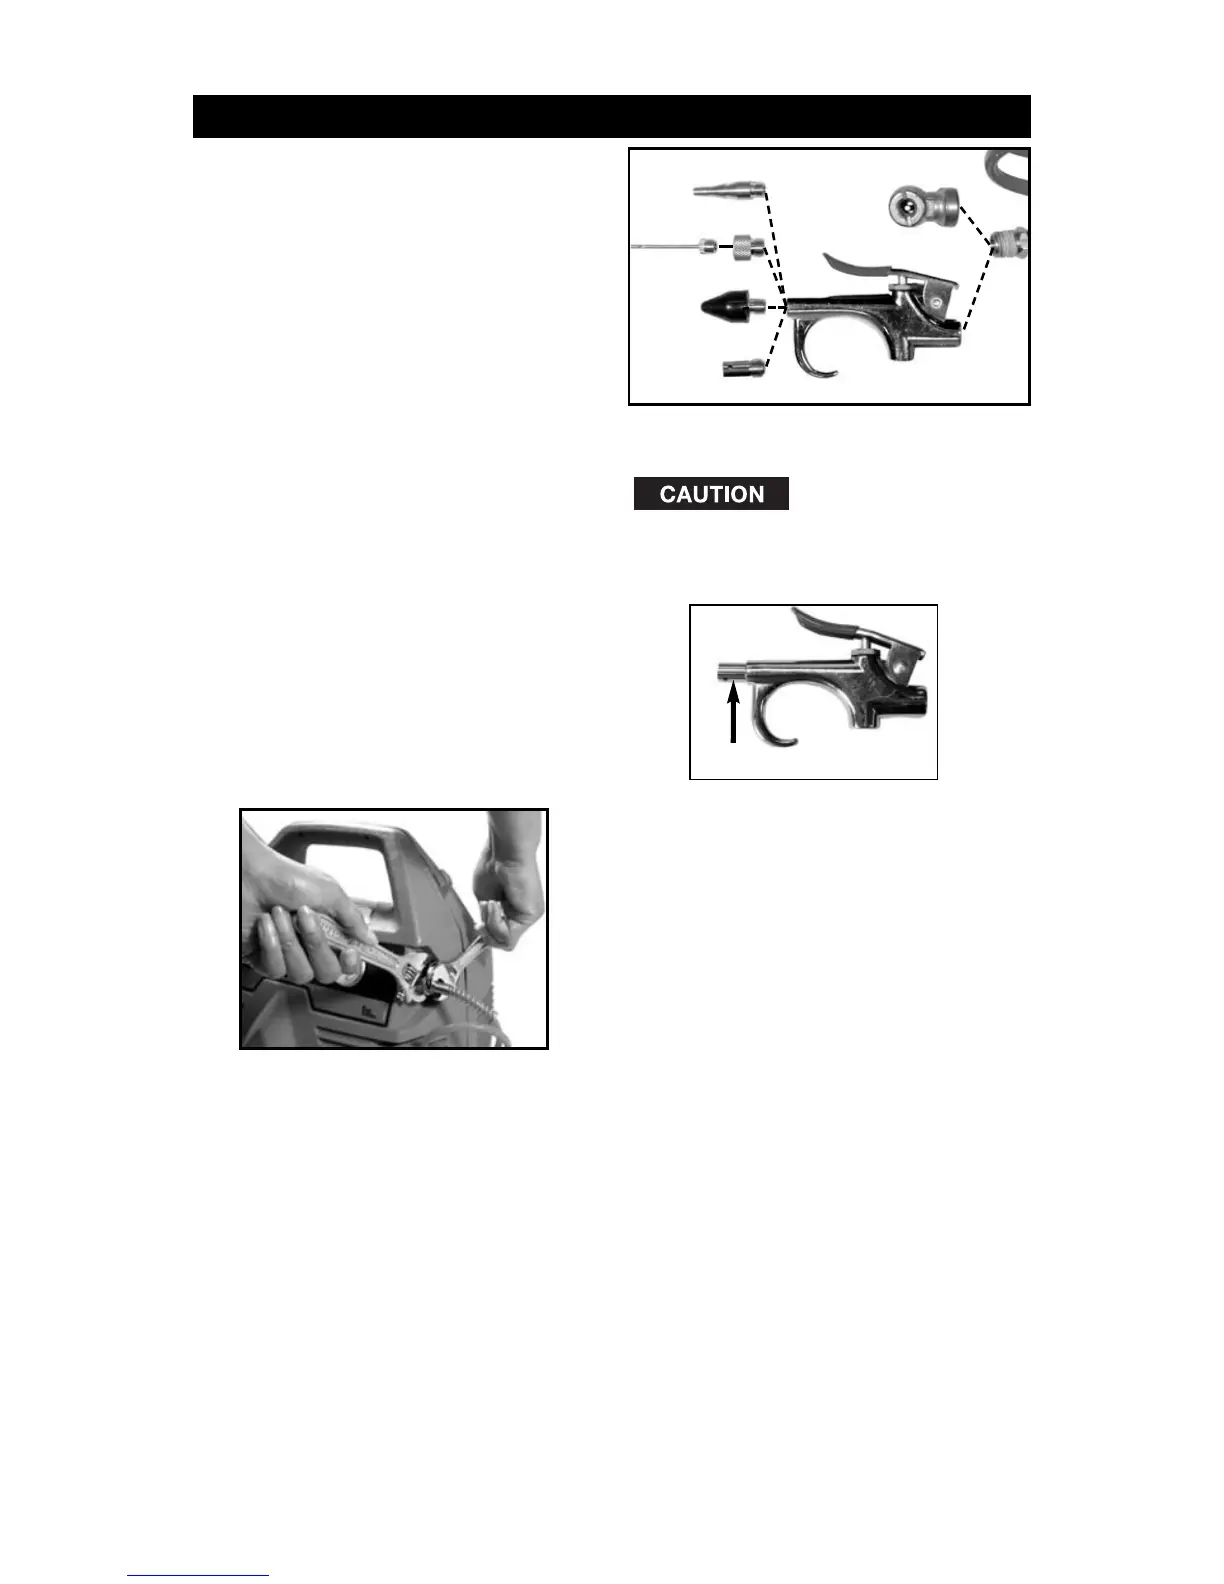
Assemble Blow Gun
1. Attach the blow gun (c) to hose (b).
Risk of unsafe
operation. If an
accessory is not being used with
the blow gun, the safety nozzle
MUST be assembled.
2. Assemble the safety nozzle (d),
tapered inflator (g), rubber blow
gun tip (h), or blow gun adapter
(e) to blow gun. NOTE: To use
the inflating needle (f) the blow
gun adapter has to be
assembled to blow gun.
3. Attach the inflating needle (f) to
the blow gun adapter on the
blow gun.
9- ENG
D29728
ASSEMBLY
Assemble Hose
1. Assemble hose to air outlet.
IMPORTANT: The hex fitting on
the air outlet MUST be held in
place with a wrench when
tightening hose onto air outlet.
Tools Required for Assembly
1 - 9/16" open end wrench or
adjustable wrench
1 - adjustable wrench
Unpacking
1. Remove unit from carton and
discard all packaging. NOTE:
Save all parts bags.
Contents of Carton
1 - Air Compressor
1 - Air Hose
1 - Blow Gun and Inflation Kit
(7 pieces)
Safety Nozzle
Assemble Accessories
Choose the accessory needed.
Assemble Hose Female Tire Chuck
1. Assemble female tire chuck (a) to
hose (b) and tighten securely
with wrenches.
a
c
b
e
d
g
f
h

 Loading...