Home
Husqvarna
Sewing Machine
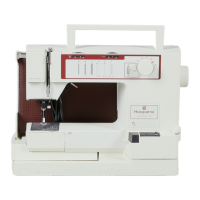
Classica 100
Husqvarna Classica 100 User Manual
4
of 1
of 1 rating
10 pages
Give review
Manual
Specs
To Next Page
To Next Page
Loading...
2
Table of Contents
Sewing Machine Overview
2
Unpacking
2
Putting the Machine Away
2
Connecting the Foot Control
3
Free Arm/Extension Table
3
Presser Bar Lever
3
Presser Foot Pressure
3
Removing the Bobbin Case
4
Bobbin Winding
4
Insertion of the Bobbin Case
4
Threading Lower/Upper Thread
4
Thread Cutter
5
Tension of the Upper Thread
5
Correct and Incorrect Thread Tension
5
Changing Needle
5
Stitch Selection and Setting Table
6
Choice of Stitch Length
6
Recommended Setting of Stitches
6
Accessory Box
7
General Hints
7
Straight Stitching
7
Three-Step Zig-Zag
8
Overlock and Overcast Stitch
8
Blindstitching
8
Corded Buttonholes
9
Cutting the Buttonhole
9
Sewing on Buttons
9
Changing the Light Bulb
10
Troubleshooting
10
Care of the Machine
10
Belts
10
4
Based on 1 rating
Ask a question
Give review
Questions and Answers:
Need help?
Do you have a question about the Husqvarna Classica 100 and is the answer not in the manual?
Ask a question
Husqvarna Classica 100 Specifications
General
Type
Mechanical
Max Stitch Length
4 mm
Max Stitch Width
5 mm
Free Arm
Yes
Bobbin Type
Front-loading
Presser Feet Included
zipper foot, buttonhole foot
Related product manuals
Husqvarna Classica 90
10 pages
Husqvarna VIKING Amber S 100
35 pages
Husqvarna 250
44 pages
Husqvarna Royale
144 pages
Husqvarna VIKING 350
54 pages
Husqvarna Prisma 990
60 pages
Husqvarna Platinum 730
38 pages
Husqvarna Optima 150 E
43 pages
Husqvarna Designer Diamond
134 pages
Husqvarna Quilt Designer II
82 pages
Husqvarna VIKING HUSKYLOCK 936
64 pages
Husqvarna VIKING Designer EPIC
202 pages