©2007 Icom America Inc. Page 1
Icom America, Inc.
2380 116
th
Ave NE
Bellevue, WA 98004
425.454.7619
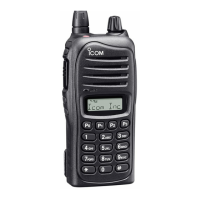
Front Panel Programming for the F3021/F4021 Radio
What You Will Need
• OPC-478 Cloning Cable
• Cloning Software
• Squelch Setting Entered in Cloning Software
• Frequencies Entered in Cloning Software
Enabling the Radio
1. Connect the OPC-478 cloning cable and read the radio.
2. In the Cloning software, navigate to Maker reserve -> Set Mode Access. Set
to Enable. Once this has been enabled, the field in step 2 (following) will
appear in the cloning software.
3. Navigate to Common -> Common -> Security -> Set Mode Access. Set to
Enable.
4. Write to the radio.
5. Turn off the radio.
Selecting Set Mode and Channel
1. Press and hold P0 and # (on the keypad) and turn on the radio. The display
shows DEALER.
2. Enter in the Dealer Password (shown in Common -> Common -> Security ->
Dealer Passcode). The numbers will not appear on the display. The display
shows SETMODE.
3. Press P0. The display shows 1 CH00 1.
4. Press P3. This allows you to enable channel change (001 Blinks).
5. Press P1 to if you want to change zones (banks).
6. Press the Up/Down keys to scroll through the channels and select a channel.
(Side buttons below PTT.)
7. Press P3 to select the channel you want to edit (Channel stops blinking).
8. Press the up/down keys to scroll through the parameters you can change for
that channel:
• 9-digit number (with lightning bolt pointing down and to the right, for receive
frequency)
• 9-digit number (with lightning bolt pointing up and to the right, for transmit
frequency)
• RC 1000 (RX tone)
• TC 1000 (TX tone)
• Alphanumeric text, if you want to rename the channel (shows blank as
default).
Once you have selected a channel, you can change the functions described in the
following paragraphs.