1
Icom IC-718 Tuner Accessory
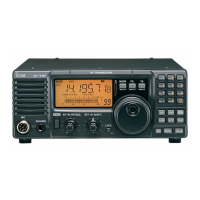
This article is about using a tuner accessory device with the Icom iC-718 transceiver.
The circuit was obtained elsewhere; here are my observations on making and installing the
tuner accessory to be used with the 718.
The tuner accessory plugs into the rear panel socket of the 718 transceiver, Tuner Control
Socket (Tuner), this socket is used to take the Icom AH-4 automatic antenna tuner.
To use the tuner accessory with the 718, the operator has to go into the menu and turn on the
automatic tuner setting. (see Page 2) Setting up the Icom menu for the tuner accessory.
When tuner accessory is installed, push (press) the button and the transceiver output
changes to a steady carrier at say 10 watts to allow the ATU to be adjusted, release the button
and the transceiver returns to the previous mode and power.
I use a manual antenna tuning unit (ATU) to match my doublet antenna. When changing bands
the ATU has to be adjusted to match the antenna impedance to the 718.
On a quiet part of the band I want to use, adjust my ATU to the antenna tuner settings for the
band, select mode as cw, reduce the output power to 5-10 watts, press (in my case) the cw
keyer tune button to transmit a steady low power (5-10 watts) carrier, adjust (fine-tune) the
ATU tuning controls for minimum reflected swr, stop transmitting, increase the transceiver
power to the operating level and if using SSB switch back to that mode.
When using the tuner accessory, I leave the mode and power settings at those I usually use
and select the band, adjust the ATU tuner to settings for the band being used, press the tuner
accessory push button and fine-tune the ATU tuning controls for minimum reflected swr,
release the tuner push button, the mode and power have returned to their previous settings.
For Icom transceivers there are a few different tuner devices to choose from, I looked for a
tuner circuit which had an external push button, uses components that I could find locally and
the tuner circuit mentioned being used with the IC-718
After the tuner accessory has been installed, pressing the tuner button will automatically:
Switch your rig to cw mode.
Change the power output to 10 watts.
Transmit a cw carrier while tuning.
Push button switched off (released), the 718 returns to the previous mode and power settings
Switch On = 10 watts cw carrier and Switch Off = previous power / mode
The tuner accessory circuit uses 1 Molex plug, 1 resistor and 1 push button: The circuit
mentions using between 10kΩ to 20kΩ ohm 1/4 watt resistor, I had a 15kΩ 1/4 watt resistor
available so used that value.