3-5
ADJUSTMENT OPERATION
ADJUSTMENT
ITEM
VALUE
IDLING CURRENT
ADJUSTMENT
-PREPARATION-
1• Disconnect W261 (Power cable) from EP501 and EP502 (PA200W
UNIT). (See the next page.)
– –
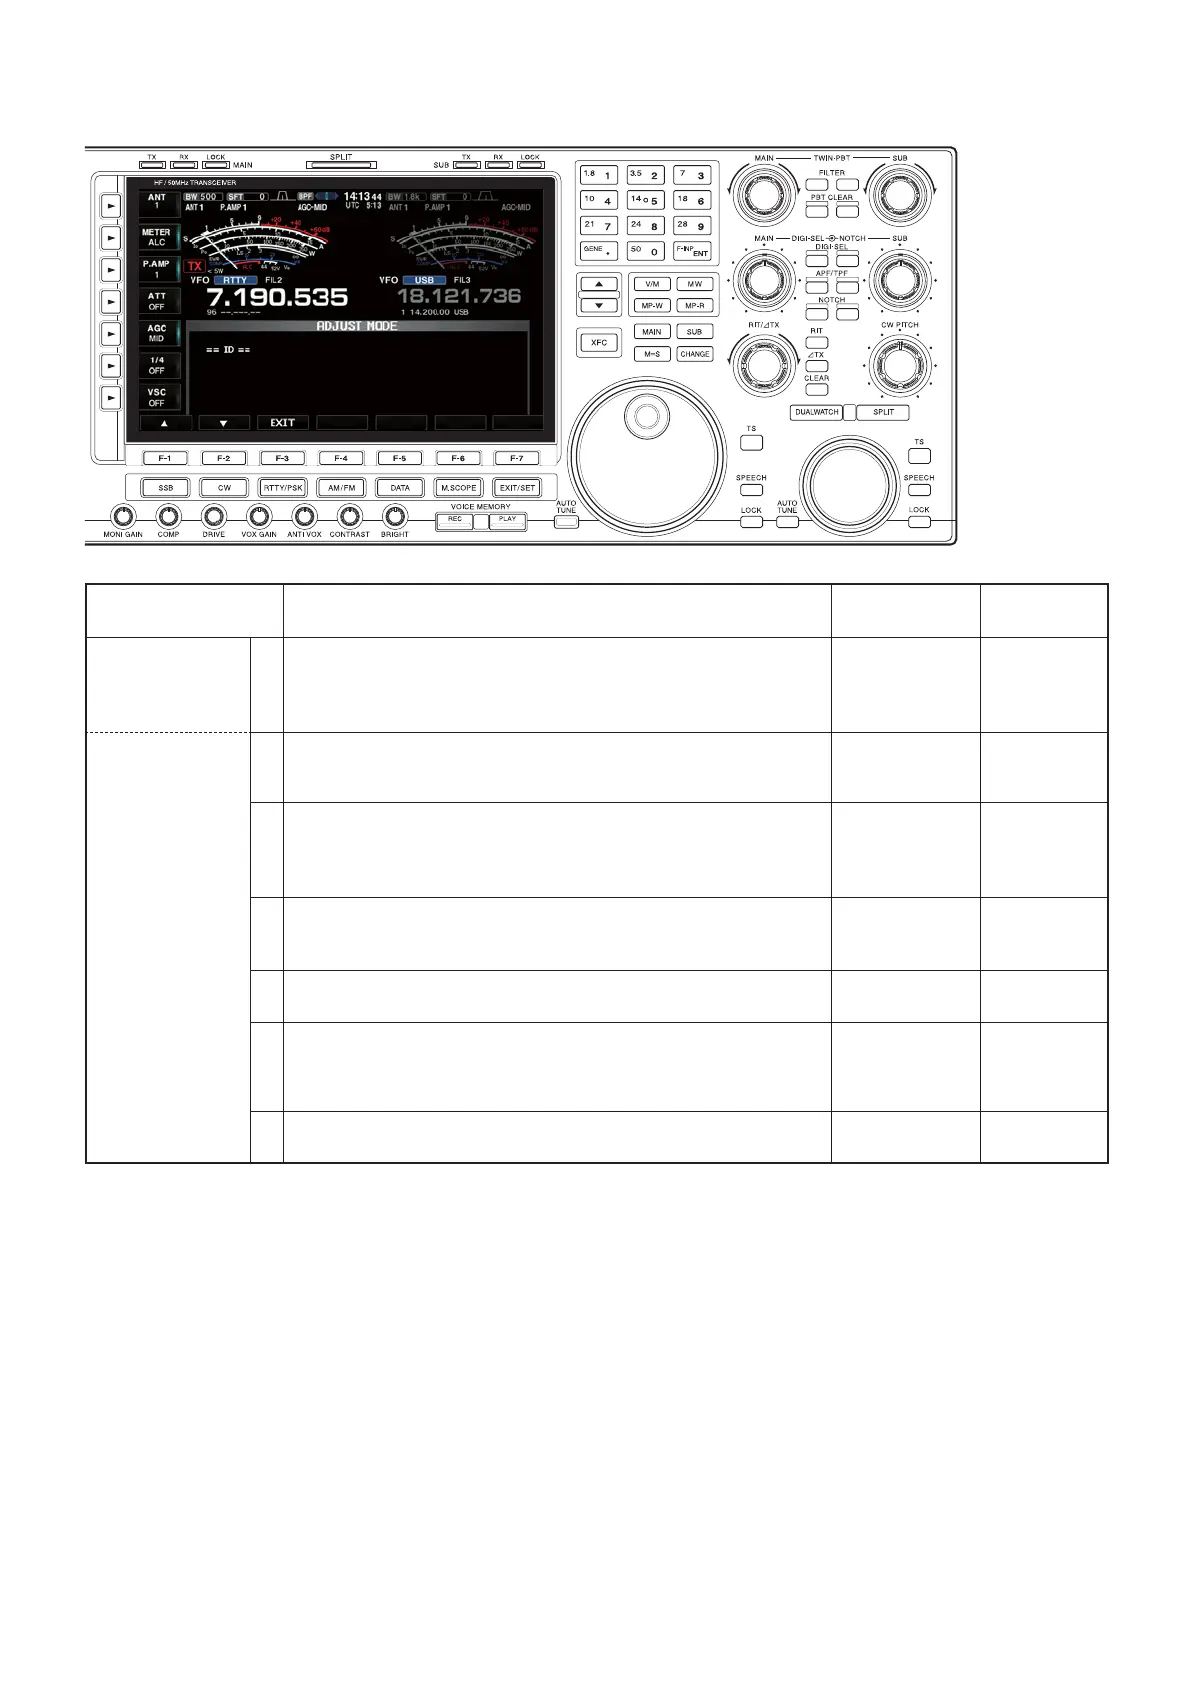
-ADJUSTMENT- 2 1) Push [F-3] (ID) to enter the ID Adjustment menu.
2) Select the item [FINAL ID SET], and then push [F-7].
• “FINAL1 IDV” appears.
[FINAL ID SET] Push [F-7].
3 1) While holding down [F-6], turn the main dial to set the
adjustment value.
2) While holding down [F-6], push [F-7].
• “FINAL2 IDV” appears.
[FINAL1 IDV]
“00”
4 1) While holding down [F-6], turn the main dial to set the
adjustment value.
2) While holding down [F-6], push [F-7].
[FINAL2 IDV]
“00”
5• Select the item [DRIVER ID SET], and then push [F-7].
• “DRIVER IDV” appears.
[DRIVER ID
SET]
Push [F-7].
6 1) While holding down [F-6], turn the main dial to set the
adjustment value.
2) While holding down [F-6], push [F-7].
• Returns to the Adjustment menu.
[DRIVER IDV]
“00”
7 1) Turn OFF the power.
2) Connect W261 to EP501 and EP502 (PA200W UNIT).
–
–
3-2 FINAL AND DRIVER IDLING CURRENT ADJUSTMENTS
(Necessary only when the fi nal or drive amplifi er has been replaced.)
• ID adjustment screen
RF-A UNIT
RF-A UNIT
MAIN UNIT
 Loading...