58
13
CONFECTION AND INSTALLATION
2001 NEW 2001 NEW
■ Using the optional MB-75
The optional MB-75 flush mount is available for mount-
ing the controller and speaker to a flat surface such as
an instrument panel.
CAUTION: KEEP the transceiver and microphone
at least 1 meter away from your ship’s magnetic
navigation compass.
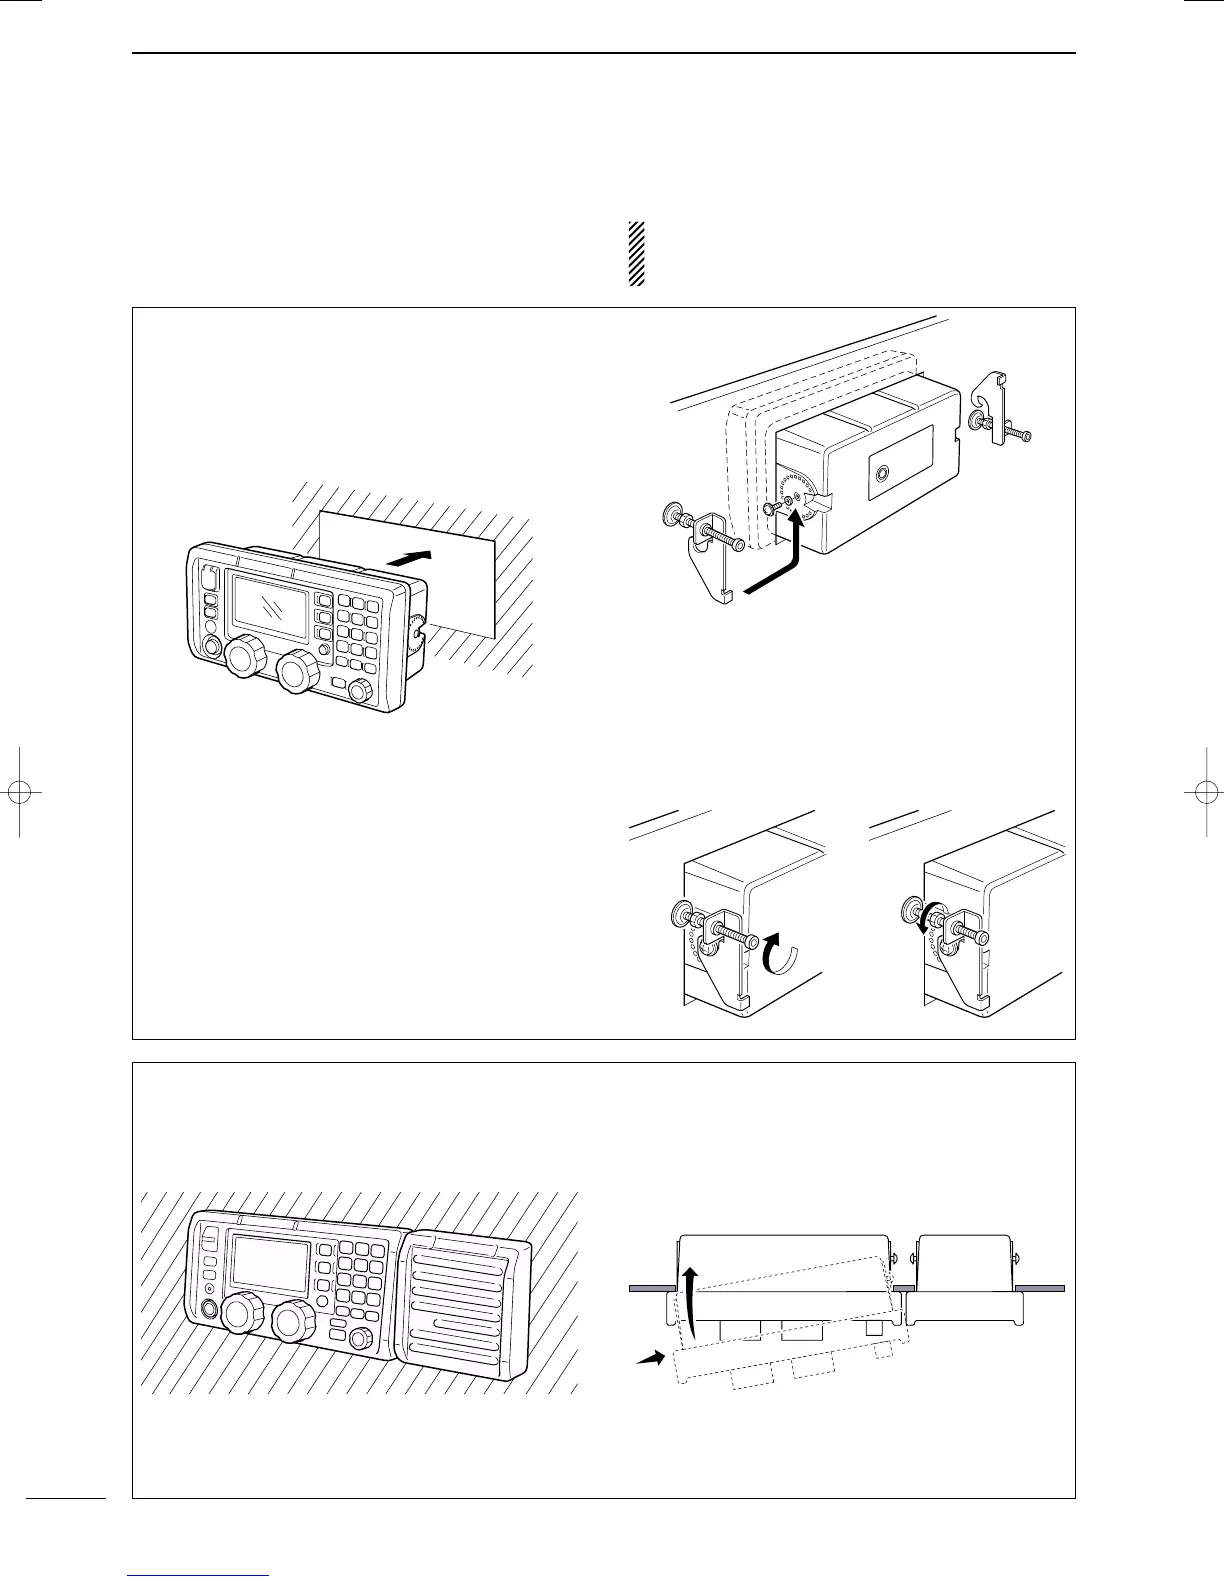
q Using the template on the page 67 for the remote
controller (RC-25), and page 69 for the speaker
(SP-24), carefully cut a hole into the instrument
panel (or wherever you plan to mount the controller
or the speaker).
w Slide the controller or the speaker through the hole
as shown below.
e Attach the supplied 2 screws (M5×8) and spacers
on either side of the controller or speaker.
r Attach the clamps on either side of the controller
or speaker.
• Make sure that the clamps align parallel to the body.
t Tighten the end screws on the clamps (rotate
clockwise) so that the clamps press firmly against
the inside of the instrument control panel.
y Tighten the locking nuts (rotate counterclockwise)
so that the controller or speaker is securely
mounted in position as below.
u Connect the control cable then return the instru-
ment control panel to its original place.
✔ For your reference
When flush mounting the controller and speaker side
by side as below, screw and spacer attachment for
the facing side will be impossible with the instructions
above.
In this case, refer to the instructions at right for refer-
ence.
q Carefully cut the holes with at least 25 mm (1 in)
space between them into the instrument panel.
w Install the speaker as instructed above, first.
e Attach the screw and spacer on the speaker side
of the controller.
r Slide the controller through the hole as shown
below.
t Attach the screw and spacer on the other side of
the controller, then attach the clamps and follow
steps t to u as above.
IC-M802_USA.qxd 02.5.30 11:40 Page 58
 Loading...