Classic SE FF - Installation & Servicing
17
INSTALLATION
REAR FLUE OUTLET
14
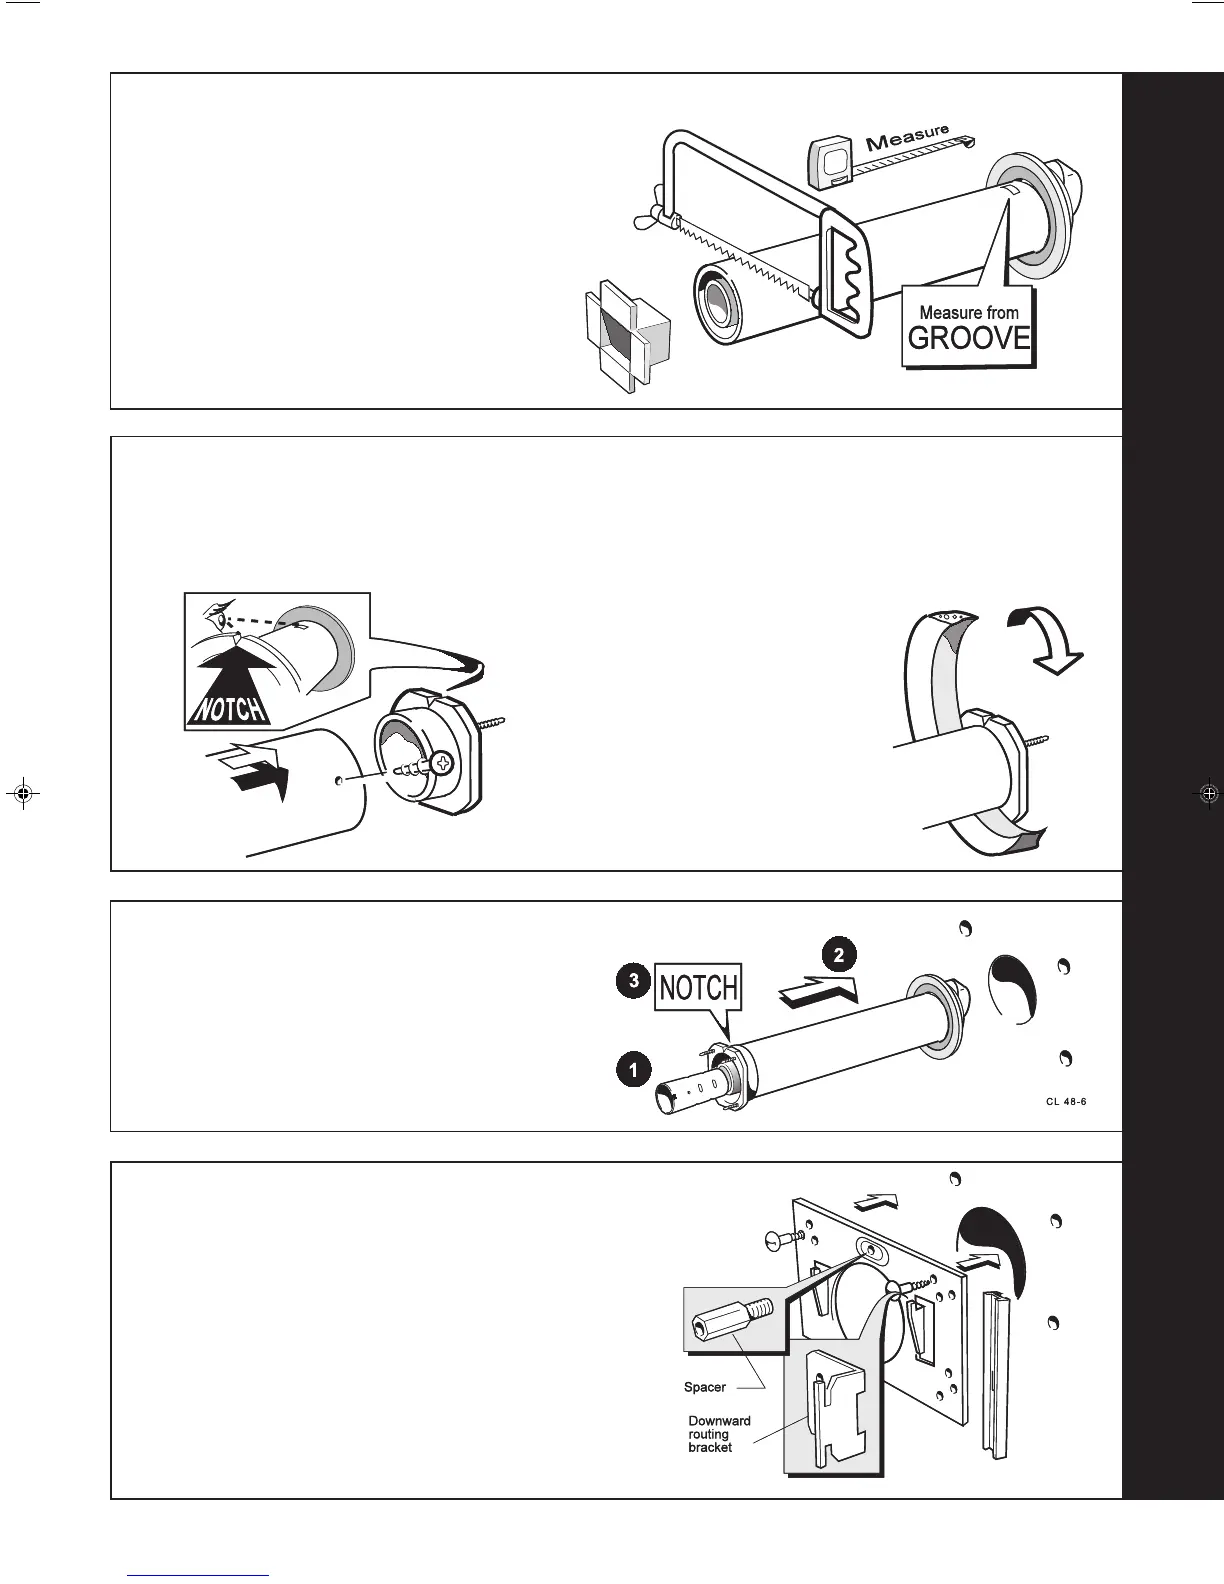
CUTTING THE FLUE - wall thicknesses of 114 to 600mm
Note. If the stand-off brackets are used it is essential that
30mm is added to the measured wall thickness when
marking the flue (to allow for the thickness of the brackets).
1. Measure and note the wall thickness X.
2. Mark the wall thickness onto the flue.
3. To ensure the tube is cut square, mark the flue all the
way round.
4. Cut to length X, using the cardboard ring for support.
5. Remove cardboard ring and remove any burrs.
15
FITTING THE BOILER SEALING RING TO THE FLUE
2. Drill 3 holes 3.2mm (1/8") dia. through the outer flue duct
and boiler sealing ring.
Do NOT drill the inner flue
duct.
3. Insert the self-tapping screws, provided, in order to fix the
boiler sealing ring in position.
1. Fit the boiler sealing ring inside the outer flue duct. Ensure
the boiler sealing ring is fully engaged.
Ensure the notch aligns with the groove on the outer flue
duct. This ensures correct alignment of the flue terminal.
4. Stick the self-adhesive
foam strip, provided in the
hardware pack, onto the
flue immediately behind
the boiler sealing ring.
17
WALL MOUNTING PLATE
1. Fix the mounting plate to the wall with the No.14 x 50mm wood
screws.
2. If downward routing of pipes is required then the downward
routing pipe brackets and M8 spacer (supplied in the
Downward Piping Kit) should be fitted to the wall mounting
plate now.
3. Fit the bottom 2 screws to secure the bracket(s) to the wall,
through the wall mounting plate.
4. Check with a spirit level that the plate is vertical.
16
FITTING THE FLUE ASSEMBLY
1. Insert the flue extension tube into the flue assembly.
2. Insert the flue assembly through the hole far enough to
allow the rubber seal to unfold completely and form an
adequate seal on the outside wall.
3. Ensure the notch is at the top. This will aid the location of
the studs into the boiler back panel.
200544-5.pmd 20/02/2008, 13:2617
 Loading...