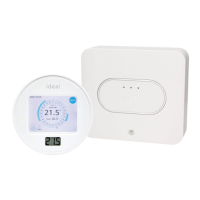
THERMOSTAT & TRANSCEIVER COMBI
INSTALLATION GUIDE
CONTENTS
Class V when used in isolation. Class VI when used with an outside sensor, Class VIII when used with more than 2 zones.
Contribution to seasonal space heating energy eciency 3% (Class V), 4% (Class VI), 5% (Class VIII).
A B C
E
F
G H I
D
A. Touch Thermostat
B. Mounting Bracket Cover
C. Mounting Bracket
D. Desktop stand
E. Transceiver
F. Batteries (AA)
G. Screws & Plugs
H. Quick Start Guide
I. SAP Registration Label
8. Hold the thermostat
approximately 2
metres away from
the boiler and
“CONNECTING TO
BOILER” will be
displayed on your
screen.
9. After approximately
60 seconds “Set
System Time” will be
displayed on your
screen. Use up and
down arrows to set
the time. Once time is
set press “DONE”
10. “Set System Date” will
be displayed on your
screen. Use up and
down arrows to set
the date. Once date is
set press “DONE”.
QUICK START GUIDE
Logic Combi C / Vogue GEN2 Combi
In the unlikely event that commissioning is unsuccessful (e.g. central heating
will not switch on or will not switch o), electrically isolate the boiler,
remove 1 battery and repeat from step 6.
Blanking
Plate
Transceiver
Slot
INSTALLATION
For User & Installation Guide please visit www.idealboilers.com
1. Isolate electrical power to the
boiler.
2. Remove the blanking plate by
inserting flat blade screwdriver
into slot situated centrally at
bottom of blanking plate.
3. Remove link wire plug & keep in
a safe place.
4. Connect the transceiver
electrical plug.
5. Locate and push the transceiver
assembly into the boiler.
6. Insert only 3 batteries into the
Thermostat.
7. Turn electrical power back on
to the boiler and immediately
insert the fourth battery into the
Thermostat.
Model Name:
Model Qualifier:
Signed: Date:
UIN 217679 A01
Touch (Single Zone)
ErP Class V or ErP Class VI
IDEAL BOILERS LTD
I certify that this boiler is connected to a weather
compensation control as indicated:
Touch enhanced load compensator (Class V)
Touch enhanced load compensator & OS2 weather
compensator temperature sensor (Class VI)
These products are compatible with the boiler and

 Loading...