Thank you for choosing an IDEC Web Server Module.
This module is compatible with the IDEC Micro3C, ONC and MicroSmart PLCs, and has
four major built-in functions:
• Remote monitoring and control over an Ethernet network using
WindLDR or standard SCADA software
• Remote reading and writing PLC parameters over an Ethernet network using
standard IE or Netscape browser
• 1:1 communication between two PLCs over an Ethernet network
• Email messaging where predefined messages can be sent to an email address
or cell phone
This Quick Start Guide will lead you through the process of confi guring a Web Server
Module, putting it onto an Ethernet network (as illustrated above) and using it to remotely
monitor and control a PLC using WindLDR software.
Introduction
Parts Check List:
Please make sure the following parts are available before proceeding to the next step.
1)
Parts Quantity Notes Check Box
Web Server Module 1 Comes with RS232 cable
WindLDR Version 4.7 1 WindLDR 4.7 or above installed
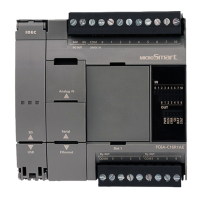
IDEC PLC 1 FC2A-( )C, FC3A, FC4A, FC5A series
24V DC Power Supply 1
Cross-over Ethernet cable 1
Standard Ethernet cable 2 Also known as Straight-thru cable
2)
In addition to the items listed above, a static IP address and its Subnet Mask & Default
Gateway are also required. An IP address needs to be assigned to the Web Server
Module in order for it to communicate over the Ethernet network. Please consult your
Network Administrator for this information. This IP Address and its Subnet Mask &
Default Gateway will be called IDEC Web Server Module IP Address. You will need this
information in Step 3F of this Quick Start Guide. Please do NOT continue if this informa-
tion is not available.
IP Address: __ __ __.__ __ __.__ __ __. __ __ __
Subnet Mask: __ __ __.__ __ __.__ __ __. __ __ __
Default Gateway: __ __ __.__ __ __.__ __ __. __ __ __
This is What You Will Be Setting Up:
Step 1: Connect the Web Server Module
This walks you through the process of connecting the Web Server Module to your PC.
Step 2: Confi gure the PC
This describes how your PC needs to be confi gured to communicate with the Web
Server Module.
Step 3: Confi gure the Web Server Module
This takes you through the process of how to confi gure the Web Server Module to
communicate with the WindLDR software.
Step 4: Confi gure the WindLDR software
This describes the Remote Monitoring & Control function of the Web Server Module using
WindLDR software.
Step 1: Connect the Web Server Module
First, make sure your PC is turned ON and the Dip Switch on the Web Server Module is in
REMOTE mode. It is recommened that you should not run any other applications during
this process.
In order to communicate with the Web Server Module, a Cross-over
Ethernet cable is REQUIRED. Please ask your IT personnel for this
Cross-over cable or it can be purchased at any electronics store.
A. Connect the Web Server Module to a 24V DC power supply.
B. Using the Cross-over Ethernet cable, connect one end of the cable to the RJ-45 port of
the Web Server Module.
C. Connect the other end of the cable to your PC Ethernet port.
Proceed to Step 2: Confi gure the PC
In step 2, you will confi gure your computer to communicate with the Web Server Module.
To do this, you will need to confi gure your PC network settings by assigning a static IP
address to your PC.
First, fi nd out which operating system your computer is running, such as Windows 95, 98,
Millennium, 2000 or XP. Once you know which Windows operating system you are running,
follow the directions in this step for your particular operating system.
If you are running: Windows 98, Windows Millennium
A.
Click the Start button, click Settings and open the Control Panel. From there, double-
click the Network icon to open the Network screen.
B. Select the Confi guration tab and highlight the TCP/IP line for the applicable Ethernet
adapter*. If the word TCP/IP appears by itself, select that line. Then, click the
Properties button.
*Note: Do not choose a TCP/IP entry whose name contains DUN, PPPoE, VPN or AOL.
Quick Start Guide
Web Server Module for MicroSmart PLC
Step 2: Confi gure the PC
C. Click the IP Address tab and select Specify an IP Address*.
* This is assuming your network is using a DHCP server. If your PC default
setting is Specify an IP Address, where the IP address and Subnet Mask
fi elds are already predefi ned, please note and write down these numbers
before proceeding to the next step. We will refer to this as the PC IP Address.
PC IP Address: __ __ __.__ __ __.__ __ __. __ __ __
Subnet Mask: __ __ __.__ __ __.__ __ __. __ __ __
You will need to revert your PC back to this IP address when you are done
confi guring the Web Server Module.
D. Enter the following information into the IP Address and Subnet Mask fi elds:
IP Address: 192.168.1.1
Subnet Mask: 255.255.255.0
E. Click the OK button. Windows may ask you for the original Windows installation disk
or additional fi les. Supply them by pointing to the correct fi le location, e.g., D:\win98,
D:\win9x, C:\windows\options\cabs, etc. (This assumes that “D” is the letter of your
CD-ROM drive).
F. If Windows asks you to restart your PC, click the Yes button. If Windows does not ask
you to restart, restart your computer anyway.
Proceed to Step 3: Confi gure the Web Server Module
If you are running: Windows 2000
A.
Click the Start button, click Settings and open the Control Panel. From there, double-
click the Network and Dial-up Connections icon. This will display the Network
screen.
B. Double-click Local Area Connection and click the Properties button.
C. Select Internet Protocol (TCP/IP) and click the Properties button.
D. Select Use the following IP address*.
* This is assuming your network is using a DHCP server. If your PC default
setting is Use the following IP address, where the IP address, Subnet
Mask and Default Gateway fi elds are already predefi ned, please note and
write down these numbers before proceeding to the next step. We will
refer to this as the PC IP Address.
PC IP Address: __ __ __.__ __ __.__ __ __. __ __ __
Subnet Mask: __ __ __.__ __ __.__ __ __. __ __ __
Default Gateway: __ __ __.__ __ __.__ __ __. __ __ __
You will need to revert your PC back to this IP
address when you are done confi guring the Web
Server Module.
E. Enter the following information into the IP Address
and Subnet Mask fi elds:
IP Address: 192.168.1.1
Subnet Mask: 255.255.255.0
F. Click the OK button to close the Internet Protocol (TCP/IP) Properties dialog box.
G. Click the OK button again, to close the Local Area Connection Properties dialog box.
Proceed to Step 3: Confi gure the Web Server Module
If you are running: Windows XP
The following instructions assume you are running Windows XP’s default interface. If you
are using the Classic interface (where the icons and menus look like previous Windows
versions), please follow the instructions for Windows 2000.
A. Click the Start button and open the Control Panel. Double click the Network
Connections icon to display the Network screen.
B. Double-click Local Area Connection and click the Properties button.
C. Select Internet Protocol (TCP/IP) and click the Properties button.
D. Select Use the following IP address*.
* This is assuming your network is using a DHCP server. If your PC default
setting is Use the following IP address, where the IP address, Subnet
Mask and Default Gateway fi elds are already predefi ned, please note and
write down these numbers before proceeding to the next step. We will
refer to this as PC IP Address.
PC IP Address: __ __ __.__ __ __.__ __ __. __ __ __
Subnet Mask: __ __ __.__ __ __.__ __ __. __ __ __
Default Gateway: __ __ __.__ __ __.__ __ __. __ __ __
You will need to revert your PC back
to this IP address when you are done
confi guring the Web Server Module.
E. Enter the following information into the IP Address and Subnet Mask fi elds:
IP Address: 192.168.1.1
Subnet Mask: 255.255.255.0
E. Click the OK button to close the Internet Protocol (TCP/IP) Properties dialog box.
F. Click the Close button to close the Local Area Connection Properties dialog box.
Proceed to Step 3: Confi gure the Web Server Module
1 2 3 4
5 6 7 8
USA
IDEC Corporation
Tel: (408) 747-0550
opencontact@idec.com
Canada
IDEC Canada Ltd.
Tel: (905) 890-8561
sales@idec.com
Australia
IDEC Australia Pty. Ltd.
Tel: +61-3-9763-3244
sales@au.idec.com
Japan
IDEC Corporation
Tel: +81-6-6398-2571
products@idec.co.jp
United Kingdom
IDEC Electronics Ltd.
Tel: +44-1256-321000
idec@uk.idec.com
Germany
IDEC Elektrotechnik GmbH
Tel: +49-40-253054-10
service@idec.de
Hong Kong
IDEC (H.K.) Co., Ltd.
Tel: +852-2803-8989
info@hk.idec.com
China/Beijing
IDEC (Shanghai) Corporation
Tel: +86-10-6599-5541
China/Shanghai
IDEC (Shanghai) Corporation
Tel: +86-21-5353-1000
idec@cn.idec.com
China/Shenzhen
IDEC (Shenzhen) Corporation
Tel: +86-755-8356-2977
Singapore
IDEC Asia Pte. Ltd.
Tel: +65-6746-1155
info@sg.idec.com
Taiwan
IDEC Taiwan Corporation
Tel: +886-2-2698-3929
service@idectwn.com.tw
Specifi cations and other descriptions in this catalog are subject to change without notice.
©2006 IDEC Corporation. All Rights Reserved.
Catalog No. FC9Y-QS100-0 4/06 7.5K
Continued on page 5
Support Information
IDEC MicroSmart
www.idec.com/plc
Software demos and upgrades:
www.idec.com/software
Technical support
support@idec.com
800-262-IDEC
www.idec.com
Phone: 800.894.0412 - Fax: 888.723.4773 - Web: www.clrwtr.com - Email: info@clrwtr.com