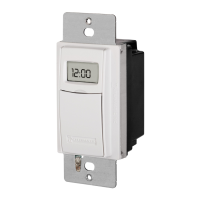
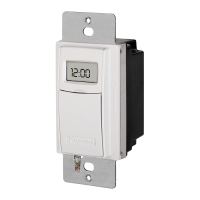
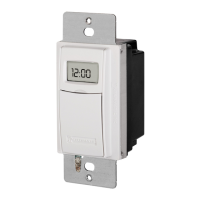
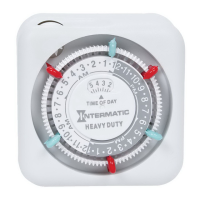
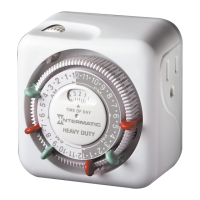
ST01/ST01K/EI600
In-Wall Timer with Astro Feature
Installation and User Guide
RATINGS
ST01/ST01K EI600
Operating
Voltage
120-277 VAC, 50/60 Hz
Resistive
(heater)
15 A, 120-277 VAC 20 A, 120-277 VAC
Tungsten
(incandescent)
15 A, 120 VAC; 6 A, 208-277 VAC
Ballast
(uorescent)
8 A, 120 VAC;
4 A, 208-277 VAC
16 A, 120-277 VAC
Motors
1 HP, 120 VAC; 2 HP, 240 VAC
DC Loads
4 A, 12 VDC; 2 A, 28 VDC
Operating
Temperature
32° F to 104° F (0° C to 40° C)
Dimensions
4 1⁄8” H x 1 3⁄4” W x 1 13⁄16” D
SAFETY SECTION
WARNING
Risk of Fire or Electric Shock
• Disconnect power at the circuit breaker(s) or disconnect
switch(es) before installing or servicing (including replacing
the battery).
• Installation and/or wiring must be in accordance with
national and local electrical code requirements.
• Use COPPER conductors ONLY.
• Do Not recharge, disassemble, heat above 212° F (100° C),
crush, or incinerate the Lithium battery. Keep out of reach
of children.
• Replace battery with Type CR2 only that is certified by
Underwriters Laboratories (UL).
• Do NOT use timer to control devices that could have
dangerous consequences due to inaccurate timing, such
as: sun lamps, saunas, heaters, slow cookers, etc.
NOTICE
• Risk of timer damage due to leakage if weak battery is not
replaced promptly.
• Dispose of product per local regulations for disposal of
Lithium batteries.
Spring Grove, Illinois 60081
www.intermatic.com
PRODUCT DESCRIPTION
The ST01 Series and EI600 Series In-Wall Timers
give you versatility in a simple to install, 24/7
programmable package. These timers allow you to
customize your timer schedule with automatic dusk/
dawn, random, and Daylight Saving Time (DST)
programming options for up to 40 ON/OFF events.
The ST01 Series and EI600 Series are incandescent/
fluorescent/CFL/LED compatible. In addition, these
timers can handle any load type and require no
neutral wire connection, making them ideal for any
application, regardless of complexity.
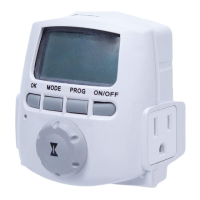
TIMER INTERFACE
Display
Mode button
On/Off button
– button (Decrease)
+ button (Increase)
Reset button
Access door to
battery tray
PRE-INSTALLATION
Before mounting the timer in the wall, install the
supplied battery.
1. Gently pry open the access door, located below
ON/OFF, and remove the battery tray from the
timer.
2. Place the supplied CR2 battery into the battery
tray, matching the battery + and – markings to
the + and – markings on the tray, then place the
battery tray back in the timer.
3. The display initializes, then flashes 12:00 am in
manual mode.
4. Press ON/OFF. The timer “clicks” to confirm it is
ready for programming.
Note: If the display doesn’t flash 12:00 am, check/replace
the battery before proceeding.
NOTES
Read these notes before continuing with the timer
installation and programming process.
• The timer is battery-powered and does not need
AC power for initial setup and programming. For
new installations, it is recommended that you set-
up and program your timer before installing it.
• The battery controls the ON/OFF function (“click-
ing” sound) and maintains the time and date. The
screen flashes BATT when the battery strength is
low. When replacing the battery, disconnect AC
power. You will have a few minutes to insert new
batteries before the date and time settings are lost.
All other settings will remain in memory, without
battery or AC power.
• Each ON or OFF setting is an event. Each event
must be programmed separately.
• The MODE menu includes SETUP, PGM (program),
AUTO (automatic), RAND (random), and MAN
(manual). AUTO and RAND modes do not appear
on the menu options until the time of day is set
and at least one ON or OFF event is programmed.
• All menus loop (repeat options when you get to the
end of the menu). When in a specific Mode, press
ON/OFF to loop within that Mode.
• When using the + or – buttons to change a flash-
ing setting, hold the button to make the numbers
scroll faster.
• When advancing to the next setting, the timer
automatically saves the data from the previous
screen whether you changed a setting or not. All
settings save automatically after five minutes.
PROGRAMMING
Follow these steps for initial setup and programming
of the ST01 Series and EI600 Series timers. (On the
following images, a white background with dashed
lines indicate what should be flashing on the unit).
Reset
1. Press and hold ON/OFF and RESET for five
seconds. A paper clip or pen may be necessary
to depress RESET.
2. Release RESET, then release ON/OFF. The
display flashes 12:00 am.
Initial Setup
1. Press MODE until SETUP
appears on the display.
2. Press ON/OFF to confirm.
3. Press + or - to adjust the
menuitem (HOUR).
4. Press ON/OFF to advance to
the next menu item (MINUTES).
5. Repeat steps 3 & 4 to set the
MINUTES, YEAR, MONTH,
andDATE.
Note: After setting the DATE, thecurrent day of the
week flashes. Verify the DAY. If wrong, press +
or - to review and adjust the YEAR, MONTH, and
DAY. Press ON/OFF to confirm.
6.