*Some features may not be available depending on installed factory options. Features NOT available for play will be ghosted.
*Remote control sold separately.
ww w.asaelectronics.com ww w.JENSENRVDirect.com
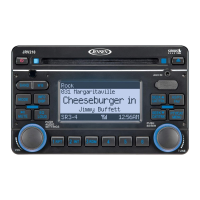
Basic Operation
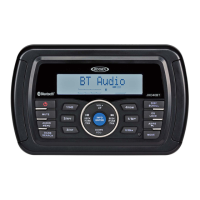
DAY/NIGHT: Press to switch between
DAY or NIGHT dimming levels for display.
Press & hold to access DISPLAY
SETUP menu to adjust DAY or NIGHT
dimming levels.
EJECT: Press to EJECT CD.
CAM: Press to access CAMERA
mode. Press & hold to access
CAMERA SETUP OPTIONS.
AUDIO: Press to access AUDIO
MODE & select a playback source.
Press & hold to access AUDIO
MENU to adjust Bass, Treble,
Balance, Fade and EQ options.
Press to return to current
playback mode.
MENU: Press to access the
SYSTEM MENU.
MUTE: Press to MUTE audio.
Press again to restore audio.
POWER: Press to turn ON/OFF.
Press & hold to turn screen OFF.
Touch screen to turn back ON.
VOL: Rotate to adjust volume output.
AUX IN: Connect portable audio player.
USB: Connect a USB Jump Drive.
NOT FOR iPOD CONTROLS.
AS/PS: Touch to SCAN through currently
stored presets. Touch & hold to STORE
strongest broadcast stations in your area.
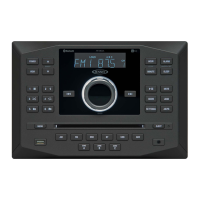
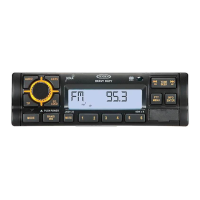
AM/FM/WB Tuner Controls
BAND: Touch to select preset group
FM (18 channel memory locations)
or AM (12 channel memory locations).
SEEK: Touch + or – to seek to NEXT
or PREVIOUS strongest station.
TUNE: Touch + or – to tune to
NEXT or PREVIOUS station.
Current Preset Group
PTY:
Touch to view program type categories
list. Touch desired program type and then
touch SEEK + or – to start search.
PRESET: Touch to display station preset list. Press &
hold desired preset number to store current channel
playing. Momentarily press to recall stored channel.
NOTE: You can store up to 30 channels (18 FM & 12 AM).
WB: Touch to listen to WEATHERBAND.
AM/FM: Touch to access AM/FM Mode.
Current station: The currently selected
station will be highlighted in blue.
Current Time
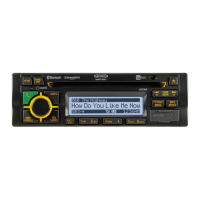
Camera Controls*
CHANNELS: Touch to select
camera display CH1, CH2, or CH3.
AUDIO: Touch to turn camera
microphone audio ON or OFF.
Touch information bar to remove it
from the display. Touch the top of the
screen again to make it re-appear.
NOTE: Current playing audio will be muted when
vehicle is put into reverse and while the rear camera
image appears on the screen. Current audio will
resume once vehicle is no longer in reverse.
Touch anywhere on the screen
while viewing camera image to
display the camera controls.
LCD SETTINGS: Touch to adjust
BRIGHTNESS, CONTRAST,
& COLOR settings.
Clock Settings
1. Press & hold to access SYSTEM MENU.
2. Use the on-screen arrows to highlight the
“Set Clock” option.
3. Touch the “Set Clock” field to view screen.
4. Use the on-screen arrows to adjust the hour.
Continue adjusting to move between AM & PM.
5. Touch NEXT button to move to the minutes field.
6. Touch OK when finished.
NOTE: If SIRIUS satellite radio is activated, SIRIUS will automatically up-
date the clock time based on the user settings for Time Zone and Daylight
Savings Time. It is necessar y to manually change the Time Zone and
Daylight Savings Time settings by accessing the SYSTEM SETUP MENU.
JRV212T QRG.indd 1 12/15/2011 2:56:35 PM