2
A19BAC, A28AA Technical Bulletin
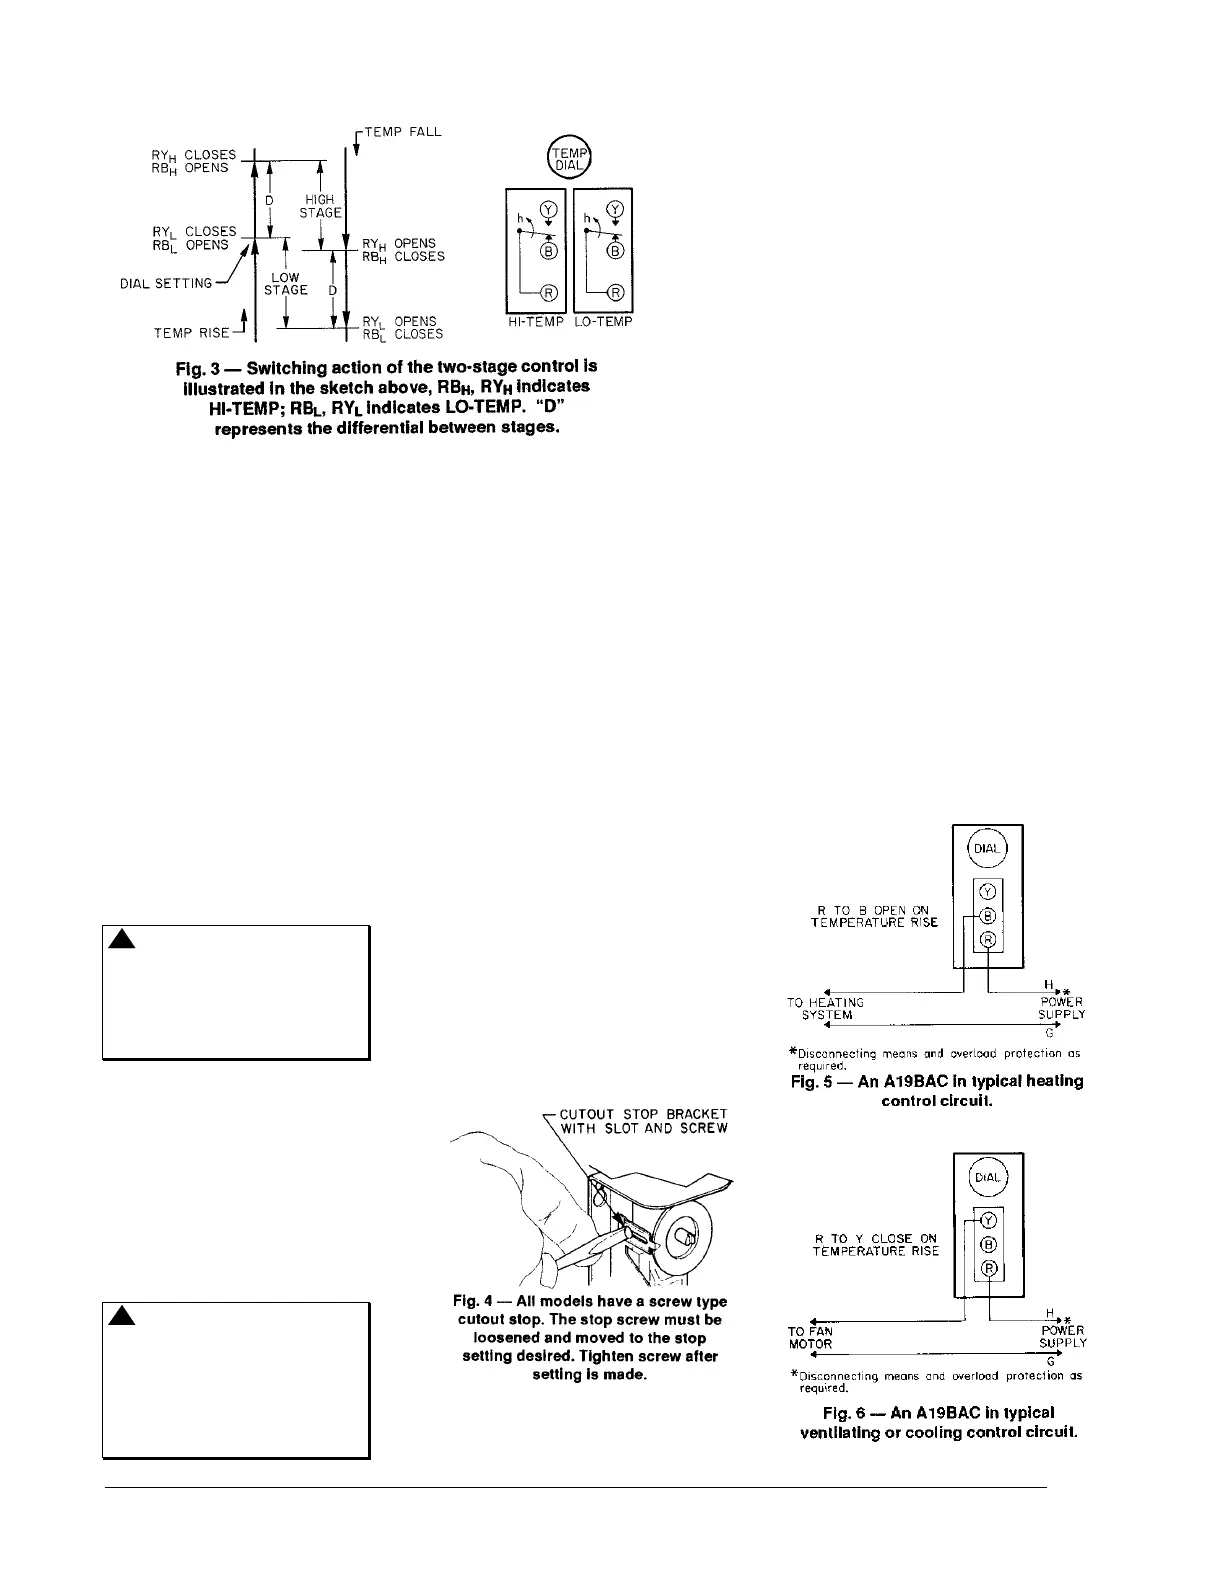
2. Remove cover from
thermostat.
3. Loosen the cutout stop
screw, slide the screw to the
front of the thermostat
against the plastic stop
behind the dial and tighten
the screw. (See Fig. 4.)
Sometimes an exact stop
setting is not possible and
stop must be set to the
closest step corresponding
to dial setting required.
4. Turn dial to set point
desired.
5. Replace cover.
Wiring
!
CAUTION: Disconnect
power supply before wiring
connections are made to
avoid electrical shock or
possible damage to
equipment.
All wiring should conform to local
codes and the National
Electrical Code. Use copper
conductors only. Do not use on
applications where electrical
ratings exceed ratings shown on
the thermostat’s cover label.
See Figs. 5 through 11 for
typical wiring applications.
!
CAUTION: Use terminal
screws furnished
(8-32 × 1/4 in. binder
head). Substitution of
other screws may cause
problems in making proper
connections.
Checkout Procedure
Before leaving the installation,
observe at least three complete
operating cycles to be sure that
all components are functioning
correctly.
Check for correct operation in
the following manner.
1. A19BAC -- Ventilating or
Cooling System: Turn dial
clockwise to a setting above
space temperature. Fan or
cooling system should be
off. When dial is turned
counterclockwise, the fan or
cooling system should turn
on approximately at the dial
setting.
A19BAC -- Heating System:
Turn dial clockwise above
the space temperature; the
heating unit should be on.
When dial is turned
counterclockwise, the
heating unit should turn off
approximately at the dial
setting.
2. A28AA -- If hookup is similar to
Fig. 8, fan should start at
approximately space
temperature and should
change to high speed as the
dial is turned counterclockwise
to a lower temperature setting.
If wiring is similar to Fig. 9, the
damper should open as the
dial is turned counterclockwise.
The devices should act in
reverse sequence when the
dial is turned clockwise to a
higher setting.
3. If control devices do not
operate in the manner
described above, check all
wiring for short circuits and
tightness of wiring
connections. If controlled
devices operate in reverse
(start in high or fully open
position) check wiring as it is
probably reversed.
Repairs and Replacement
Field repairs must not be made.
For replacement thermostat
contact the nearest Johnson
Controls wholesaler.
 Loading...