1. Fully charge the NiMH battery or insert fresh alkaline batteries
into the laser.
2. Mount the laser on a tripod or other stable mounting surface in
either the horizontal or vertical position.
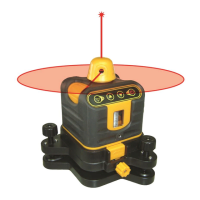
3. For horizontal operation, unlock the pendulum and press
. The
laser will self-level and rotate. If the laser is out of its self-level-
ing range, it will stop rotating and beep. NOTE: The laser will
NOT operate in the horizontal position if the pendulum lock is
engaged.
To disengage it, rotate the knob counterclockwise.
4. For vertical operation, keep the pendulum in the locked position
and adjust the manual leveling foot until the level vial indicates
that the laser is level, then power on the laser by pressing .
5. Adjust your rotational speed by pressing
or . High speeds
are recommended for use with a laser detector; low speeds
improve visibility when working indoors without a detector.
6. When finished, power o the laser by pressing
and ensure the
pendulum lock is engaged.
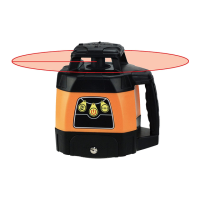
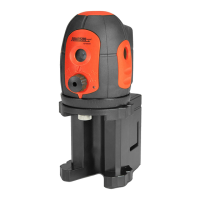
Thank you for purchasing this Johnson long-range rotary laser!
These lasers are ideal for large jobsites, both indoor and out. With up
to a 2,000’ working diameter, these rotaries can provide complete
coverage of commercial buildings, industrial complexes and small
subdivisions with ease.
This tool features:
• Long-range laser – Class IIIa
• 1/8” @ 100’ accuracy
• Scan mode for simulated line and
dot laser output
• Manual vertical mode
• 1,200’ range green beam
(Model 40-6543)
• 2,000’ range red beam (all other models)
• Some models include a remote control
and laser detector
Long-Range Rotary Lasers: Models 40-6532, 40-6539, 99-027K & 40-6543
www.johnsonlevel.com/manuals
We want to get you up and running as quickly as possible - but this quick start guide is not a replacement for reading and understanding your
operator’s manual! For complete safety & operating instructions, refer to the operator’s manual included with your rotary laser, or scan the QR code.
GETTING STARTED
SCAN MODE
Scan mode simulates a laser line or dot laser; it is especially useful
when working indoors without a detector, since it makes the beam
more visible to the naked eye.
To enable scan mode:
1. With the laser powered on, press
.
2. Repeated presses of
will change the beam angle (narrow/
wide/dot). The narrower the angle, the more visible your laser
beam will be when not using a detector.
3. The position of the laser beam can be rotated by using
and .
4. Return to normal rotation by pressing
.
USING THE REMOTE CONTROL
Models 40-6532, 40-6539 and 40-6543 come equipped with an
infrared remote control to operate your laser from a distance.
1. NOTE: The laser must be initially powered on using the laser’s
control panel. After 30 minutes of inactivity, the laser will stop
receiving remote signals. Power it on again from the laser’s panel
by pressing
.
2. Position the remote within 200’ of the laser. The laser has infrared
receivers on all four sides for convenience.
3. The buttons on the remote are identical to the buttons on the
laser. Aside from the initial power-on, operation via the remote is
identical to operation via the laser’s operation panel.
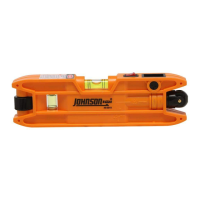
USING THE PENDULUM LOCK
The pendulum lock is located on the left side of the laser. Rotate it
clockwise to lock the pendulum (for transport or vertical operation)
or counterclockwise to unlock the pendulum (for horizontal operation).
• LOCK the pendulum for transportation
and vertical operation.
• UNLOCK the pendulum for horizontal
operation.
• Note that UNLOCKED is also called “ON,”
indicating the laser can be powered on in
horizontal operating mode.