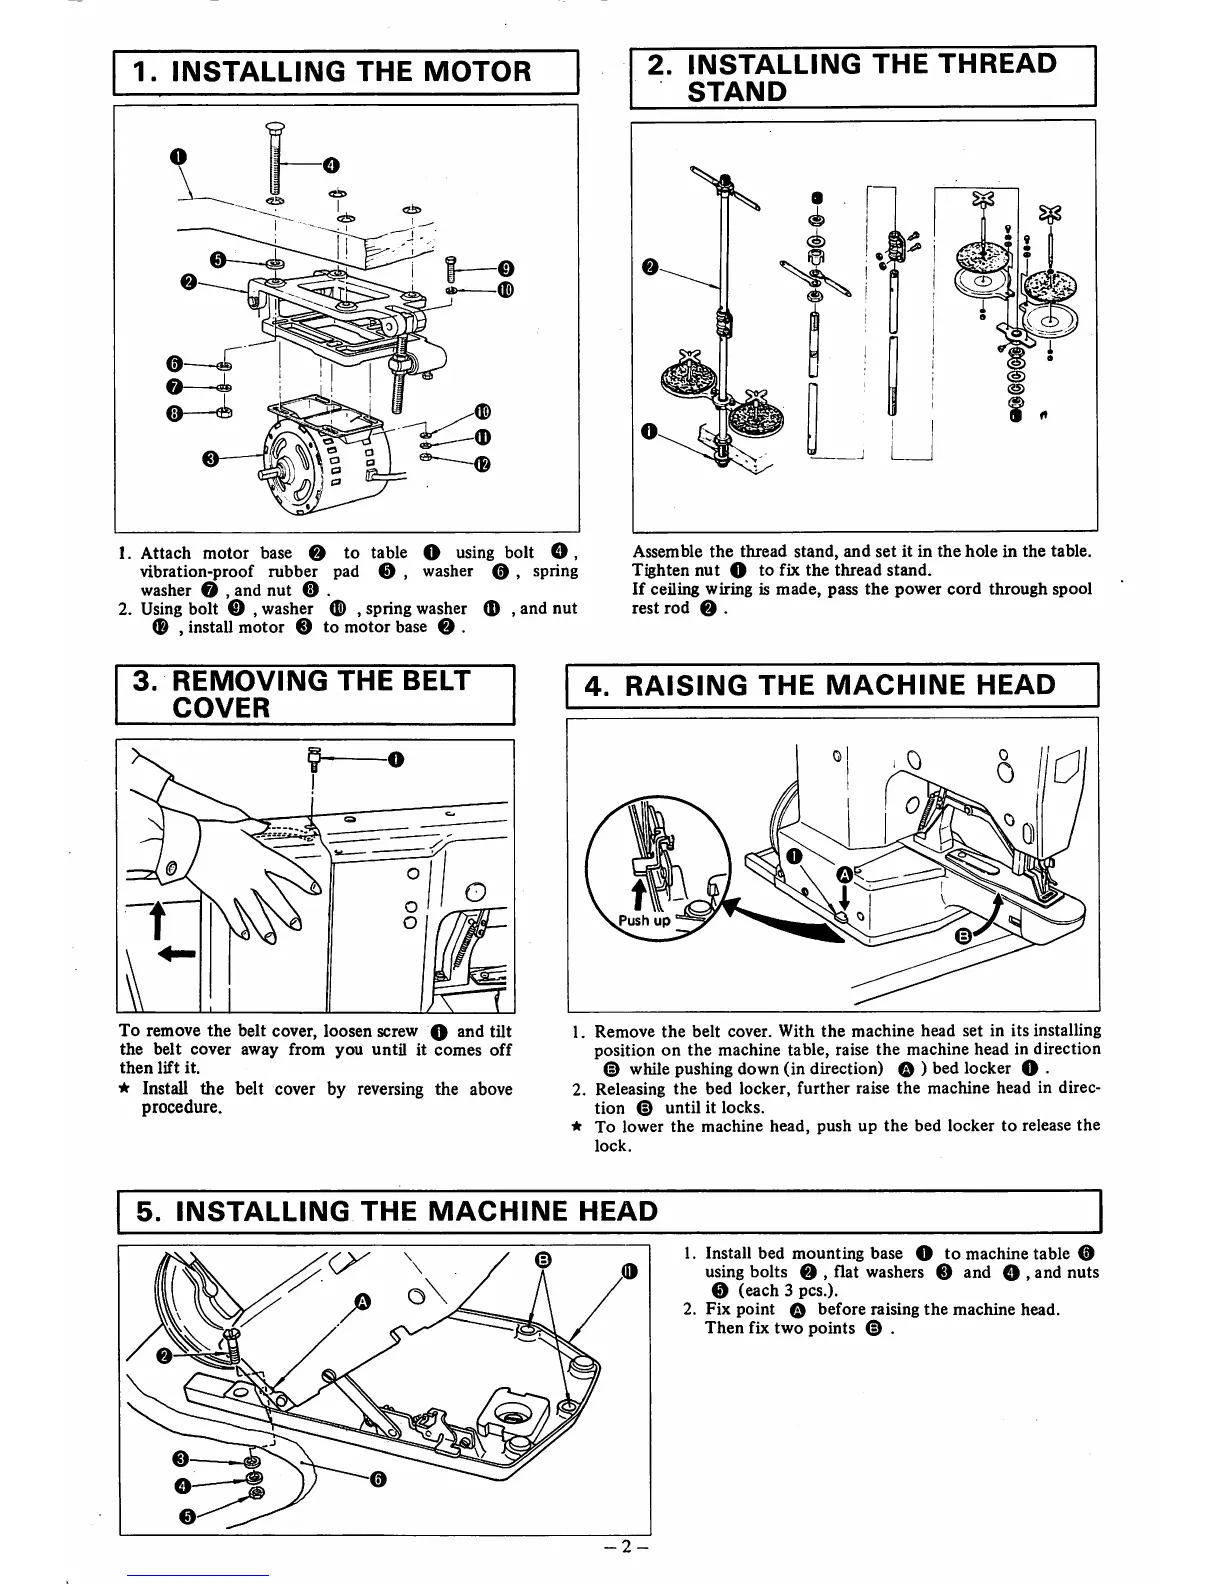
1.
NSTALLING
THE
MOTOR
a
2.
INSTALLING
THE
THREAD
STAND
I
1. Attach motor base e to table O using bolt
O,
vibration-proof rubber pad 0 , washer
0,
spring
washer 0 , and nut 0 .
2. Using bolt 0 , washer
(£)
, spring washer 0 , and nut
® , install motor 0 to motor base
0.
Assemble
the
thread
stand,
and
set
it in
the
hole
in
the
table.
Tighten
nut
0 to fix
the
thread
stand.
If
ceiling
wiring
is
made,
pass
the
power
cord
through
spool
rest
rod
9.
3.
REMOVING
THE
BELT
COVER
To remove
the
belt cover, loosen screw 0 and tilt
the
belt
cover
away
from
you
until
it
comes
off
then
lift
it.
★
Install the belt cover by reversing the above
procedure.
4.
RAISING
THE
MACHINE
HEAD
1.
Remove
the
belt
cover.
With
the
machine
head
set
in
its
installing
position on
the
machine table, raise
the
machine head in direction
© while pushing down (in direction) 0 ) bed locker 0 .
2. Releasing
the
bed locker, further raise
the
machine head in direc
tion
©
until
it
locks.
*
To
lower
the
machine
head,
push
up
the
bed
locker
to
release
the
lock.
5.
INSTALLING
THE
MACHINE
HEAD
-2-
1. Install bed mounting base 0 to machine table 0
using bolts 0 , flat washers 0 and O , and nuts
0
(each
3 pcs.).
2. Fix
point
0
before
raising
the
machine
head.
Then
fix
two
points
© .
 Loading...