– 5 –
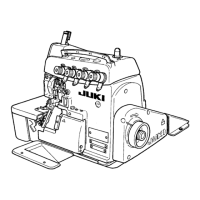
4) 布くずシュート(上)
6
をテーブルの左側に寄せ
て取り付け、その後、布くずシュート(下)
7
を
布くずシュート(上)に取り付けます。取り付け
長さは 56mm の範囲内で調整できます。
4) Install upper waste chute
6
to the left on the table,
and then attach lower waste chute
7
to the upper
waste chute. The installation of the chutes can be
adjusted within a length of 56 mm.
4) Den oberen Abfallkanal
6
auf der linken Seite des
Tisches montieren, und dann den unteren Abfallkanal
7
in den oberen einhängen. Die Einbauposition des
unteren Abfallkanals kann innerhalb einer Länge von
56 mm eingestellt werden.
7
6
56 mm
4) Poser la section supérieure de la rampe de chutes de
tissus
6
sur la gauche de la table. Poser ensuite la
section inférieure de la rampe de chutes de tissus
6
sur la section supérieure. Il est possible de régler la
longueur d’installation des deux sections de la rampe
sur 56 mm.
4)
Instale la canaleta
6
para desperdicios superior en
el lado izquierdo sobre la mesa, y luego monte la
canaleta
7
para desperdicios inferior en la canaleta
para desperdicios superior. La instalación de las
canaletas se puede ajustar con una longitud de 56 mm.
4) Montare lo scaricaritagli
6
superiore a sinistra del
6
allo scarico
superiore.
É possibile regolare la posizione di montaggio degli
scarica ritagli entro una lughezza di 56 mm.
4)
把布屑板(上)
6
安装到靠近台板左侧,再把布
屑盒(下)
7
安装到布屑板上,安装长度可以在
56 mm 的范围内调整。
4) 6
7
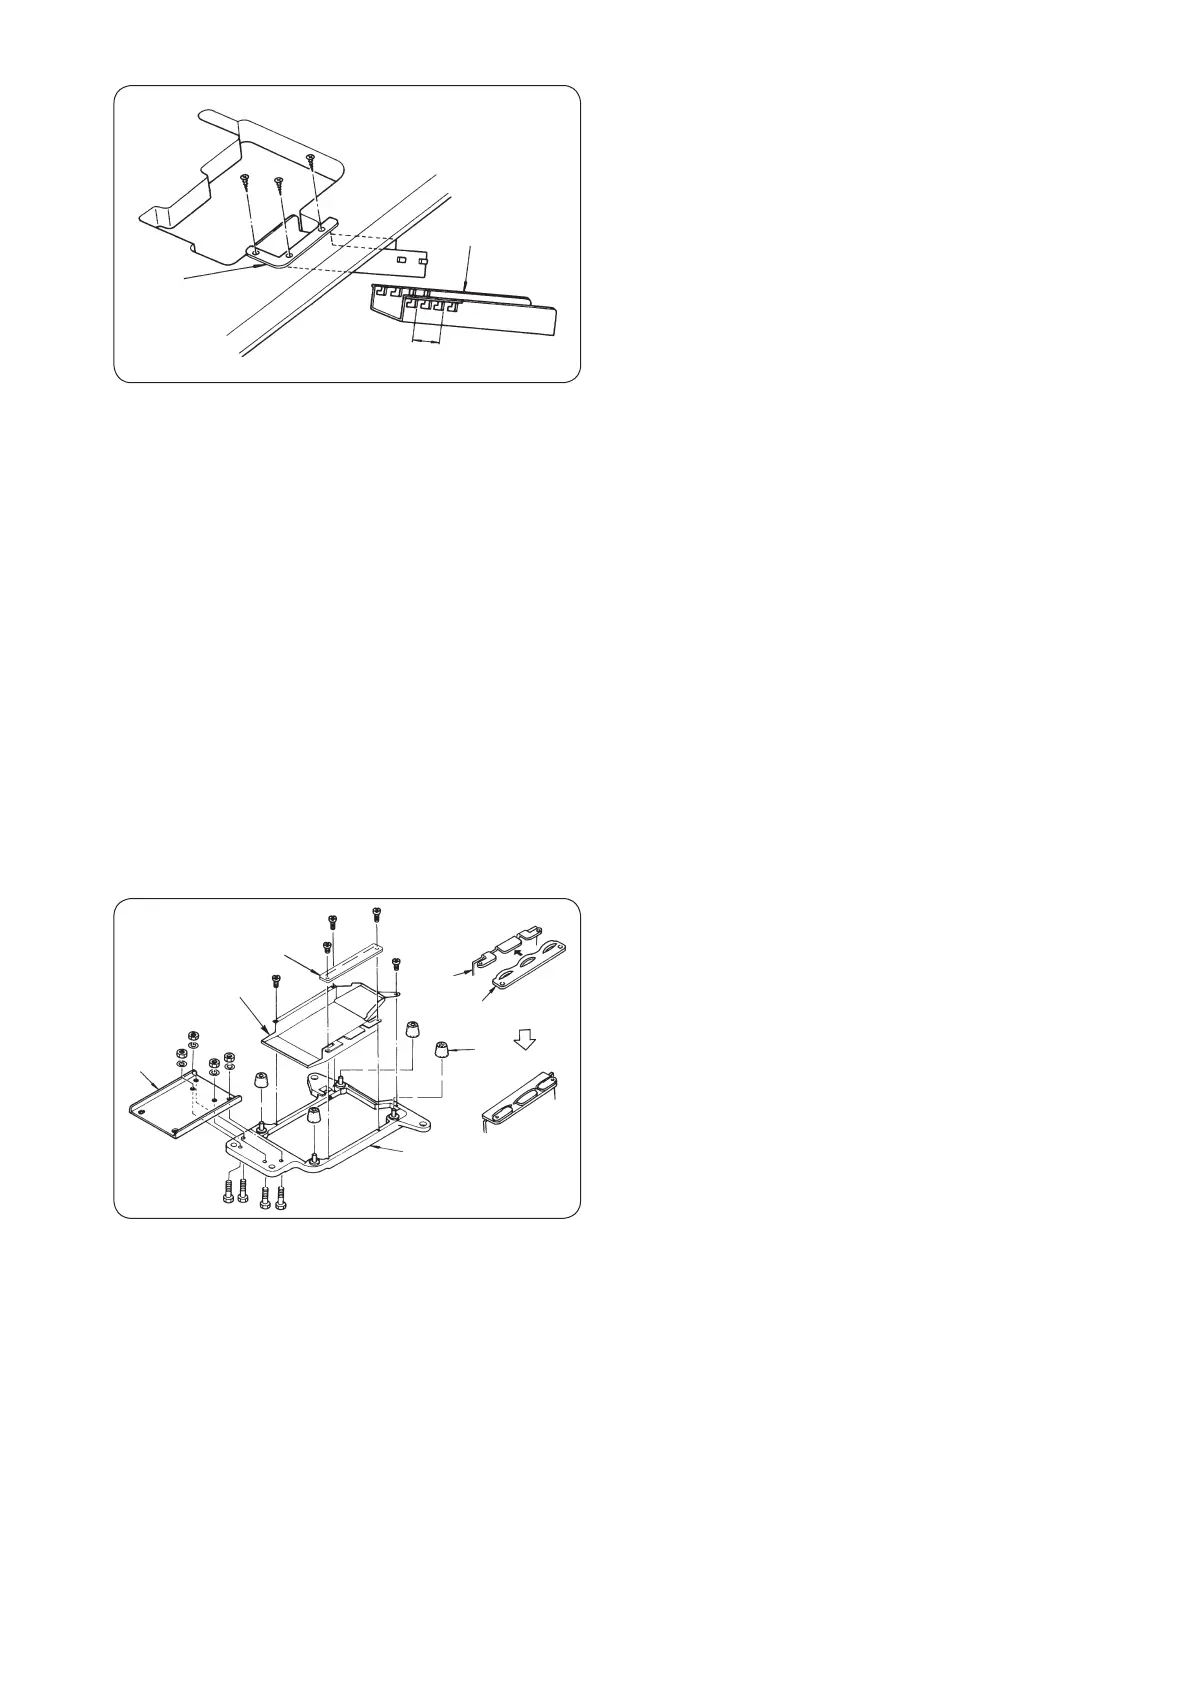
Fully-sunken type / Voll versenkter typ / Type entièrement encastré /
Tipo totalmente hundido / Tipo completamente affondata /
落地式时 /
Tam gömme tip
1) 送風ケース
1
にケーススポンジ
2
を取り付けま
す。
2) フレーム受板
3
にフレーム受板継手
4
、送風ケー
ス
1
、防振ゴム
5
を取り付けます。
1) Attatch case sponge
2
to blower case
1
.
2) Attach frame support plate joint
4
, blower case
1
and rubber cushion
5
to frame support plate
3
.
1) Den Gehäuseschwamm
2
am Gebläsegehäuse
1
anbringen.
2) Das Verbindungsstück
4
der Rahmenstützplatte, das
Gebläsegehäuse
1
und das Gummidämpfer
5
an
der Rahmenstützplatte
3
anbringen.
2
3
5
4
1
1
2
1) Poser la bande en mousse de carter de soufflante
2
1
.
2) Poser la pièce de jonction de plaque-support du
bâti
4
, le carter de soufflante
1
et le tampon en
caoutchouc
5
sur la plaque-support du bâti
3
.
1) Coloque la esponja
2
de la caja en la caja
1
del
soplador.
2) Coloque la junta
4
de la place del armaón, la caja
1
del soplador y el amortiguador
5
de la caja del
soplador en la placa
3
de soporte del armazón.
1)
Fissare la spugnetta del contenitore
2
al contenitore
1
.
2) Fissare il giunto
4
della piastra di supporto della
fusione, il contenitore
1
e il tampone di gomma
5
alla piastra
3
di supporto della macchina.
1)
把海棉垫
2
安装到送风胶盖
1
。
2)
把机承托板接头
4
、送风胶盖
1
、防震橡胶垫
5
安装到机承托板
3
。
1) Kasa süngerini 2 muhafazaya 1
2)
4 muhafazaya 1 ve
lastik takozu 5
3
 Loading...