7. Reverse feed stitch lever
Preparation
™
Remove belt cover.
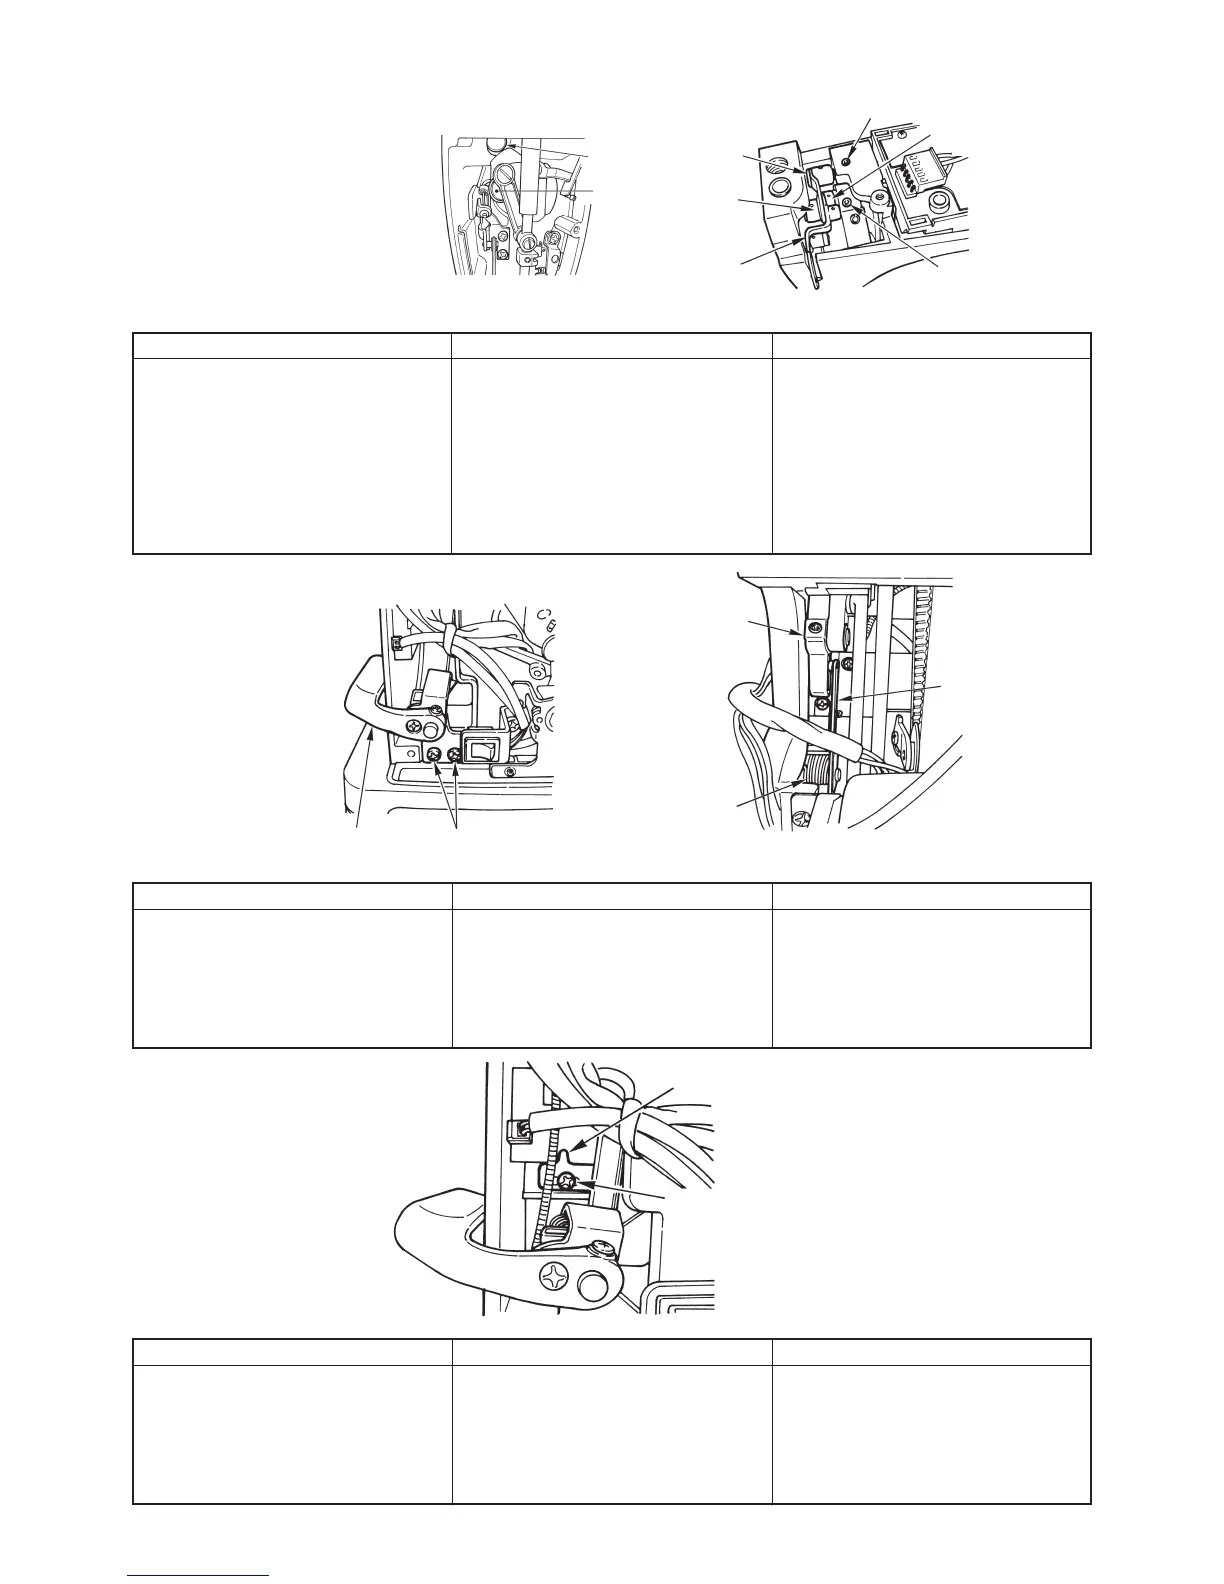
8. Idler
Preparation
™
Remove belt cover.
Disassembly
™
Remove
1
setscrew and remove
idler asm.
Assembly
™
Assemble idler and tighten it with
1
setscrew.
™
Belt tension : Belt sags 6 to 7 mm
when center of the belt is applied
with a 1.96N load.
Point
™
Belt tension can be changed only
by removing belt cover. Move
2
convex portion to the left or right.
Disassembly
™
Remove
1
spring from arm.
™
Remove two
2
setscrews.
™
Remove
4
lever arm from the
slot of
5
regulator when remov-
ing
3
.
Assembly
™
Attach
3
lever and set with
2
setscrews.
™
Hook lever spring
1
to lever arm
4
.
Point
™
Set
4
lever arm to the slot of
5
regulator.
Disassembly
™
Loosen
1
setscrew.
™
Loosen two
2
setscrews.
™
Draw out thread
3
take-up sup-
porting shaft.
™
Remove
5
and
6
together with
4
needle bar crank.
Assembly
™
Set needle bar crank to thread
take-up, attach it onto main unit
and tighten setscrews (2 pcs.).
™
Set
6
to
5
, enter thread take-up
supporting shaft
3
to
6
, attach
it onto frame and tighten
1
set-
screw.
Point
™
Tighten setting portion (flat por-
tion) of needle bar crank with
screw No. 1.
™
Press
3
shaft to frame side while
viewing the torque and tighten
1
setscrew.
6. Thread take-up
Preparation
™
Remove arm cover asm.
™
Remove face plate mas. asm.
™
Remove presser bar.
™
Remove needle bar.
2
Convex portion of idler installing plate
1
Idler setscrew
SM5040855SN
5
Feed regulator
1
Reverse feed
stitch lever spring
4
Reverse feed
stitch lever arm
2
Needle bar
crank setscrew
5
Thread take-up
1
Thread take-up supporting shaft setscrew
SM8050602TP
3
Thread take-up
supporting shaft
4
Needle bar crank
6
Thread take-up
support
3
Reverse feed stitch
lever mas. asm.
2
Reverse feed stitch lever
setscrew SM5040855SN

 Loading...