– 23 –
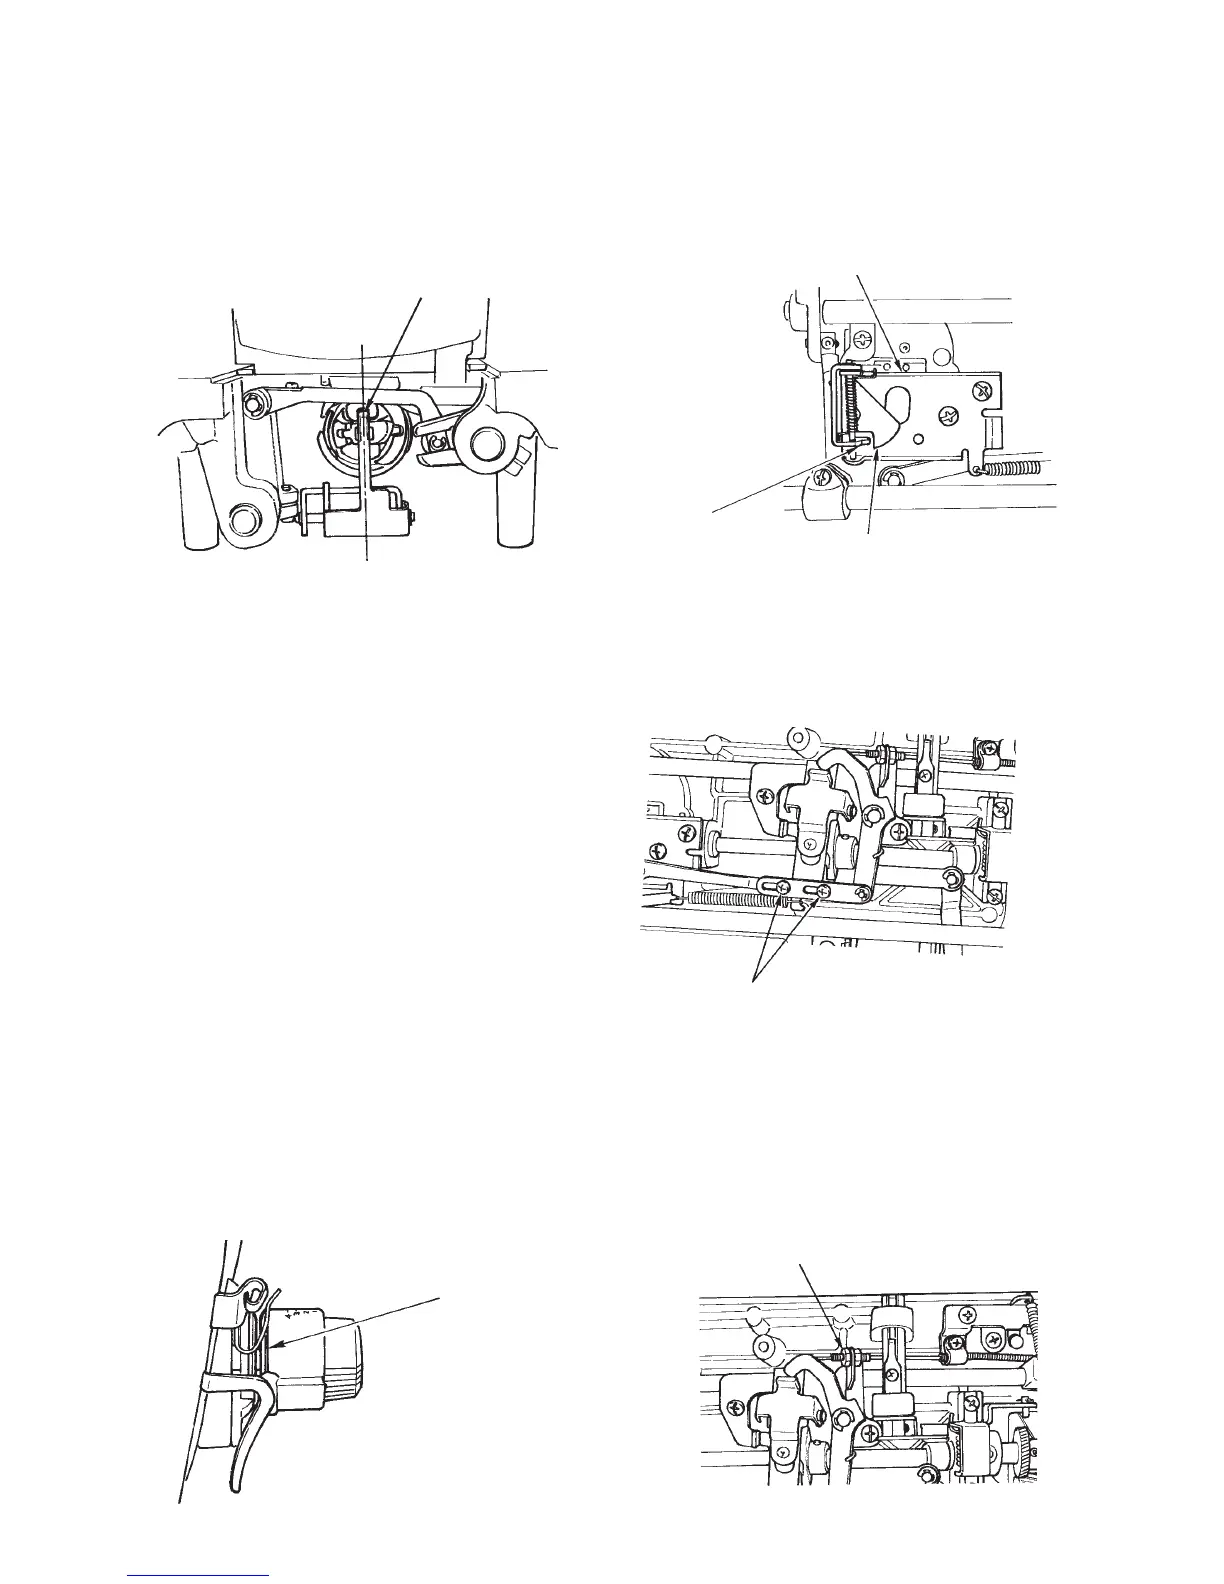
4. Position and protruding amount of looper
(Left/right position and moving amount)
4-1. Adjustment of left/right position of looper
™ Adjust with looper installing plate 2 so that center of inner hook is aligned with center of lopper 1.
4-2. Adjustment of moving amount of looper
™ When thread trimmer solenoid is ON, top end of looper comes in contact with bobbin case.
™ Perform with setscrews 5 adjustment to provide a clearance of 1±0.2 mm between convex of looper 3 and
looper cam 4.
5. Position of nut of wire setscrew
(Adjustment of thread tension disk open/close)
™ Lower presser foot.
™ When thread trimmer solenoid is ON, disk 1 should be open. (Lifting amount is 1 mm when scale is set to 3.)
™ Perform adjustment with nut on the left side after loosening nut 2 on the right side.
™ Perform fixing with nut located inside.
Nut of 2 setscrew (Wrench 9 mm)
5 Looper link setscrew
1 Looper and inner hook
4 Looper cam (Position where it
comes in contact with looper)
2 Looper installing plate
3 Looper (Convex
that looper cam
pushes out)
Thread tension disk

 Loading...