Quick Start Guide
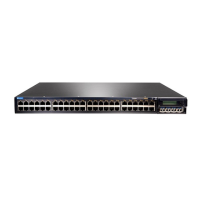
EX3200 and EX4200
IN THIS GUIDE
Step 1: Begin | 1
Step 2: Up and Running | 7
Step 3: Keep Going | 8
Step 1: Begin
IN THIS SECTION
Install a Power Supply (If It Is Not Installed) | 2
Install a Fan Tray (If It Is Not Installed) | 3
Mount the Switch | 4
Connect Power to the EX3200 and EX4200 | 4
To install and perform initial configuration of a Juniper Networks
®
EX3200 or EX4200 Ethernet Switch, you need:
•
Two mounting brackets and eight mounting screws (provided)
•
Electrostatic discharge (ESD) grounding strap (not provided)
•
For AC power supply installation—An AC power supply (if not installed), an AC power cord with a plug appropriate for
your geographical location, and a power cord retainer (if not installed)
•
For DC power supply installation—A DC power supply (if not installed) and DC power source cables (12–14 AWG—not
provided) with ring lugs (Molex 0190700067 or equivalent—not provided) attached
•
Fan Tray (if not installed)
•
Ethernet cable with an RJ-45 connector attached (provided)