JVC DILA projector Firmware Update Instructions
Page 6 of 6
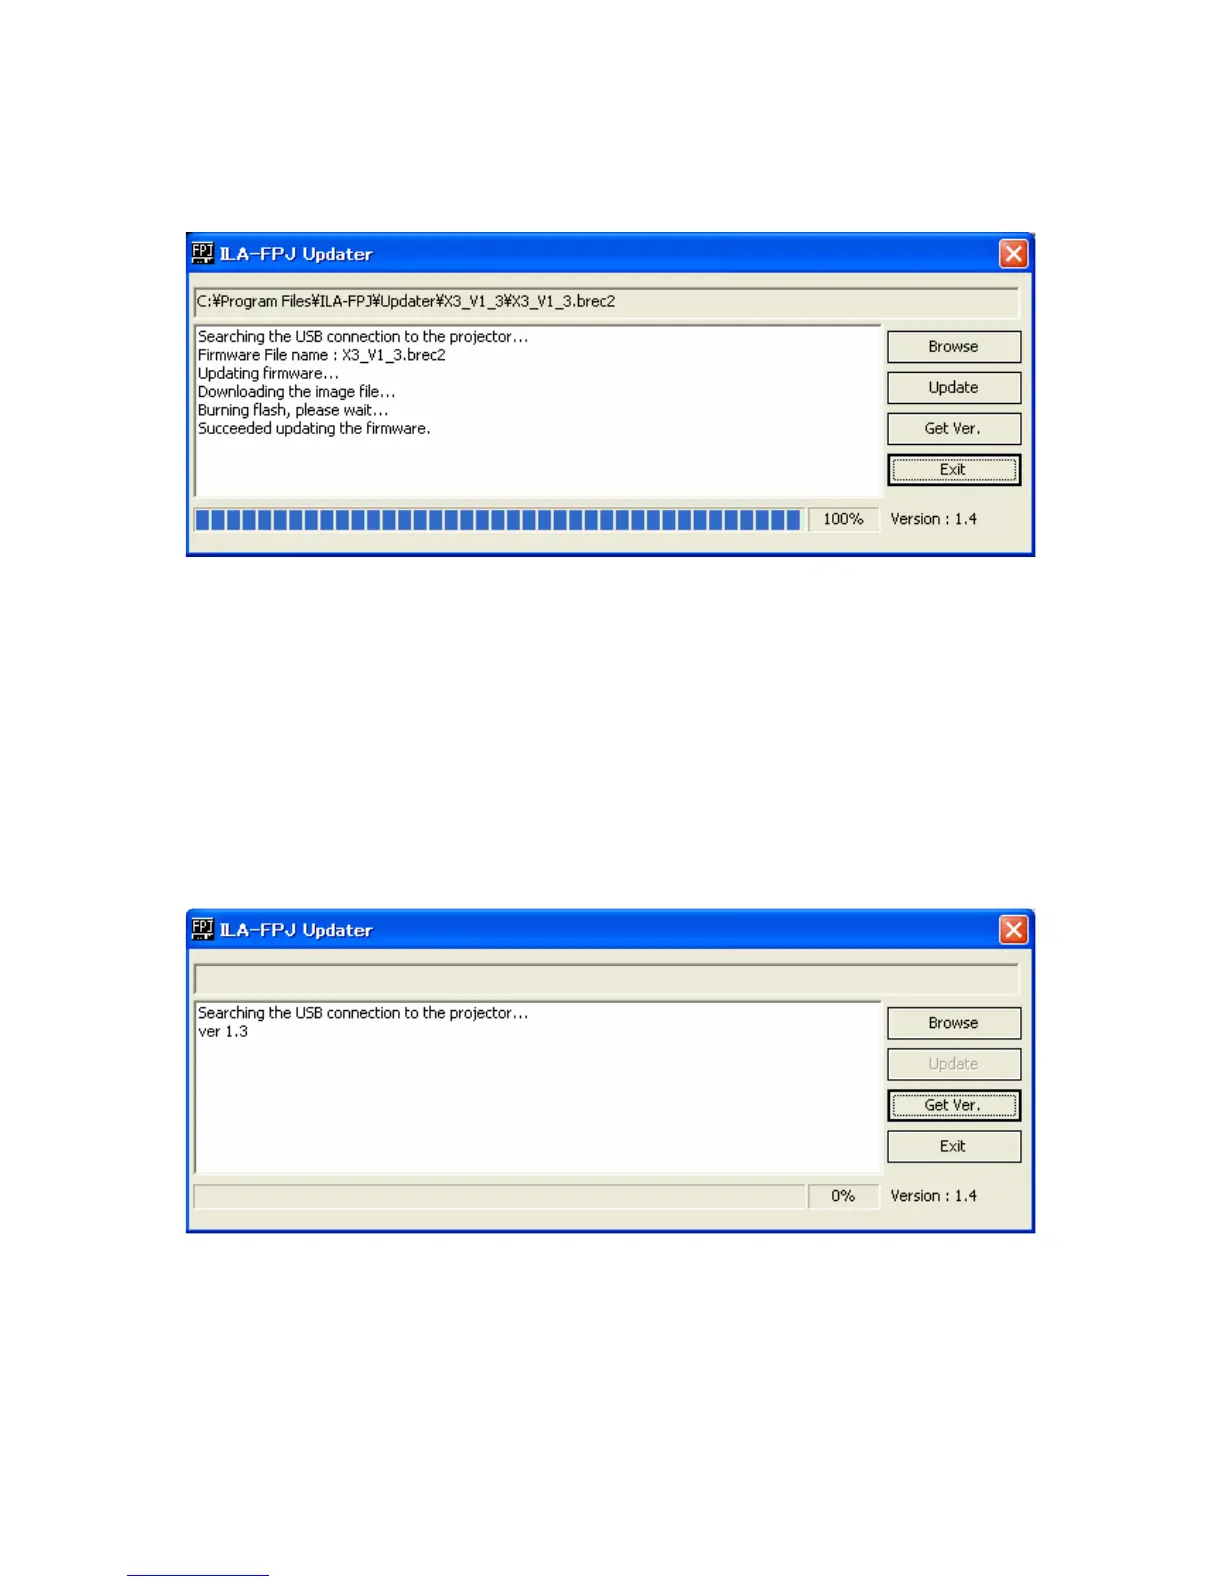
Click “OK” to continue.
The program will then show that the transfer is complete and, after 3-4 seconds,
the text in the “Browse” and “Update” buttons will change from grey to black.
After this happens, press the Standby/On button on the projector. The
three LEDs will flash slowly for around 30-40 seconds. The projector will then go
into Standby mode.
CHECK FIRMWARE VERSION
To check that the firmware has been updated correctly, leave the USB cable
connected, switch the projector on as normal and wait for it to display a picture
or the blue background. Once it has displayed a picture, click the “Get Ver.”
Button in the update program. After a few seconds, the Updater Program will
display the firmware version. If the update has been successful, the version
number should be “ver 1.3”.
If the Updater Program doesn’t display “ver 1.3”, the update has not been
successful and you should repeat the update from the top of Page 4 above.
To finish the update, switch off the projector and wait until the Standby LED has stopped
flashing, then remove the mains lead from the projector, remove the USB cable, refit the
connector cover, plug the mains lead back in, switch on and enjoy.
Produced by JVC (ver1.3)
 Loading...