64 EN
Master Page: Left
For More Accurate Editing
Some VCRs make the transition from Record-Pause
to Record mode faster than others. Even if you begin
editing for the camcorder and the VCR at exactly the
same time, you may lose scenes you wanted, or find
that you have recorded scenes you did not want. For
a cleanly edited tape, confirm and adjust the timing
of the camcorder against your VCR.
Diagnosing VCR/Camcorder Timing
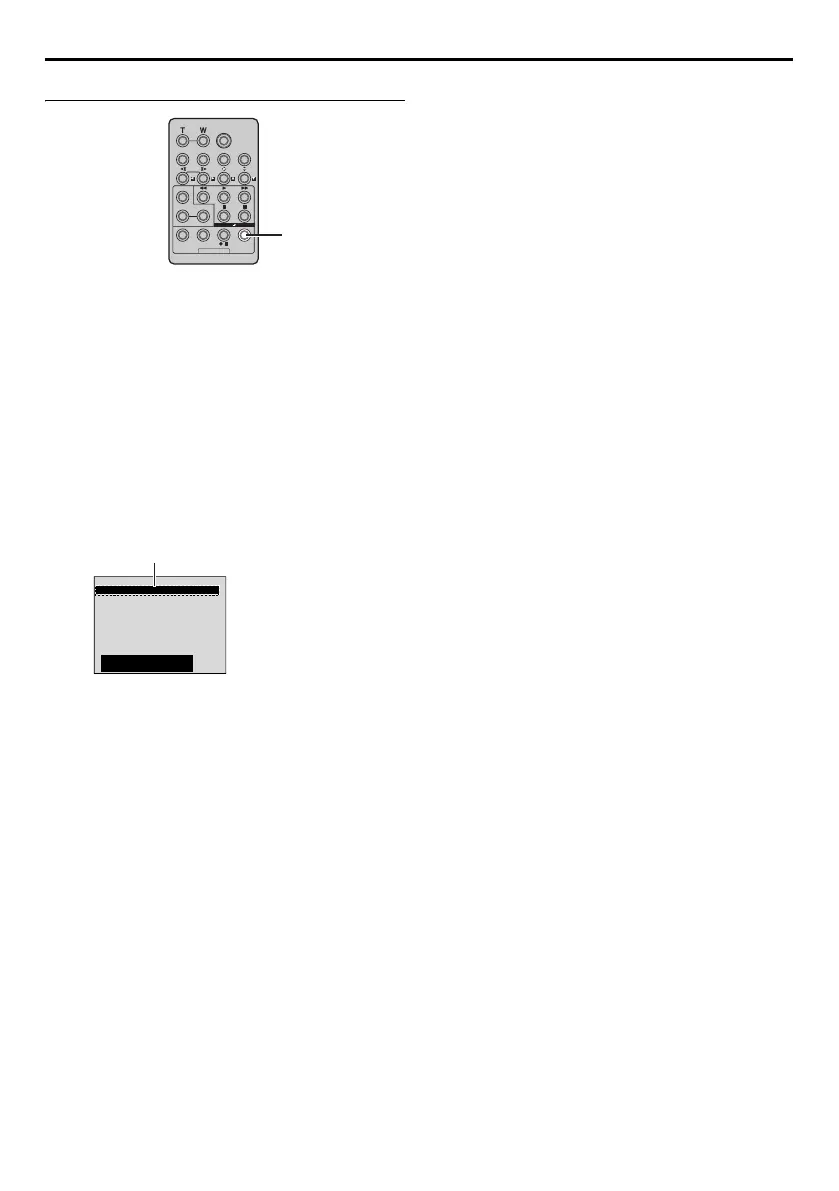
1 Play back the tape in the camcorder, then point
the remote control at the camcorder’s remote
sensor and press R.A.EDIT ON/OFF.
Random Assemble Editing Menu appears.
2 Perform Random Assemble Editing on Program 1
only. In order to check VCR and camcorder
timing, select the beginning of a scene transition
as your Edit-In point.
3 Play back the dubbed scene.
● If any images from the scene prior to the
transition you chose for your Edit-In point were
recorded, that means your VCR moves too
quickly from Record-Pause to Record mode.
● If the scene you tried to dub starts in progress,
the VCR is slow to start recording.
Adjustment Of VCR/Camcorder Timing
4 Press R.A.EDIT ON/OFF to make the Random
Assemble Editing menu disappear, then press the
MENU Wheel in. The Menu Screen appears.
5 Rotate the MENU Wheel to select “t”, and
press it. The VIDEO Menu appears.
6 Rotate the MENU Wheel to select “SYNCHRO”,
and press it. The value for “SYNCHRO” is
highlighted.
7 Based on the diagnostics performed, you can
now advance the VCR’s record timing by rotating
the MENU Wheel towards “+”. You can also
delay the VCR’s record timing by rotating the
MENU Wheel towards “–”.
The adjustment range is from –1.3 to +1.3
seconds, in 0.1-second increments.
Press the MENU Wheel in to finish the setting.
8 Rotate the MENU Wheel to select “BRETURN”,
and press it twice.
Now perform Random Assemble Editing
beginning with step 6 on page 62.
NOTES:
● Before performing actual Random Assemble
Editing, do a few Random Assemble Editing trial
runs to check whether the value you have input is
appropriate or not, and make adjustments
accordingly.
● Depending on the recorder, there may be
situations where the timing difference cannot be
fully corrected.
R.A.EDIT
ON/OFF
1
2
3
4
5
6
7
8
–– : –– ~
~
~
~
~
~
~
~
––
NIOUT
MOD E
–
–
:
––
0
:
000
TOTAL
CODETIME
Random Assemble
Editing Menu
Program 1
USING THE REMOTE CONTROL UNIT (cont.)
GR-DV4000PAL.book Page 64 Friday, February 14, 2003 10:30 PM
 Loading...


