1
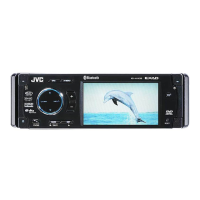
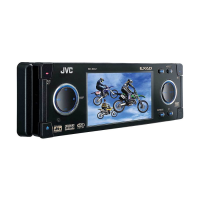
KD-AVX33
Installation/Connection Manual
ϰ༬ો˿
°“√µ‘¥µ—Èß/§ŸË¡◊Õ°“√µ‘¥µ—Èß
ENGLISH
This unit is designed to operate on 12 V DC, NEGATIVE ground
electrical systems. If your vehicle does not have this system, a
voltage inverter is required, which can be purchased at JVC car audio
dealers.
WARNINGS
• DO NOT install any unit and wire any cable in locations where;
– it may obstruct the steering wheel and gearshift lever operations,
as this may result in a traffic accident.
– it may obstruct the operation of safety devices such as air bags, as
this may result in a fatal accident.
– it may obstruct visibility.
• DO NOT operate any unit while manipulating the steering wheel, as
this may result in a traffic accident.
• The driver must not watch the monitor while driving. If the driver
watches the monitor while driving, it may lead to carelessness and
cause an accident.
• The driver must not put on the headphones while driving. It is
dangerous to shut off the outside sounds while driving.
• If you need to operate the unit while driving, be sure to look around
carefully.
• If the parking brake is not engaged, “Parking Brake” appears on the
monitor, and no playback picture will be shown.
– This warning appears only when the parking brake lead is
connected to the parking brake system built in the car.
Notes on electrical connections:
• Replace the fuse with one of the specified rating. If the fuse blows
frequently, consult your JVC car audio dealer.
• It is recommended to connect to the speakers with maximum
power of more than 50 W (both at the rear and at the front, with an
impedance of 4 Ω to 8 Ω).
If the maximum power is less than 50 W, change “Amplifier Gain”
setting to prevent the speakers from being damaged (see page 51 of
the INSTRUCTIONS).
• To prevent short-circuit, cover the terminals of the UNUSED leads
with insulating tape.
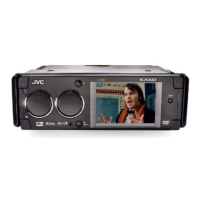
• The heat sink becomes very hot after use. Be careful not to touch it
when removing this unit.
Q
Rubber cushion
ጁሗՎ࿑
¬“ß°—π°√–·∑°
G
Crimp connectors
қʪᏃ
¢—È«µËÕ”À√—∫Àπ’∫
N
Washer (ø5)
࿑ (ø5)
ª√–‡°Áπ«ß·À«π (ø5)
o
Lock nut (M5)
ᕬ׆ᒘ (M5)
πÕµ≈ÁÕ§ (M5)
R
Mounting bolt—M5 x 20 mm
ႌ֣ᒘ—M5 × 20 mm
≈—°µ‘¥——M5 × 20
¡¡.
P
Handles
ػܓӕ˾
§—π∫—ߧ—∫
I
Batteries
ྐЖ
·∫µ‡µÕ√’Ë
‰∑¬
™ÿ¥ª√–°Õ∫π’ȉ¥È√—∫°“√ÕÕ°·∫∫¡“‡æ◊ËÕ„™Èß“π°—∫√–∫∫ °√–·‰øøÈ““¬¥‘π¢—È«≈∫°√–
·µ√ß
12 ‚«≈∑Ï À“°√∂¬πµÏ¢Õߧÿ≥‰¡Ë‰¥È„™È√–∫∫π’È µÈÕß„™È‡§√◊ËÕß·ª≈ß°√–
·‰ø™Ë«¬ ´÷Ëß“¡“√∂À“´◊ÈÕ‰¥È®“°√È“π¢“¬‡§√◊ËÕ߇’¬ß√∂¬πµÏ
JVC
Heat sink
ಞᇊ
·ºËπ√–∫“¬§«“¡√ÈÕπ
M
Reverse gear signal extension cord
Ծዥۑ༙עۂྐង
“¬µËÕ—≠≠“≥‡°’¬√Ï∂Õ¬À≈—ß
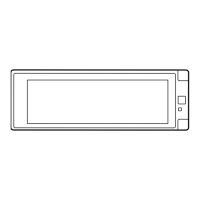
Required space for installation / ϰ༬ᄕ࠲ڐ /
æ◊Èπ∑’Ë«Ë“ß∑’˵ÈÕß„´È„π°“√µ‘¥µ—Èß
Control panel
վࡒػ
ÀπÈ“ªí¥
K
Microphone
ఐџࡘ
‰¡‚§√‚øπ
L
Microphone clip
ఐџࡘқ
§≈‘ª‰¡‚§√‚øπ
Installing the remote controller / ϰ༬ჳેወ/
°“√µ‘¥µ—Èß√ï‚¡µ§Õπ‚∑√≈
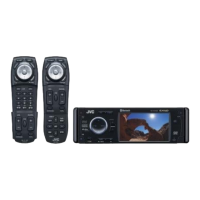
H
Remote controller/Holder
ჲ/ށ
√’‚¡µ§Õπ‚∑√≈/∑’ˬ÷¥
Trim plate is detached on this illustration for explanation.
Џ࿌˖ڄ༫ྟʵூ؛۔༱ᙼé
„π√Ÿªπ’ȇªÁπ°“√∂Õ¥·ºËπ‚≈À–¢Õ∫·µËßÕÕ° ‡æ◊ËÕ„™È„π°“√Õ∏‘∫“¬
LVT1708-005A
[U]
0207MNMMDWJEIN
EN, CT, TH
©2007 Victor Company of Japan, Limited
F
Audio/video cord
ࡖᏁ/ඁᏁྐង
“¬ÕÕ¥‘‚Õ/ «‘¥’‚Õ
Parts list for installation and connection / Έءϰ༬֝ોڅྒྷέ / √“¬°“√Ë«πª√–°Õ∫”À√—∫µ‘¥µ—Èß·≈–‡™◊ËÕ¡µËÕ°—π
The following parts are provided for this unit. After checking them, please set them correctly.
ʓλྒάݵᎲʹጅಏաڄéଡᓭ݈çᇧϙઅմ༫é
«πª√–°Õ∫µËÕ‰ªπ’È„ÀÈ¡“°—∫™ÿ¥ª√–°Õ∫π’È À≈—ß®“°µ√«®Õ∫·≈È« ª√—∫µ—È߇§√◊ËÕß„ÀÈ∂Ÿ°µÈÕß
Dashboard
ᄭڷػ
·ºßÀπÈ“ªí∑¡á
ˁ
ʹጅ෮՟·ڈޠ12 V é࠸ોϚڅྑກԧéϨسڄԾቩ
ԅЉɾྐԦç۱ᄔ࠱ɾࡴྐᏫ᜵ಗçϚJVCԆԾ
ࡖᛏ˜ኀளකռé
C
Sleeve
ࢭጅೋ
ª≈Õ°ÀÿÈ¡
E
Power cord
ྐཔ·ڄለӧ
“¬‡§‡∫‘≈°”≈—ß
A / B
Hard case/Control panel
ഢୢ/վࡒػ
≈—ß∫√√®ÿ/ÀπÈ“ªí¥
D
Trim plate
༫ྟ
·ºËπ‚≈À–¢Õ∫·µËß
J
Double-sided adhesive tape
ᕻࡒሗઘ
‡∑ª°“«ÕßÀπÈ“
Double-sided adhesive tape
ᕻࡒሗઘ
‡∑ª°“«ÕßÀπÈ“
Holder / ށ/ ∑’ˬ÷¥
Remote controller
ჲ
√’‚¡µ§Õπ‚∑√≈
ᙲѿ
• ʿ࠱Ϛʓтϯ༫έщጅά֜έщྐង;
–
Ҟᗉዬѕώᇟ֜᜵ᐑଁڄтçѴ۱˺ചΟ
Ֆݭé
– Ҟᗉዬѕϯη༫çϨϯηெമڄтçѴ۱
˺ചࠓ֡ڄΟՖݭé
– Ҟᗉඁ௴ڄтé
•
˝ˡϚዬѕώᇟڄཫദˀዬѕʹጅçѴ۱˺ചΟՖݭé
• ኢአ࢜Ϛኢአཫദˀ˝ˡᝳߡΕéࠜኢአ࢜Ϛኢአཫദˀ
ᝳߡΕçϕٌำʍʿූˀЩࠓำՖݭڄചΆé
• ኢአ࢜Ϛኢአཫദˀ˝ˡըᐁЫጅéϚኢአཫദˀ˝ᔃߍڄ
ᑵࡖݵ݃υᎳڄé
• Ϩسᄔ࠱Ϛኢአዬѕʹጅçᇧٌۘำۮé
• ϨسԅЉቢԾվç“Parking Brake” Ϛܳʕ
ç
ψ
અʿΕᆑ؞ഐࡒé
– ෮ະ˾۫ԾለႩԆԾ˖ڄ˾۫ԾԦߟЏᙱѾۑ
ࣥʼé
нྑཕોٍิ:
• ӕۘᎳീӦಗᖃ׆࠷மࡩڄۘᎳീéϨسۘᎳീગጛᖢç
ቁώJVC ԆԾࡖᛏ˜ኀ༿é
•
݈֜ۮಙᑵڄఛʨ᎔ʈᏻʨؠ50 Wçմۇӏ
4 Ωü8 Ωé
Ϩسఛʨʮؠ 50 Wçቁቆ
“Amplifier Gain”
׆ࡩç
Վಙᑵ๑ᖢ
(
ኌ՟·იاڄ୶51ࡗ
)
é
• Վྐഠཔçቁ·ഽሇઘу͵՟·ྐለڄၷʪé
• ʹጅ՟·݈çಞᇊ݃ᇊéϕЏçϚ୰ʹጅçʮ˻ʿ࠱
᙮ညಞᇊé
§”‡µ◊Õπ
• ÀÈ“¡µ‘¥µ—ÈßÕÿª°√≥ÏÀ√◊Õ“¬‡§‡∫‘≈„¥Ê„π∫√‘‡«≥π’È;
– Õ“®°’¥¢«“ß°“√∑”ß“π¢Õßæ«ß¡“≈—¬·≈–§—π‡°’¬√Ï ‡æ√“–Õ“®°ËÕ„Àȇ°‘¥Õÿ∫—µ‡Àµÿ¢÷È
–
Õ“®°’¥¢«“ß°“√∑”ß“π¢ÕßÕÿª°√≥ϪÈÕß°—𧫓ª≈Õ¥¿—¬ ‡™Ëπ ·Õ√Ï·∫§ ‡æ√“–
Õ“®°ËÕ„Àȇ°‘¥Õ—πµ√“¬√È“¬·√ß∂÷ß™’«‘µ¢÷Èπ‰¥È
– Õ“®°’¥¢«“ß“¬µ“
• լ˓„™Èß“π¢≥–¢—∫¢’Ë ‡æ√“–Õ“®°ËÕ„Àȇ°‘¥Õÿ∫—µ‘‡Àµÿ¢÷Èπ‰¥È
• ºŸÈ¢—∫µÈÕ߉¡Ë¡Õß∑’ˮաÕ𑇵Õ√Ï¢≥–¢—∫¢’Ë ∂È“ºŸÈ¢—∫¡Õß∑’ˮաÕ𑇵Õ√Ï¢≥–¢—∫¢’Ë
Õ“®π”‰ªŸË§«“¡ª√–¡“∑ ·≈–‡ªÁπ“‡Àµÿ„Àȇ°‘¥Õÿ∫—µ‘‡Àµÿ¢÷Èπ‰¥
• ºŸÈ¢—∫¢’˵ÈÕ߉¡Ë«¡ÀŸøíߢ≥–¢—∫¢’Ë ‡π◊ËÕß®“°®–‡ªÁπÕ—πµ√“¬Õ¬Ë“߬‘ËßÀ“°∑Ë“π‰¡Ë‰¥È¬‘π‡
’¬ß®“°¿“¬πÕ°¢≥–¢—∫¢’Ë
• ¿ô“®”‡ªìπµÈÕß„™È‡§√◊ËÕߢ≥–¢—∫¢’Ë ¢˝Õ„™È§Ÿ∑“ߢô“ßÀπÈ“„ÀÈ¥’
• À“°‰¡Ë‰¥È∑”°“√‡¢È“‡°’¬√Ϯե√∂À√◊Õ‡°’¬√Ïæ’‰«È §”«Ë“ “Parking Brake”
®–ª√“°Ø¢÷Èπ∑’ËÀπÈ“®Õ ·≈–√Ÿª°“√‰¡Ë‡≈Ëπ®–·¥ß¢÷Èπ¡“
– §”‡µ◊Õππ’È®–ª√“°Ø¢÷Èπ‡©æ“–‡¡◊ËÕµËÕ“¬‡∫√°°—∫√–
∫∫‡∫√°„π√∂¬πµÏ‰«È‡∑Ë“π—Èπ
¡ÈÕπŸ≈„π°“√•ËÕ√–∫∫‰ø:
•
„™Èæ‘°—¥®”‡æ“–·∑πøî«À“°øî«Ï¢“¥∫ËÕ¬ „ÀȪ√÷°…“√È“ π¢“¬‡§√◊ËÕ߇’¬ß√∂¬πµÏ JVC
•
¢Õ·π–π”„ÀȵËÕ≈”‚æß ∑’Ë¡’°”≈—ߢ—∫ßÿ¥‡°‘π°«Ë“ 50 W (∑—ÈߥȓπÀπÈ“·≈–¥È“πÀ≈—ß
¡’§Ë“§«“¡µÈ“π∑“π
4 Ω ∂÷ß 8 Ω)
∂È“°”≈—ߢ—∫µË”°«Ë“
50 W „Àȇª≈’ˬπ§Ë“ “Amplifier Gain”
‡æ◊ËÕªÈÕß°—π‰¡Ë„ÀÈ≈”‚æß™”√ÿ¥
(¥ŸÀπÈ“ 51 §”·π–π”)
•
°“√ªÈÕß°—π°“√≈—¥«ß®√ ®–µÈÕßæ—π¢—È«“¬µ–°—Ë« ∑’ˉ¡Ë„™È·≈È«¥È«¬‡∑ ªæ—𓬉ø
• ·ºËπ√–∫“¬§«“¡√ÈÕπ®–√ÈÕπ¡“°À≈—ß®“°„™È √–¡—¥√–«—ßլ˓‰ª
—¡º—‡¡◊ËÕ∂Õ¥™ÿ¥ª√–°Õ∫π’È
Instal1-3_KD-AVX33[U].indd 1Instal1-3_KD-AVX33[U].indd 1 2/27/07 4:45:11 PM2/27/07 4:45:11 PM