18
ENGLISH
Data Size: B6L (182 mm x 128 mm)
Book Size: B6L (182 mm x 128 mm)
Installing the unit (in-dash mounting)
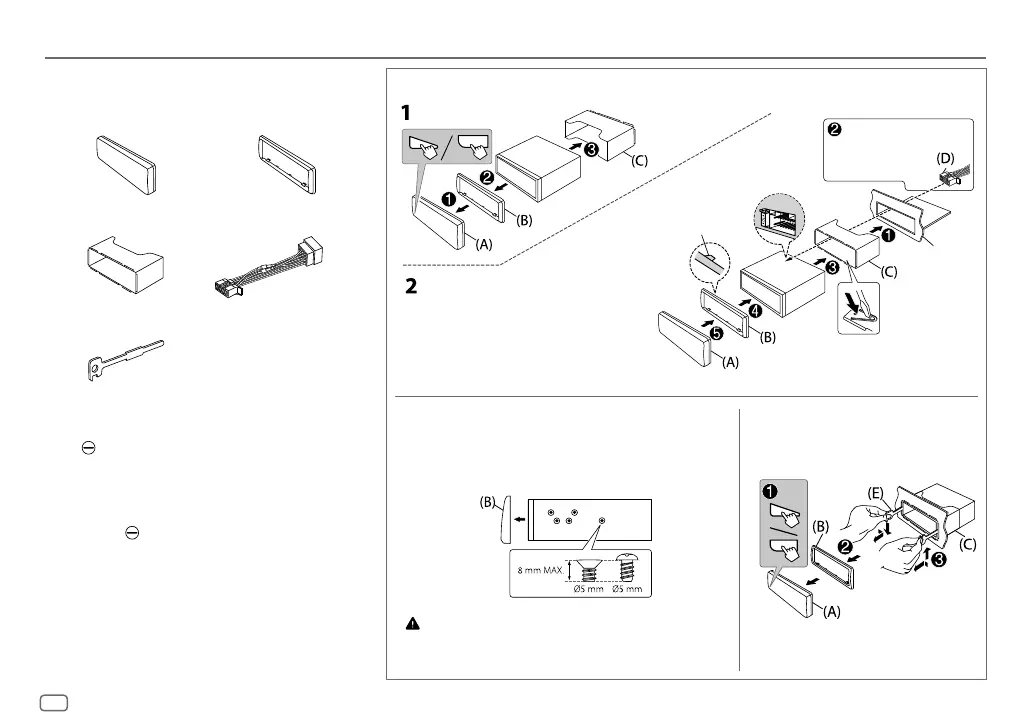
Part list for installation
(A)
Faceplate (×1)
(B)
Trim plate (×1)
(C)
Mounting sleeve (×1)
(D)
Wiring harness (×1)
(E)
Extraction key (×2)
Basic procedure
1
Remove the key from the ignition switch, then disconnect
the
terminal of the car battery.
2
Connect the wires properly.
See “Wiring connection” on page 19.
3
Install the unit to your car.
See “Installing the unit (in-dash mounting)”.
4
Connect the terminal of the car battery.
5
Detach the faceplate and reset the unit. (Page3 or 4)
Removing the unitInstalling without the mounting sleeve
1
Remove the mounting sleeve and trim plate from the unit.
2
Align the holes in the unit (on both sides) with the
vehicle mounting bracket and secure the unit with screws
(commercially available).
Use only the specified screws. Using wrong screws might damage
the unit.
Do the required wiring.
(Page 19)
Bend the appropriate tabs to hold the
sleeve firmly in place.
Hook on the top side
Orientate the trim
plate as illustrated
before fitting.
Dashboard of
your car
INSTALLATION/CONNECTION
JS_JVC_KD_T409_E_EN_02.indd 18JS_JVC_KD_T409_E_EN_02.indd 18 6/11/2018 3:50:59 PM6/11/2018 3:50:59 PM
 Loading...