3
Data Size: B6L (182 mm x 128 mm)
Book Size: B6L (182 mm x 128 mm)
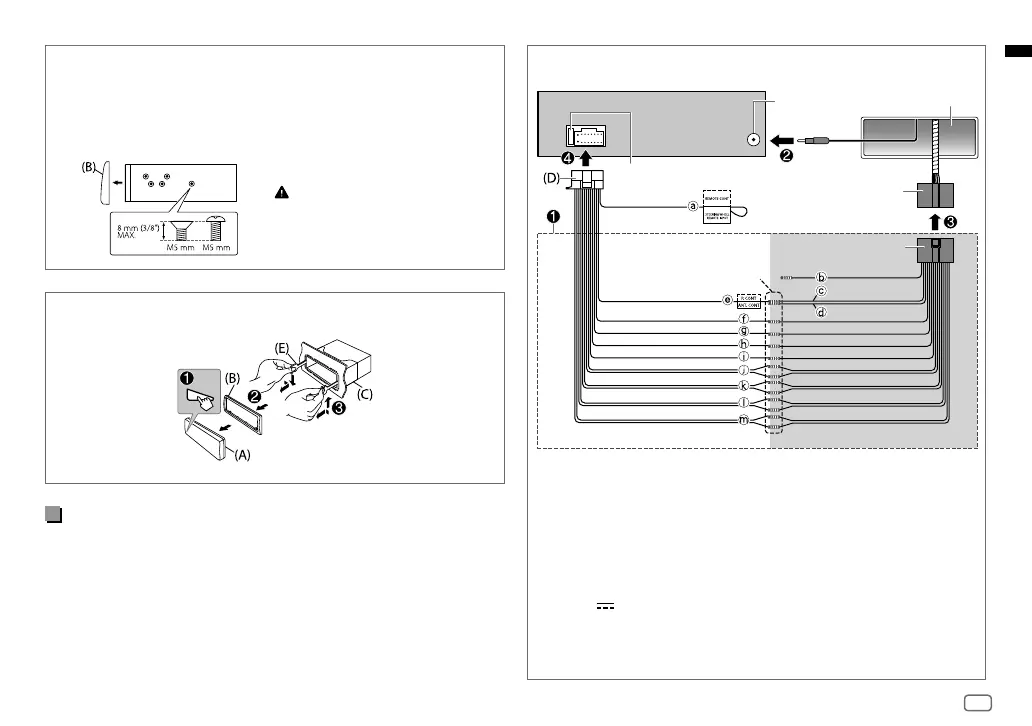
Wiring connection
a Light blue/yellow: To the
steering wheel remote control
adapter
b Brown (not used)
c Blue: To power antenna
d Blue/white: To amplifier
e Blue/white: Remote
(12 V
350 mA)
f Orange/white: Illumination
g Yellow: Battery 12 V
h Red: Ignition 12 V
i Black: Ground
j Gray ª, Gray/black ·:
Front speaker (right)
k White ª, White/black ·:
Front speaker (left)
l Purple ª, Purple/black ·:
Rear speaker (right)
m Green ª, Green/black ·:
Rear speaker (left)
Removing the unit
Installing the unit (without mounting sleeve)
1 Remove the mounting sleeve and trim plate from the unit.
2 Align the holes in the unit (on both sides) with the vehicle
mounting bracket and secure the unit with screws (commercially
available).
Part list (supplied)
(A) Faceplate (×1)
(B) Trimplate (×1)
(C) Mounting sleeve (×1)
(D) Wiring harness (×1)
(E) Extraction key (×2)
Use only the specified screws.
Using wrong screws might damage
the unit.
Join the same color
wires together.
Custom wiring harness
(separately purchased)
Vehicle dashboard
Recommended connection
Factory wiring
harness (vehicle)
Antenna terminal
Fuse (10 A)
JS_JVC_QSG_KD_T905BTS_K_EN_2A.indd 3JS_JVC_QSG_KD_T905BTS_K_EN_2A.indd 3 5/23/2018 11:14:41 AM5/23/2018 11:14:41 AM
 Loading...