184 mm
53 mm
Multi
Music
Scan
SEL
7
1234
5
6
40W
X
4
/I /I
AT
T
TT
CD-
CH
TUNER TAPE
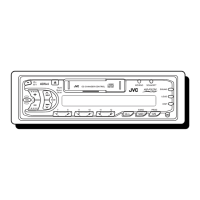
KS-F150
Installation/Connection Manual
1
Before mounting: Press (Control Panel Release
button) to detach the control panel.
2
Remove the trim plate.
3
Remove the sleeve after disengaging the sleeve locks.
1 Stand the unit.
Note: When you stand the unit, be careful not to damage
the fuse on the rear.
2 Insert the 2 handles between the unit and the sleeve, as
illustrated, to disengage the sleeve locks.
3 Remove the sleeve.
Note: Be sure to keep the handles for future use after
installing the unit.
4
Install the sleeve in the dashboard.
* After the sleeve is correctly installed in the dashboard,
bend the appropriate tabs to hold the sleeve firmly in place,
as illustrated.
5
Fix the mounting bolt to the rear of the unit’s body and place
the rubber cushion over the end of the bolt.
6
Do the required electrical connections explained on the back
of this instructions.
7
Slide the unit into the sleeve until it is locked.
8
Attach the trim plate.
9
Attach the control panel.
J
V
C
7
8
*
4
6
5
4
wÐdŽwÐdŽ
wÐdŽwÐdŽ
wÐdŽ
•
wzUÐdN —UOð WDÝ«uÐ qLFO “UN'« «c¼ rLbI dýU³ DC
ÆVUÝ i¹—Qð WOzUÐdN WLE½« ¨Xu ±≤
ðð
ðð
ð
dd
dd
d
OO
OO
O
VV
VV
V
««
««
«
''
''
'
NN
NN
N
UU
UU
U
““
““
“
®®
®®
®
œœ
œœ
œ
««
««
«
šš
šš
š
qq
qq
q
‡‡
‡‡
‡
ðð
ðð
ð
UU
UU
U
ÐÐ
ÐÐ
Ð
KK
KK
K
uu
uu
u
««
««
«
OO
OO
O
UU
UU
U
——
——
—
……
……
…
©©
©©
©
•O³¹Òl ÆWOU¦*« VOd²« WI¹dÞ wU²« w×O{u²« rÝd« s
w?²?« …—U?O??« Ÿu?½ o?ÐU?D?ð ö?¹b?F?ð q?L?Ž p?O?KŽ V−¹ ¨p–
’uBÐ UuKF* WłUŠ Ë« «—UH²Ý« „UM¼ ÊU «–« ÆUNJK²9
W?O?ðu?B?« …e?N?łô« Ÿ“u? …—U?A?²?Ý« v?łd?¹ ¨VOd²« «Ëœ«
W—U «—UOKJVCÆ«Ëœô« …cN WŽ“u*« WdA« Ë«
±
³?³?
³?³?
³?
q??q??
q??q??
q??
ÐÐ
ÐÐ
Ð
b?b?
b?b?
b?
¡¡
¡¡
¡
««
««
«
²??²??
²??²??
²??
d?d?
d?d?
d?
O??O??
O??O??
O??
V?V?
V?V?
V?
∫∫
∫∫
∫ «{G??j? «d??“ ®“— %d?¹d? u??ŠW?
«²×Jr© s «łq Bq uŠW «²×JrÆ
≤≤
≤≤
≤«½eŸ uŠW «e¹MWÆ
≥≥
≥≥
≥
«½eŸ «NOJq «u«w ÐFb Bq ¦³²U «NOJq «u«wÆ
±nË« «'NU“ ÐAJq ŽLuœÍÆ
öö
öö
ö
ŠŠ
ŠŠ
Š
E?E?
E?E?
E?
WW
WW
W
∫∫
∫∫
∫ ŽM?b ðu?On «'N?U“¨ ðQ?b s Žb? ðCd?— «Ë
«ðö· «HOu“ «*ułuœ w «'NW «)KHOW s «'NU“Æ
≤O³ u¼ UL ¨w«u« qJON«Ë “UN'« 5Ð 5²U*« qšœÒs
qJA« w¨ HBq ¦³?²U «NOJq «u«wÆ
≥«½eŸ «NOJq «u«wÆ
öö
öö
ö
ŠŠ
ŠŠ
Š
EE
EE
E
WW
WW
W
∫∫
∫∫
∫ ¹dłw «;UEW ŽKv «*UU s «łq «ôݲFLU‰
ôŠIU ÐFb ðdOV «'NU“Æ
¥¥
¥¥
¥—V «NOJq «u«w œ«šq ðUÐKu «OU—…Æ
*ÐFb ðdOV «NOJq «u«w KOU œ«šq ðUÐKu «OU—… ÐAJq
×?O?`¨ «ŁM?w? «_?M?W? ÐAJ?q? M?U?ÝV ²?¦?³?O?X? «NO?J?q?
«u«w? ÐAJ?q ×?Jr? w «*JU?Ê «B×?O`?¨ LU? ¼u O?³Òs
w «AJqÆ
µµ
µµ
µŁ³ÒX LU— «²dOV ÐU'NW «)KHOW s ¼OJq «'NU“ ËÐFb
–p {l «(Au… «*DUÞOW u‚ ½NU¹W «*LU—Æ
∂∂
∂∂
∂
«ŽLq «²uOö «JNdÐUzOW «*DKuÐW LU ¼u AdËÕ nKš
¼cÁ «²FKOLUÆ
∑∑
∑∑
∑«œšq «'NU“ œ«šq «NOJq «u«w Š²v ¹¦³X ÐAJq ×O`Æ
∏∏
∏∏
∏
—ÒV uŠW «e¹MWÆ
ππ
ππ
π—ÒV uŠW «²×JrÆ
O²O²
O²O²
O²
ÒÒ
ÒÒ
Ò
ØVOd²« ULOKFð VØVOd²« ULOKFð V
ØVOd²« ULOKFð VØVOd²« ULOKFð V
ØVOd²« ULOKFð V
qOu²«qOu²«
qOu²«qOu²«
qOu²«
9
Dashboard
…—UO« uKÐUð
Mounting bolt
VOd²« —UL
Sleeve
w«u« qJON«
Trim plate
WM¹e« WŠu
See the back page for electrical
connections.
qł« s WOHK)« W×HB« dE½«
ÆWOzUÐdNJ« öOu²«
0100HISFLEJES
EN, CH, AR
FSUN3096-T181
[U]
1
2
10
3
10
1
2
3
1
2
3
5
4
WOÞUD*« …uA(«
Rubber cushion
Sleeve
w«u« qJON«
Lock plate
XO³¦²« W×OH
Fuse
“uOH«
Slot
oýÒdOG
Handle
WU*«
ENGLISH
• This unit is designed to operate on 12 volts DC, NEGATIVE
ground electrical systems.
INSTALLATION (IN-DASH
MOUNTING)
• The following illustration shows a typical installation. However,
you should make adjustments corresponding to your specific
car. If you have any questions or require information regarding
installation kits, consult your JVC car audio dealer or a company
supplying kits.
!"#$
• !"#$% 12V !"#$%&'(
!
!"#$%
!
!
!"
!
!"#$%&' ()*+,-./0123452
!"#$%&'()*+,-%./0 123.45
!"#$%&JVC !"#$%&'()*+,-
•
!"#$%&'()*
!"
1
!" !"#$%& !"#$
2
!"#
3
!"#$%&'()&*+
1 !"#
!"#$%&'()*+,-./01
2 !"#$%&'(%)*+,-./0123
!"
3
!"#$
!"#$%&'()*+,#-./0123
4
!"#$%&'()
* !"#$%&'()*+,-./01-23!"45
!"#$%&'()*+
5
!"#$%&&'()*+,-./0$ !"1
6
!"#$%&'()%*+,-./01
7
!"#$ %&'( !"
8
!"
9
!"#$
•
•
Install.KS-F150[U]/1 02/15/2000, 12:52 PM1