1-8
Fig.7
[Caution] Although the CD mechanism unit can be
removed without removing the CD tray
panel, it is still recommended to remove it
in order to prevent damage.
Prior to performing the following procedures,
remove the top cover and botn sides BOARD
a.
b.
c.
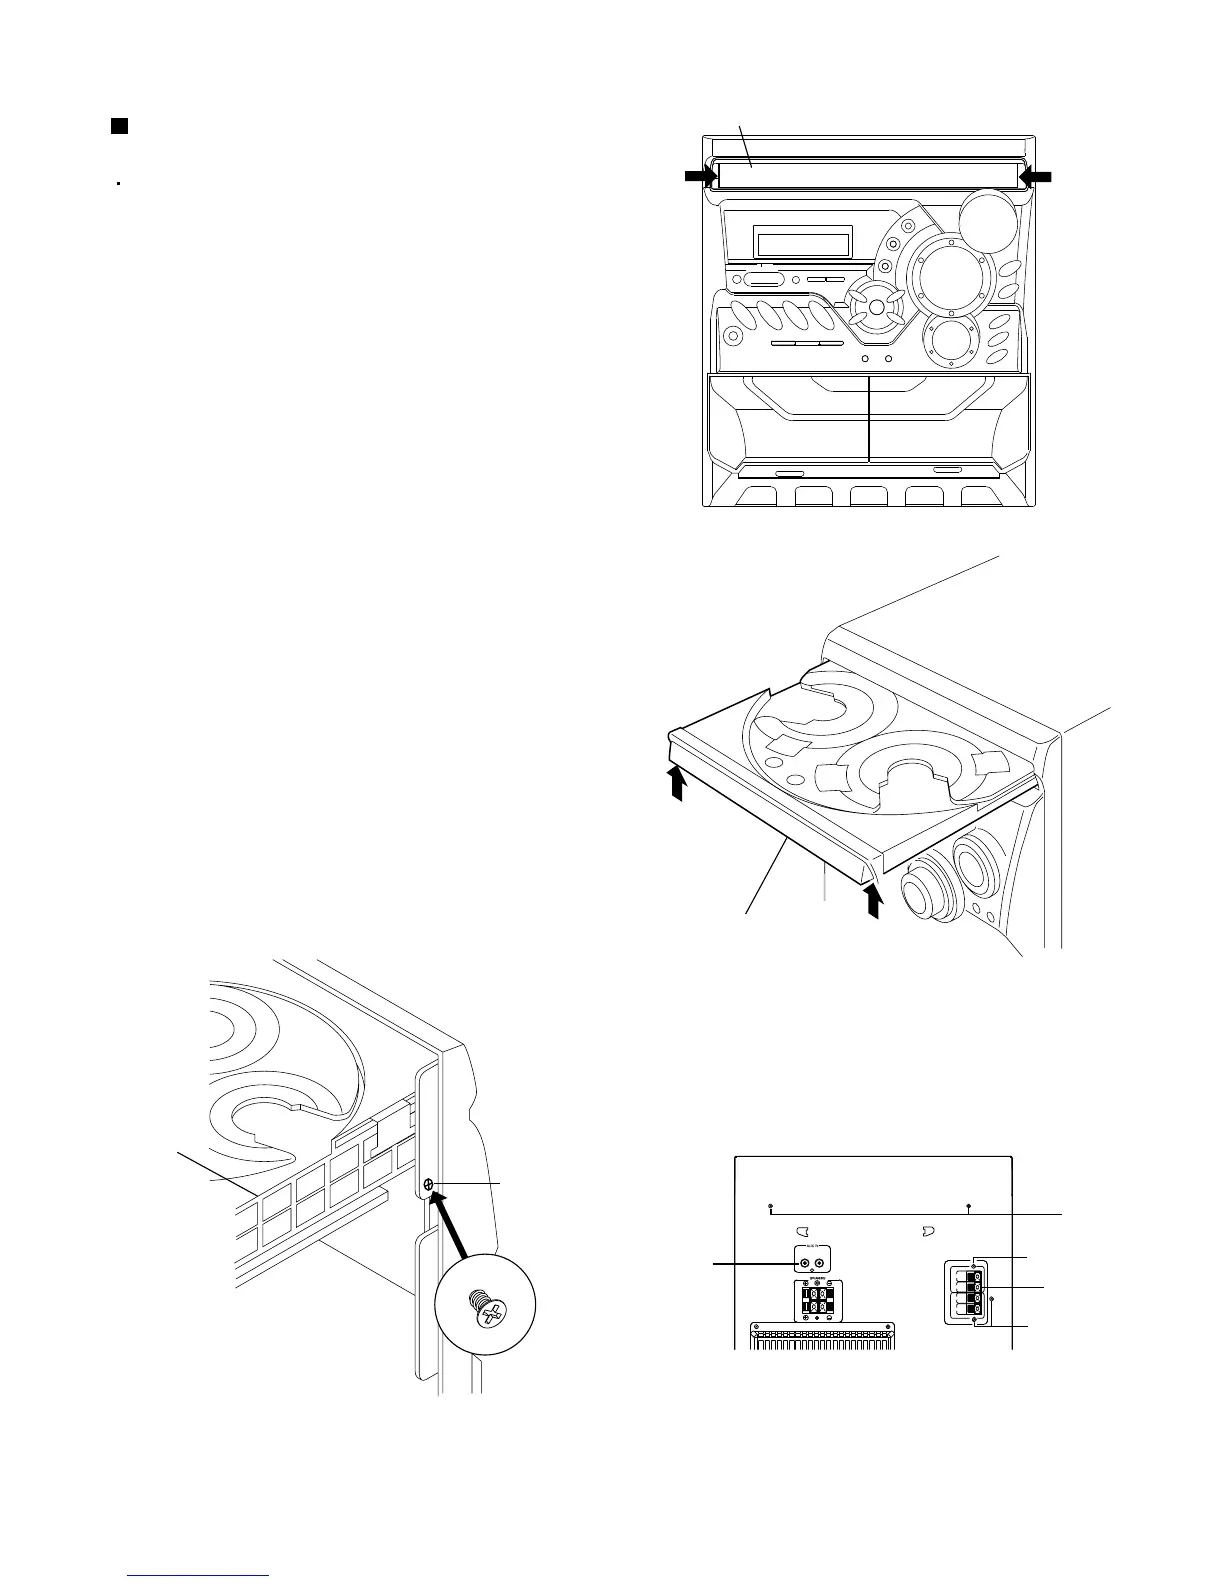
From the front panel side of this set, push in the
sections marked with arrows and pull out the CD
tray toward the front.
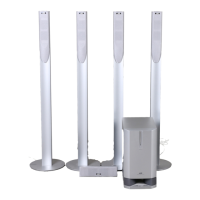
Remove the CD tray panel by pushing both of its
extremities upward in the direction of the arrows.
Push the CD tray deep into the set.
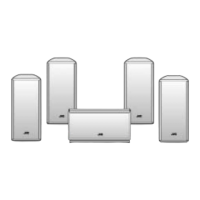
1. Disconnect the card wires from the CD PCB
CN703 and CN203.
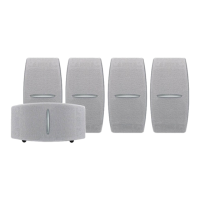
2. From the rear of the set, remove the two screws
"E"and two serews "G" on the front panel left and
right side.
3. Handle the CD changer unit rear, take out unit.
Removing the CD changer unit
(See Fig.7 to 10)
Fig.9
Fig.10
Fig.8
CD tray panel
CD tray panel
CD changer
unit
Accessory
terminal
Antenna
termianl
E
F
F
G