1-9
UX-P3
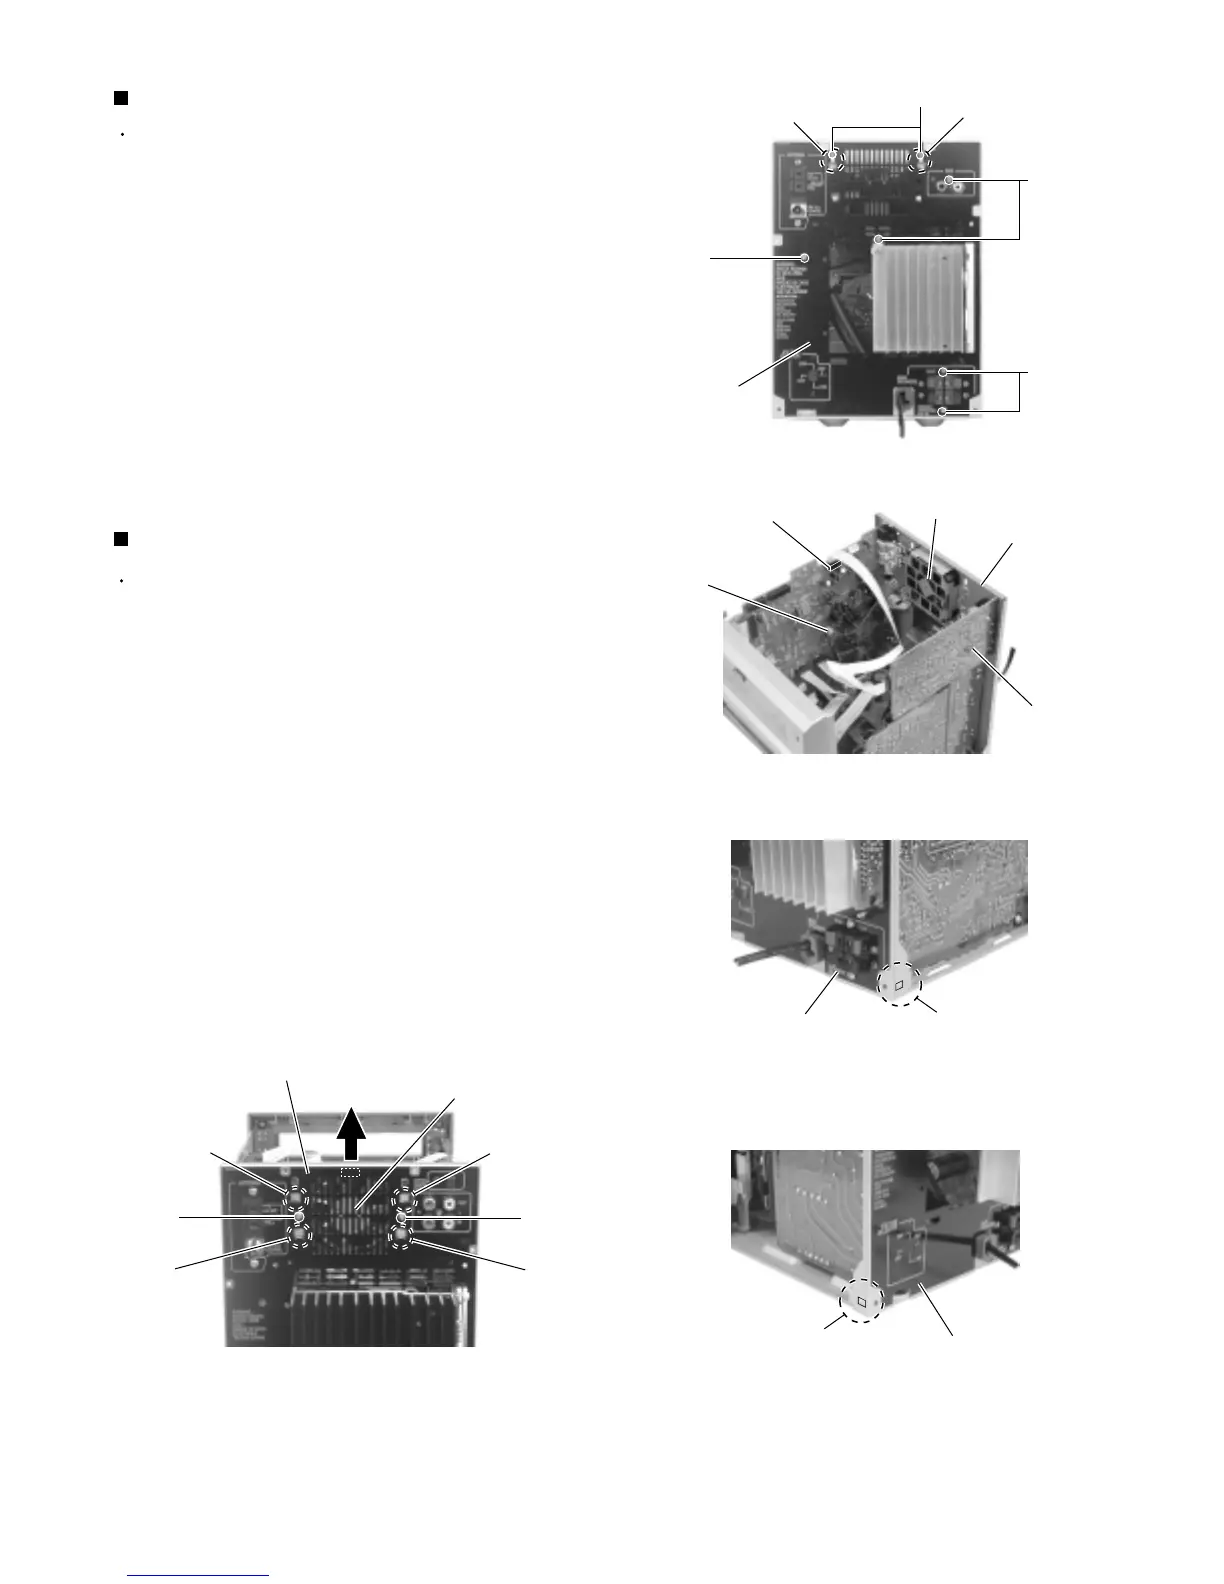
Prior to performing the following procedure, remove
the metal cover, rear cover and the CD mechanism
assembly.
Remove the five screws G attaching the rear panel.
Disconnect the card wire from CN902 on the main
board.
Disengage the lower two joints b on each side of the
rear panel using a screwdriver and remove the rear
panel backward (The tuner board and the fan will be
also detached.Remove them as needed).
1.
2.
3.
Remove the rear panel (See Fig.8 to 11)
Prior to performing the following procedure, remove
the metal cover, the rear cover andthe CD
mechanism assembly.
Disconnect the wire from connector CN908 on the
main board.
Remove the two screws H on the back of the body.
Move the fan upwards to disengage the four joints c
and release from the rear panel.
1.
2.
3.
Removing the fan (See Fig.9 and 12)
Fig.8
Fig.10
Fig.11Fig.12
F
G
G
Rear panel
Joint a
Joint a
Joint b
Rear panel
Rear panel
Joint b
Fan
Rear panel
H
H
Joint c
Joint c
Joint c
Joint c
G
Main board
CN908
CN902
Fan
Rear panel
Tuner board
Fig.9

 Loading...