Do you have a question about the Kenwood KA-7100 and is the answer not in the manual?
Guidelines for safe and optimal placement of the amplifier, avoiding direct sunlight and temperature extremes.
Instructions on recording the unit's serial number for warranty purposes.
Recommendations for inspecting the unit for shipping damage and retaining packing materials.
Details about voltage compatibility and AC selector switch usage for different regions.
Explains how to select the correct AC voltage for the amplifier's operation.
Crucial safety warning to prevent fire or shock hazards related to moisture.
Highlights the DC power amplifier's low distortion and good transient response for high sound quality.
Explains how separate power supplies eliminate dynamic crosstalk distortion for excellent reproduction.
Specifies the amplifier's continuous power output at 8 ohms with low total harmonic distortion.
Details the use of an FET differential circuit for low distortion and high S/N ratio in the equalizer circuit.
Mentions the BAX type low-distortion tone control and tone defeat switch for sound customization.
Describes the ATT type master volume control with 32 contacts for precise adjustment.
Explains the attenuator switch for instantly cutting the audio level by 20 dB.
Highlights the convenient 2-stage loudness control for low-frequency correction.
Notes the convenient tape switch with a through circuit for two tape decks.
Emphasizes Kenwood's design excellence and craftsmanship in the KA-7100.
Illustrates the connection diagram for a turntable to the amplifier.
Shows the interconnection diagram for a tape deck (Tape A).
Diagram showing connections for speaker systems A and B.
Explains the use of switched and unswitched AC outlets on the rear panel.
Detailed instructions on connecting speakers and using the speaker selector switch.
Guide on how to determine and ensure correct speaker phasing for optimal sound.
Instructions for connecting turntables and external components via AUX jacks.
Instructions for connecting tape decks for recording and playback.
Information on using a DIN connector for tape deck connection.
Instructions for connecting an FM stereo or AM-FM stereo tuner.
Explains the function of the SPEAKERS switch for different speaker configurations.
Details the operation of the ON/OFF power switch and its pilot lamp.
Describes the use of the PHONES jack for private listening with headphones.
Explains the TONE switch's DEFEAT position for frequency response measurements.
Details the SUBSONIC and HIGH filters for noise reduction and sound quality.
Explains the attenuator switch for reducing audio output level by 20 dB.
Describes the function of the VOLUME control for adjusting output level.
Explains the LOUDNESS switch for boosting bass response at low volumes.
Describes the MODE SELECTOR switch for stereo, reverse stereo, and mono reproduction.
Explains how the INPUT SELECTOR switch chooses the audio source.
Details the TAPE switch functions for playback, monitoring, and dubbing.
Explains the SOURCE MON function for simultaneous reproduction of other sources.
Describes the BALANCE control for adjusting volume between left and right channels.
Explains the BASS and TREBLE controls for adjusting audio response.
Provides initial settings for various controls before powering on the unit.
Instructions for operating the amplifier with an FM/AM tuner.
Steps for operating the amplifier with a turntable.
Guide on using the AUX jacks for external components.
Instructions for tape deck playback and monitoring.
Steps for recording with a single tape deck.
Instructions for recording with two tape decks, including monitoring.
Procedure for duplicating tape recordings between two tape decks.
Explains input signal level for tape recording jacks.
Describes how playback signals enter the tape jacks and are heard.
Illustrates dubbing from tape deck A to B using different TAPE switch settings.
Explains the benefits and design of the direct current (DC) amplifier.
Details the reproduction of low frequencies and zero phase difference in DC amplifiers.
Comprehensive safety precautions for handling and operating the unit.
Visual representation of the amplifier's internal functional blocks and signal flow.
Lists common symptoms encountered with the amplifier.
Identifies potential causes for the listed symptoms.
Provides corrective measures for resolving amplifier issues.
Detailed specifications for the power amplifier section.
Detailed specifications for the pre-amplifier section.
General specifications including power consumption, dimensions, and weight.
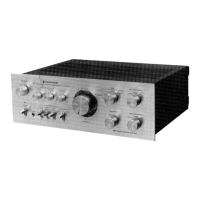
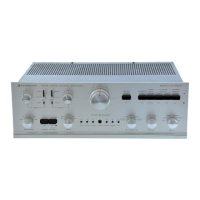
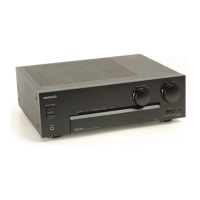
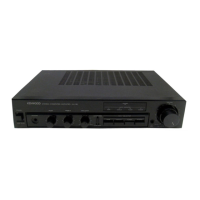
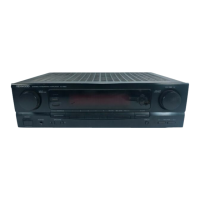
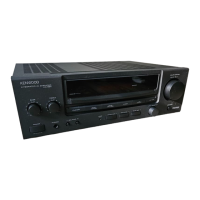
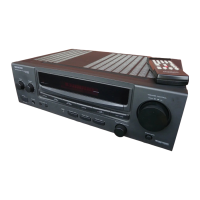
The Kenwood KA-7100 is a DC Stereo Integrated Amplifier designed to deliver high-quality audio reproduction with a focus on low distortion and stable performance. This amplifier incorporates several advanced features to enhance the listening experience and provide versatility in system integration.
The KA-7100 functions as the central hub for an audio system, connecting various source components like turntables, tuners, and tape decks to loudspeakers and headphones. Its primary role is to amplify audio signals from these sources to a level suitable for driving speakers, while maintaining signal integrity and minimizing distortion.
At its core, the KA-7100 features a newly incorporated DC power amplifier. This design choice is significant as it aims to achieve extremely low distortion and excellent phase characteristics, particularly in the very low-frequency range. The DC amplifier ensures that output waveforms closely match the original input waveforms, preserving the nuances and dynamics of the sound. This results in a high quality of reproduced sound, offering a greater sense of power and accurately reproducing the high-energy sounds of live performances. A key benefit of the DC amplifier is the elimination of phase distortion, as there are no capacitors in the signal path to cause phase rotation, ensuring a faithful duplication of the input waveform.
The amplifier also boasts a dual mono construction with separate power supplies for the right and left channels. This independent power supply design effectively eliminates dynamic crosstalk distortion, contributing to excellent reproduction and a stable acoustic image.
For signal processing, the KA-7100 includes an equalizer circuit in the first stage, which utilizes an FET differential circuit. This design ensures a low distortion factor and a high signal-to-noise (S/N) ratio, crucial for clean audio from sources like turntables.
Tone control is handled by a BAX type low-distortion tone control, complemented by a tone defeat switch. This allows users to either fine-tune the bass and treble response or bypass the tone control circuit entirely for the purest possible sound, catering to different acoustic environments and personal preferences.
Volume control is managed by an ATT type master volume control with 32 contacts. This precise design minimizes interlock errors, ensuring accurate and balanced volume adjustments across both channels. Additionally, a multi-function attenuator switch is provided, which instantly cuts the audio level by 20 dB. This feature is practical for quick volume reduction, such as when answering the telephone or for making precise level adjustments without disturbing the main volume setting.
The amplifier supports two tape decks with a convenient tape switch and a through circuit. This allows for easy recording, playback, and tape-to-tape dubbing between two decks, offering flexibility for tape enthusiasts.
A 2-stage loudness control is included for low-frequency correction, which can be particularly useful at lower listening volumes to compensate for the human ear's reduced sensitivity to bass frequencies.
The KA-7100 is designed for user-friendly operation, with clearly labeled controls and versatile connectivity options.
While the manual primarily focuses on operation, it includes important precautions and checks that contribute to the longevity and safe use of the device, which can be considered aspects of maintenance.
The manual provides a comprehensive "Points to Be Checked Prior to Servicing" section, which acts as a first-line maintenance guide for common issues. This empowers users to diagnose and potentially resolve minor problems before seeking professional service.
These detailed instructions and troubleshooting tips aim to ensure safe, optimal, and long-lasting performance of the Kenwood KA-7100 amplifier.
| Power Output | 60 watts per channel into 8Ω (stereo) |
|---|---|
| Frequency Response | 7Hz to 50kHz |
| Total Harmonic Distortion | 0.02% |
| Damping Factor | 50 |
| Input Sensitivity | 2.5mV (MM), 150mV (line) |
| Speaker Load Impedance | 4Ω to 16Ω |
| Type | Stereo Integrated Amplifier |