4.3
Section 4
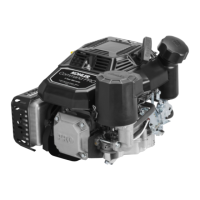
Air Cleaner and Air Intake System
4
NOTE: Damaged, worn, or loose air cleaner
components can allow unfi ltered air into the
engine causing premature wear and failure.
Tighten or replace all loose or damaged
components.
Disassembly
The following procedure is for complete disassembly
of all air cleaner components.
1. Loosen the air cleaner cover retaining knob and
remove the air cleaner cover.
2. Remove the wing nut and air cleaner element.
3. If so equipped, remove the precleaner from the
paper element.
4. Disconnect the breather hose from the air cleaner
base.
5. Remove the air cleaner base mounting nuts, air
cleaner base, and gasket.
6. If necessary, remove the self-tapping screws and
stud from the air cleaner base.
Reassembly
The following procedure is for complete assembly of
all air cleaner components.
1. Install the stud and self-tapping screws to the air
cleaner base.
2. Install the gasket, air cleaner base, and base
mounting nuts. Torque the nuts to 9.9 N·m
(88 in. lb.).
3. Connect the breather hose to the air cleaner base
and valve cover. Secure with hose clamps.
4. If so equipped, install the precleaner (washed
and oiled) over the paper element.
5. Install the air cleaner element and wing nut.
Thread the wing nut on the stud until it contacts
the metal cap on the element, then tighten an
additional 1/2-1 turn.
6. Install the air cleaner cover. Tighten the knob
securely.
Air Intake/Cooling System
Clean Air Intake/Cooling Areas
To ensure proper cooling, make sure the grass screen,
cooling fi ns, and other external surfaces of the engine
are kept clean at all times.
Every 100 hours of operation (more often under
extremely dusty, dirty conditions), remove the blower
housing and other cooling shrouds. Clean the cooling
fi ns and external surfaces as necessary. Make sure
the cooling shrouds are reinstalled.
NOTE: Operating the engine with a blocked grass
screen, dirty or plugged cooling fi ns, and/or
cooling shrouds removed, will cause engine
damage due to overheating.
Air Intake Filter (Optional)
Some engines used under extremely dusty conditions
such as fl oor buffer applications are equipped with a
foam air fi lter which fi ts over the retractable starter.
The fi lter is held in place by velcro studs affi xed to the
starter cover. This fi lter must be checked daily before
each start and frequently during operation. It should
be serviced whenever wax, dust, or dirt builds up on
its surface. If it becomes clogged, the engine can not
receive suffi cient cooling air and will overheat.
To service, peel the fi lter loose from the velstuds, lift
the fi lter and carefully work the recoil starter handle
through the hole in fi lter. Clean the fi lter in soap and
warm water, rinse, squeeze out excess water and
allow it to air dry. If time will not permit air drying, keep
a spare fi lter on hand (Kohler Part No. 12 050 02-S).
When reinstalling, make sure the foam fi lter seals
against the blower housing around its base and is
securely attached to the velstuds.
 Loading...