TP-590T, TP-590R Quick Start
TP-590T and TP-590R Quick Start Guide
This guide helps you install and use your TP-590T and TP-590R for the first time.
Go to www.kramerav.com/downloads/TP-590T and/or www.kramerav.com/downloads/TP-590R to
download the latest user manual and check if firmware upgrades are available.
Step 1: Check what’s in the box
TP-590T 4K HDMI/USB Transmitter OR
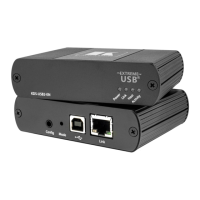
TP-590R 4K HDMI/USB Receiver
1 Bracket set
1 Power cord
4 Rubber feet
1 Quick start guide
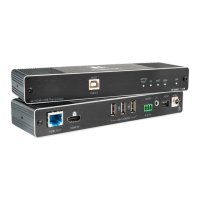
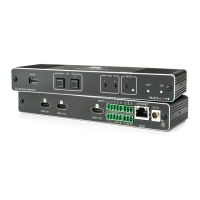
Step 2: Get to know your TP-590T and TP-590R
TP-590T
Connect to the USB host, (for example, a laptop) to communicate with the USB
peripheral devices (for example, a smart board) connected to USB device ports on
either the transmitter or the receiver.
Lights orange when the device is enabled as an active USB host (see Step 4:
Connect inputs and outputs).
Lights blue when an active HDMI input signal is detected on HDMI IN.
Lights blue when an output device is connected to the receiver.
Lights green when the HDBT active link connection is established.
Lights green when the device receives power.
Connect to the HDBT IN RJ-45 connector on the receiver.
Connect to the HDMI source.
USB 2.0 Charging Connectors (3)
Connect to the USB local peripheral devices (for example, a mic, a keyboard, a
mouse and so on).
RS-232 3-pin Terminal Block
Connect to a controller device (for example, RC-306) to control a remote device via
serial connection (for example, the PTZ USB camera that is connected to the
receiver).
IR 3.5mm Mini Jack Connector
Connect to an external IR emitter to control a local IR-controlled device from the
receiver side (for example, TP-590R).
Connect to an IR sensor to control a remote IR-controlled device connected to the
receiver side (for example, TP-590R).
Sets the device behavior (see Step 4: Connect inputs and outputs).
Connect to the power supply.