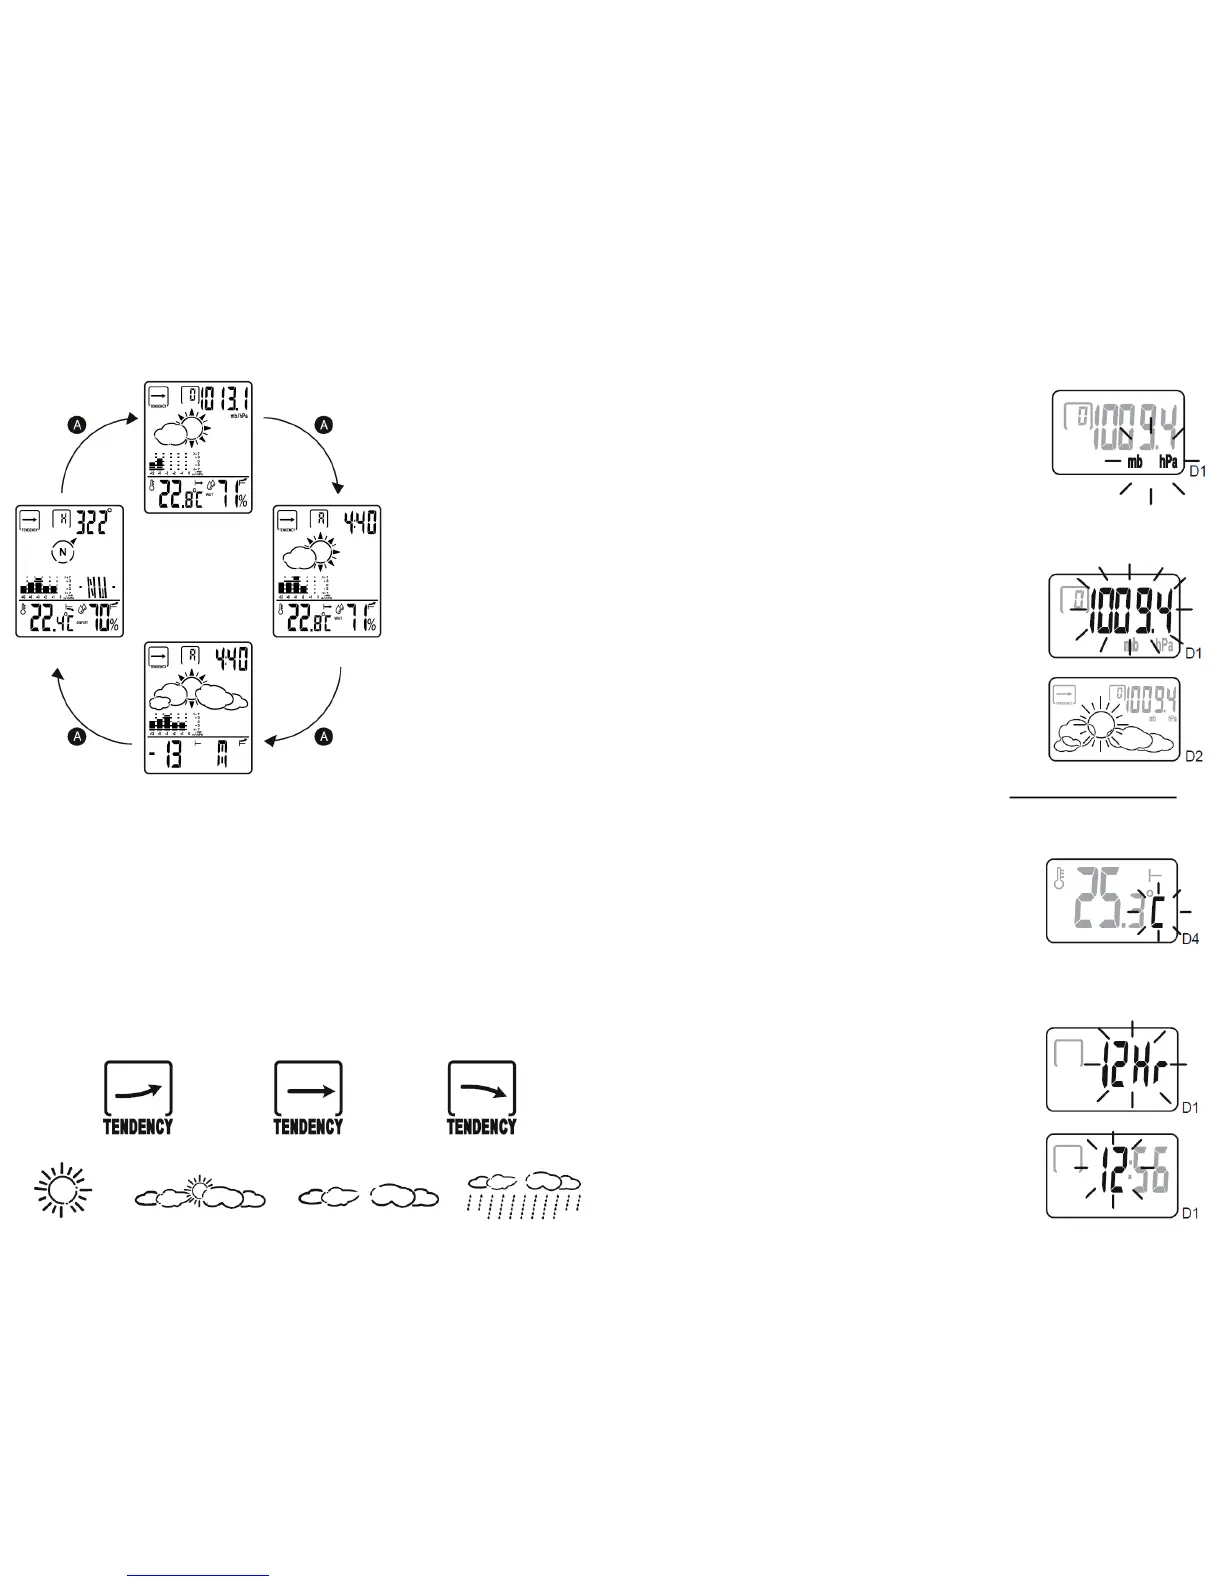
TO ENTER DIFFERENT MODE
WAKE UP YOUR COMPUTER
Insert the battery in battery
compartment. The data will
displayed on the screen.
Notes:
If display shows irregular
figures or no data displayed,
take out battery and install
again.
Barometer mode
Time mode
Altimeter mode
Compass mode
5
BAROMETER SETTING
Barometer Unit (mb / hPa / inHg) Setting
1. Press button A to enter the Barometer Mode, press and
hold button A until “mb hPa / inHg” flicker.
2. To select mb hPa or inHg, press button B and then press
button A to confirm.
1.To adjust the barometer and weather states, weather
forecast function can have a good initialization.
2.Right after the barometer unit setting, the barometer
digits will then start to flicker.
3.Press button B to set and then press button A to
confirm.
4.Right after the barometer digits setting, press button B
to select different states and then press button A to
confirm.
Barometer and Weather States Adjustment
6
1. The unit is capable of detecting atmospheric pressure changes to predict
the weather for the forthcoming 8 hours.
2. The weather forecast is meant for the next 8 hours. It may not
necessarily reflect the current weather situation.
3. The accuracy of all general pressure-based technology weather forecast
is about 70%, and therefore, cannot be held responsible for any
inconveniences so caused by an inaccurate one.
4. According to the barometer change, the pressure trend will indicate the
weather is going fine (Fig. 1 UP), stable (Fig.2 Stable) and going worse (Fig.
3 Down).
WEATHER FORECAST
There are four different states:
Sunny Slightly Cloudy Cloudy Rainy
7
Temperature Unit (°C / °F) Setting
1. Right after the Barometer setting, the Celsius digit will
then start to flicker.
2. To select C or F, press button B and then press button
A to confirm, and return to Barometer Normal Mode.
CLOCK SETTING
1. Press button A to enter the Time Mode, press and
hold button A until “12Hr / 24Hr” flicker, change to 12
Hr or 24 Hr by press button B and confirmed by button
A.
2. Continuing to set the correct time by button B and
then press button A to confirm, and return to Time
Normal Mode.
8
 Loading...