1
RU IT DE ES FR EN
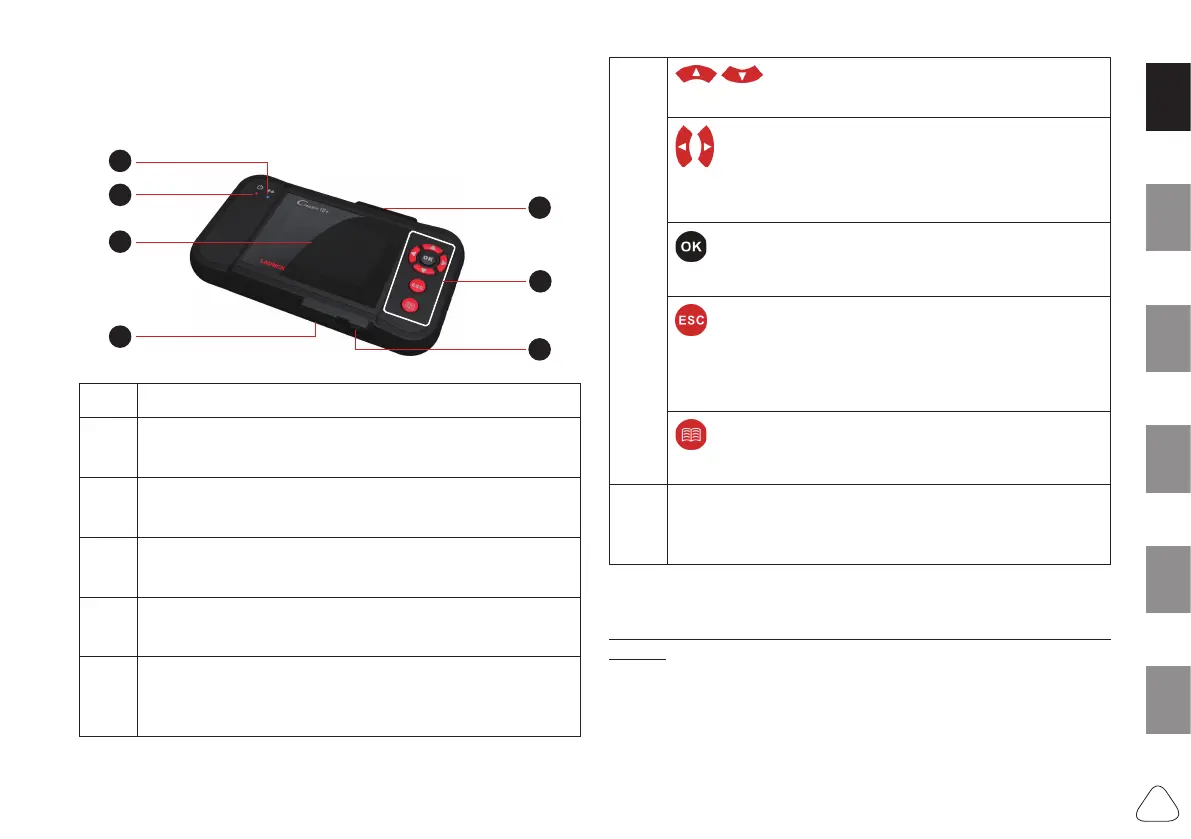
1. Components & Controls
Creader VIII features same appearance as Creader VII+. Here we
only take Creader VII+ for example.
1
2
3
4
5
6
7
No. Descriptions
1
Power indicator
It will light up while the tool is energized.
2
Communication indicator
It will ash when the tool is communicating with ECU.
3
LCD
Indicates test results.
4
Data I/O port
To connect on PC to upload data or upgrade the tool.
5
Memory card slot
Insert the memory card into it to read or write the data/
le.
6
/
Move cursor up or down for selection.
/
Move cursor left or right for selection; Or turn page up or
down when more than one page is displayed.
Conrms a selection (or action) from a menu list.
Exit the current program or return to the previous screen;
or confirm to display the selected data stream in Data
Stream.
To retrieve the DTCs in the database.
7
OBD-15 connector
To connect on vehicle's DLC(Data Link Connector) via
diagnostic cable.
2. Register & Update
Follow the steps described as below to proceed registration and
update:
1. Go to http://www.x431.com/CReader VII+&VIII and download
the update tool to the computer. Decompress and install it on
your computer (compatible with Windows XP, 7, 8 & 10).
Note: Creader VIII shares the same URL with Creader VII+.
 Loading...