LAUNCH Tyre Changer(TWC Series)
5
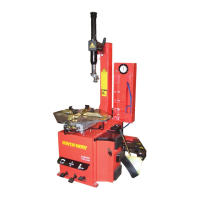
Tyre changer with swing arm:
l Pull back the swing arm(3, fig.07) to working position,
adjust hexagonal column(4) up and down to make
mount/demount head 1-2 mm away from rim flange
to protect rim(fig.09), turn knob (12)to lock swing arm,
and turn locking handle(2) clockwise to lock
hexagonal column.
Tyre changer with tilting post:
l Depress pedal “ “ to restore the tilting post to its
working position (Fig.08).
l Press the hexagonal column and adjust hexagonal
column and horizontal arm to make mount/demount
head 1-2 mm away from rim flange to avoid
scratching rim(fig.09). Press button (a) (fig.08) on the
locking handle to lock the hexagonal column.
Fig.07
Fig.08
Fig.09
Attention:
The angle of the mount/demount head has been
adjusted by manufacturer according to standard rim
(15"). Re-adjustment may be necessary to prevent
scratching the tyre when the rim is extremely large or
small.
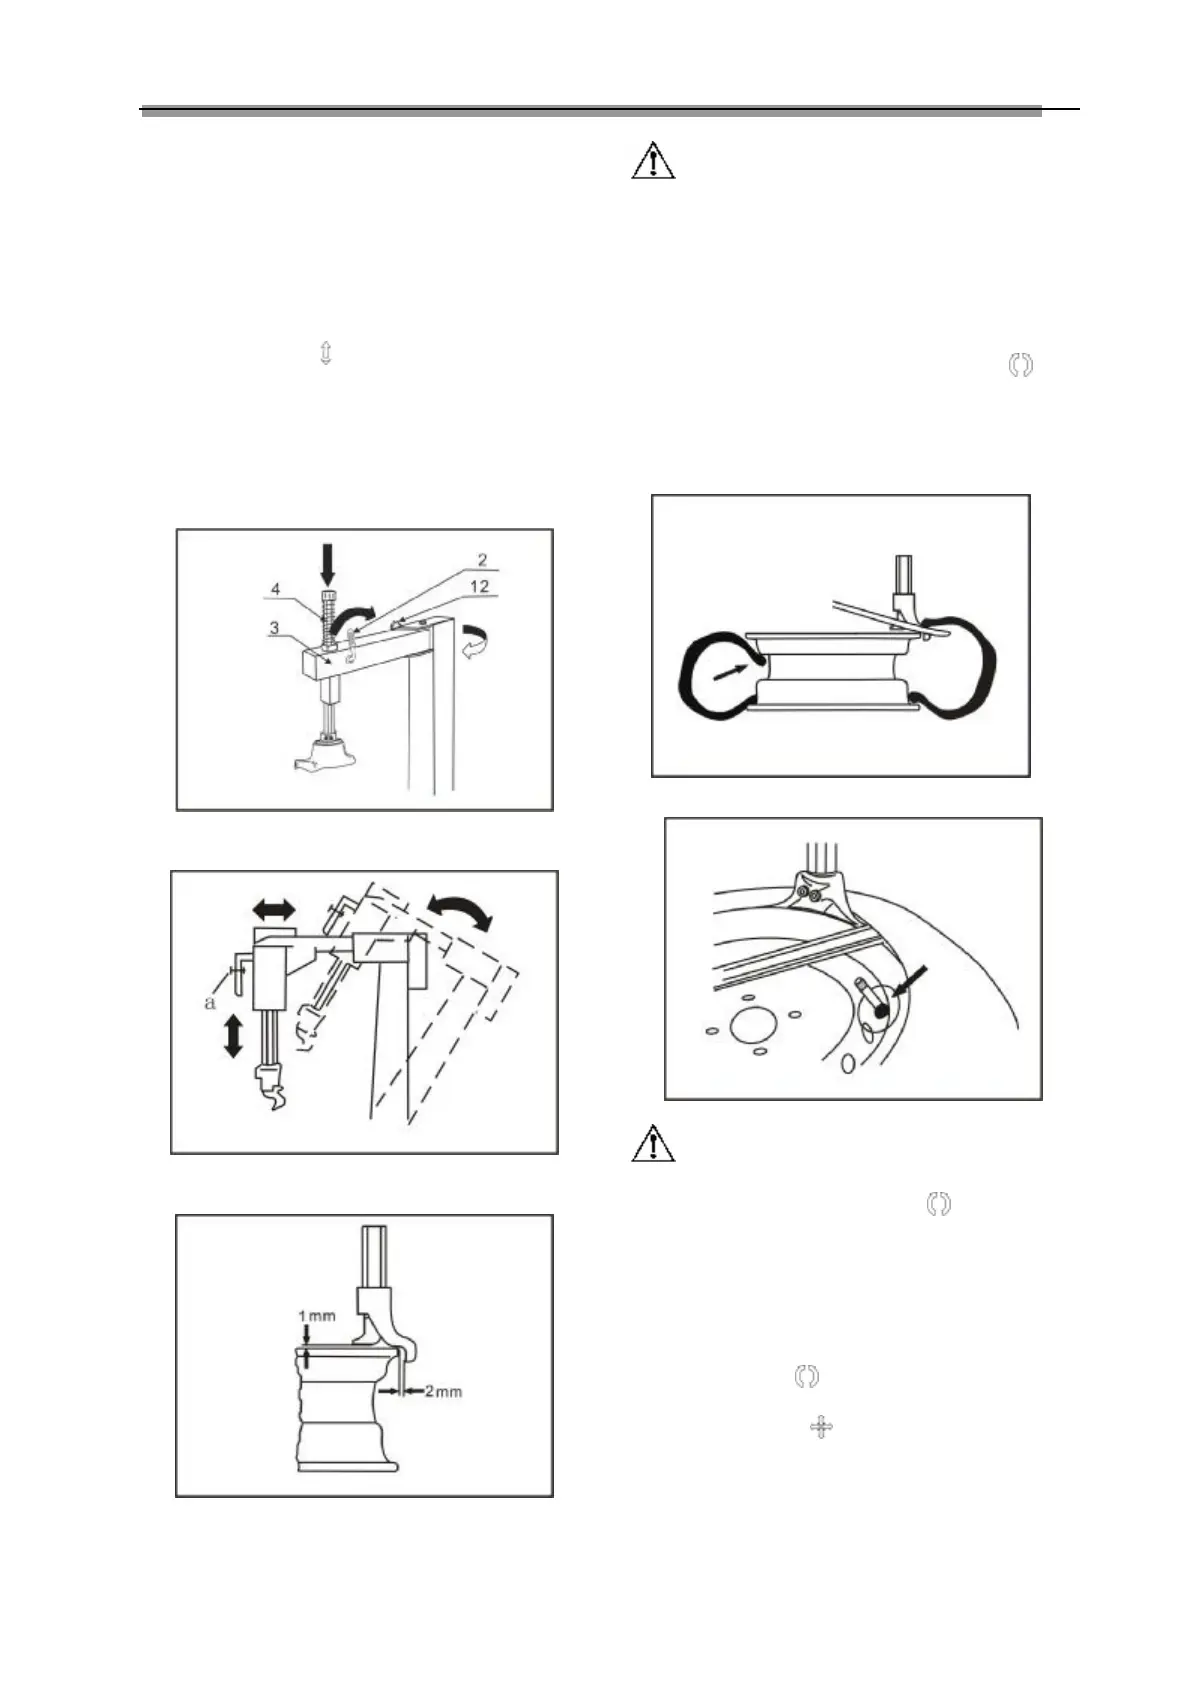
Lift the tyre bead onto the demount/mount head with tyre
lever( to make it easy, press down the tyre opposite to the
mount/demount head)(fig.10) Depress pedal “ ” to
turn the turntable clockwise until bead is unseated. To
avoid damage to the tube when where is one, it is
advisable to place the air inflating valve about 10 mm
(fig.11) away from the mount/demount head.
Fig.10
Fig.11
Caution:
In case the demounting is hindered, stop the machine
immediately. Lift up the pedal “ ” to turn the
turntable counter-clockwise to clear away the
hindrance.
l If there is tube in the tyre, remove it first.
l Lift the lower tyre bead so that the rim at the relative
side enters the groove (fig.12), use tyre lever to lift
the lower bead onto the mount/demount head.
l Depress pedal “ ” to separate the lower bead from
rim.
l Depress pedal “ “ to loose the jaw to take the
rim off.
 Loading...