2
Step 4. Install the side surround panels by lining up the holes in the tabs
on the side surround panels in front of the holes on the surround
brackets. Next insert two slotted 1/4" truss screws for each side
surround panel and secure loosely.
Step 5. Fasten top surround panel with the remaining two truss screws.
Tighten all six truss screws after adjusting the surround panels
to eliminate space between side and top surround panels.
Step 6. Assemble the surround trim by inserting the elbowed retainer in
the rectangular slot in the ends of the longest piece of trim and
secure by tightening the screw in the retainer. Slide the mitred
ends of the two side trim pieces onto the elbowed retainer and
secure by tightening the retainer screw.
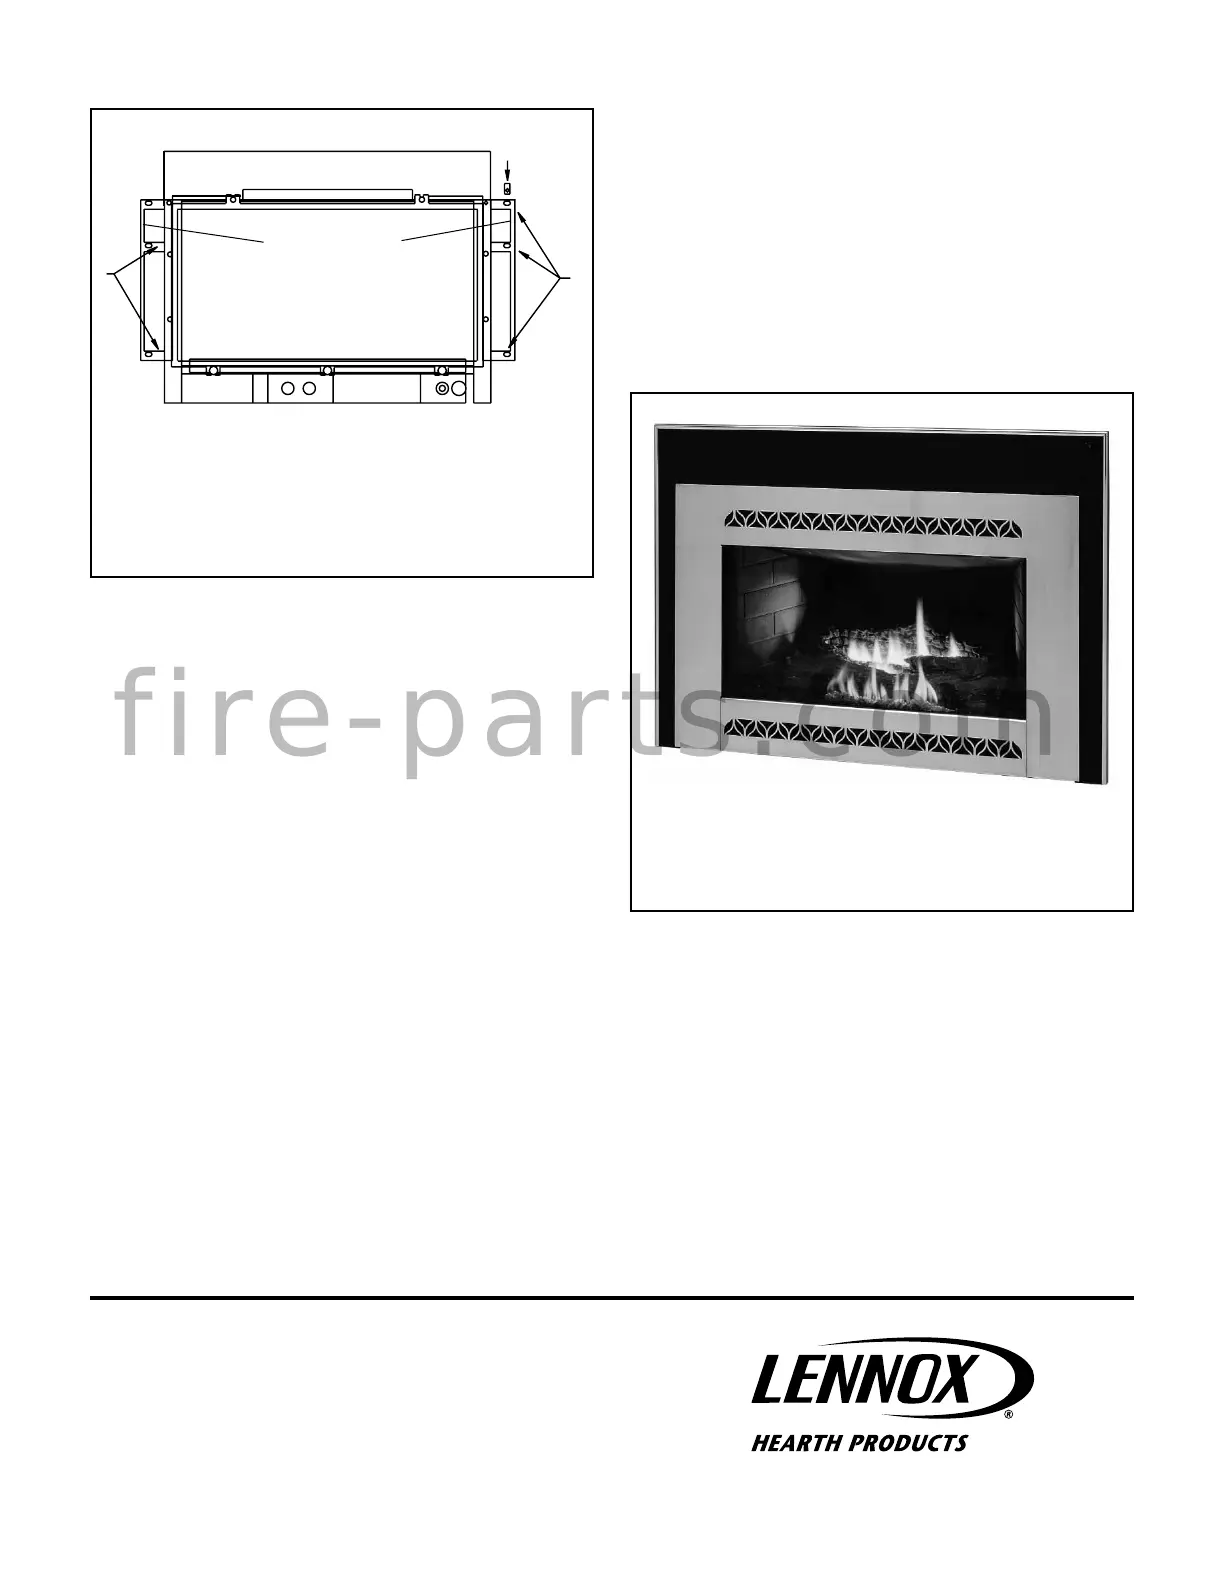
Shown with brushed nickel traditional face (sold separately)
Figure 3 - Completed Installation
Printed in U.S.A. © 2010 Lennox Hearth Products
P/N 775261M REV. B 05/2012
Lennox Hearth Products reserves the right to make changes at any time, without notice, in
design, materials, specifications, prices and also to discontinue colors, styles and products.
Consult your local distributor for fireplace code information.
NOTE: DIAGRAMS AND ILLUSTRATIONS ARE NOT TO SCALE.
1508 Elm Hill Pike, suite 108 • Nashville, TN 37210
Figure 2
The face (kit sold separately) has two hooks on each side that slide over and
hang on the surround brackets at (C). The face can slide slightly from side to
side to center the face on the glass.
Surround Brackets
B
C
Step 7. The fastened trim pieces should now be horseshoe shaped. Slide
the trim down over the surround panels so the edge of the sur-
round panel fits just behind the rounded edge of the trim.
Step 8. Install three spring clips (found in parts bag in firebox) in each
piece of trim by inserting them between the rear of the surround
and the channel of the trim. The spring clips will push the trim
tight to the surround.
If you have a gold or nickel face, be sure to clean the face with a soft
cloth and household glass cleaner prior to burning the insert. Finger-
prints left on the face while burning will usually remain on the face
permanently.
f i r e - p a r t s . c o m
 Loading...