13INSTALLATION
ENGLISH
hose can result in flooding and property
damage.
• The drain must be installed in accordance with
any applicable local codes and regulations.
• Make sure that the drain hose is not stretched,
pinched, crushed, or kinked.
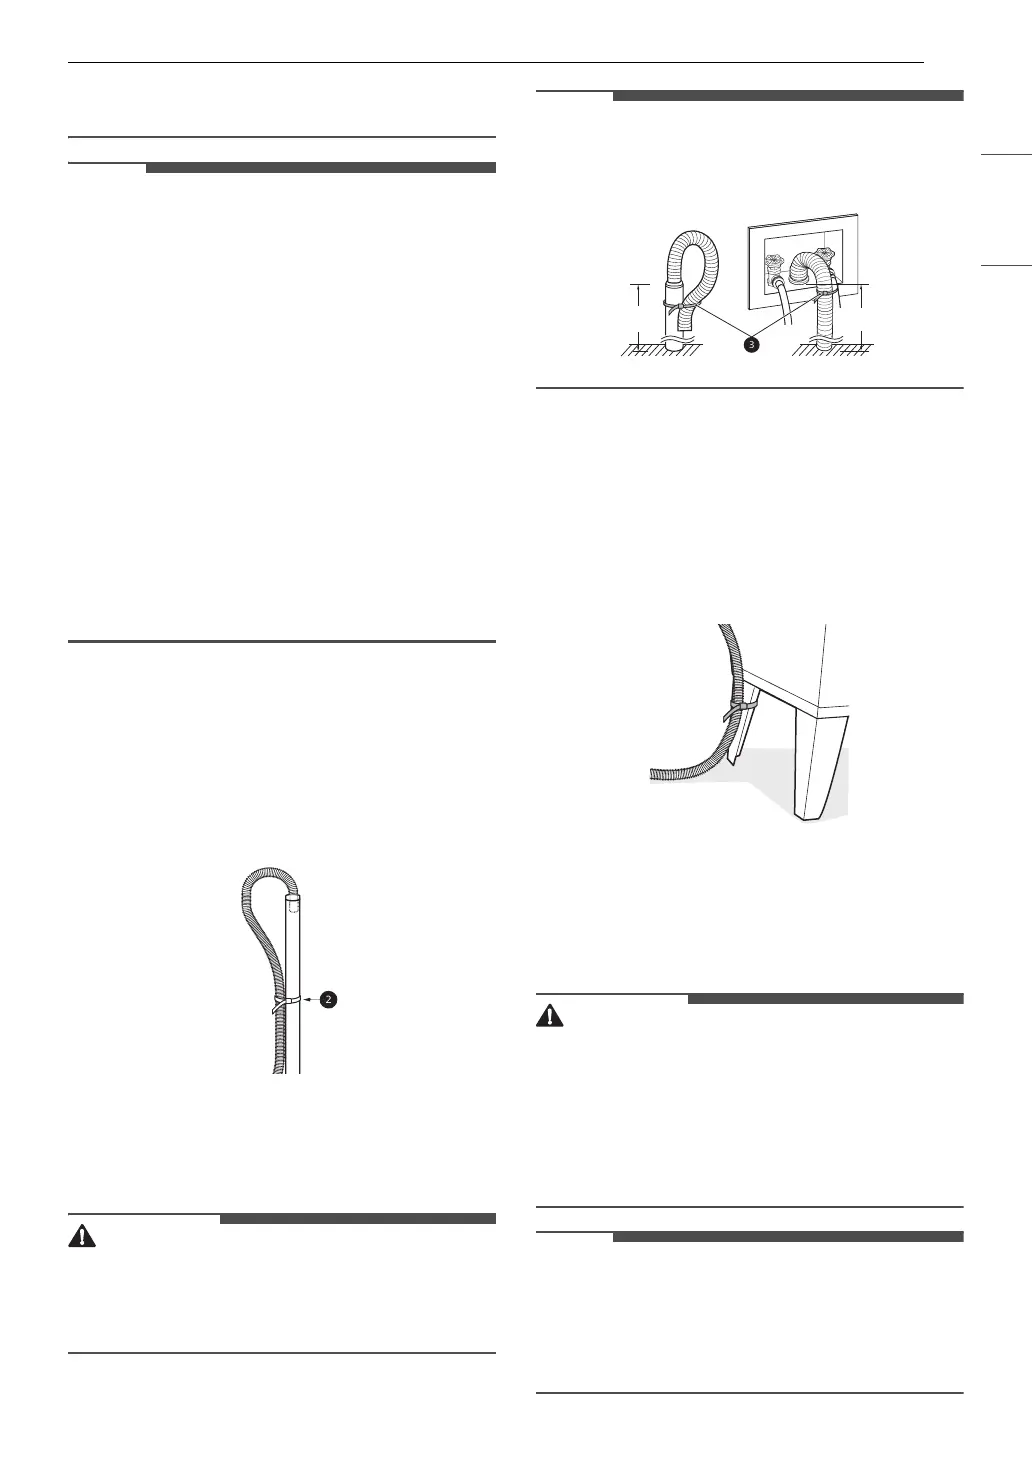
• The end of the drain hose should be located a
minimum of 29.5 inches (75 cm) and a
maximum of 96 inches (244 cm) above the
bottom of the washer.
• For best results, locate the end of the drain hose
no higher than 66 inches (168 cm) above the
bottom of the washer. As the drain outlet is
raised beyond 66 inches (168 cm), the drain
function will be increasingly affected.
• Never create an airtight seal between the hose
and the drain with tape or other means. If no air
gap is present, water can be siphoned out of the
tub resulting in poor wash/rinse performance or
clothing damage.
Using a Standpipe to Drain
1 Insert the end of the drain hose into the
standpipe.
2 Use the provided tie strap a to secure the
drain hose in place.
3 If the water valves and drain are built into the
wall, fasten the drain hose to one of the water
hoses with the provided tie strap b (ribbed
side on inside).
• Do not insert the end of the drain hose into the
standpipe more than 8 inches (20 cm). Doing so
can cause siphoning, odors, or improper
draining.
• If the drain is large enough for the flange on the
hose to fit inside, then do not insert the flange
more than 1 - 2 inches into the drain.
Using a Laundry Tub to Drain
1 Hang the end of the drain hose over the side
of the laundry tub.
2 Use the provided tie strap to secure the drain
hose in place.
Leveling the Washer
The tub of the washer spins at very high speeds. To
minimize vibration, noise, and unwanted
movement, the floor must be a solid, level surface.
• Using the washer without leveling it may cause
excess vibration and noise, leading to a washer
malfunction.
• Adjust the leveling feet only as far as necessary
to level the washer. Extending the leveling feet
more than necessary can cause the washer to
vibrate.
• Before installing the washer, make sure that the
floor is clean, dry and free of dust, dirt, water
and oil so the washer feet cannot slide easily.
Feet that move or slide on the floor can
contribute to excessive vibration and noise.
29.5 - 96 "
(75 - 244 cm)
29.5 - 96 "
(75 - 244 cm)
 Loading...