3
lci1.com 574-537-8900 Rev: 11.27.18
ToyLok
®
Cable System
Installation and Owner’s Manual
(For Aftermarket Applications)
CCD-0001817
Installation
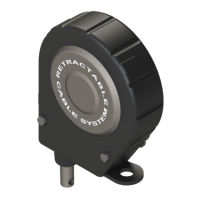
1. Place ToyLok in desired mounting location.
2. Mark or measure mounting holes on mounting surface.
Refer to (Fig.1A) for mounting hole locations.
3. Using a ⁄” or ⁄” drill bit, drill two mounting holes in the
mounting surface.
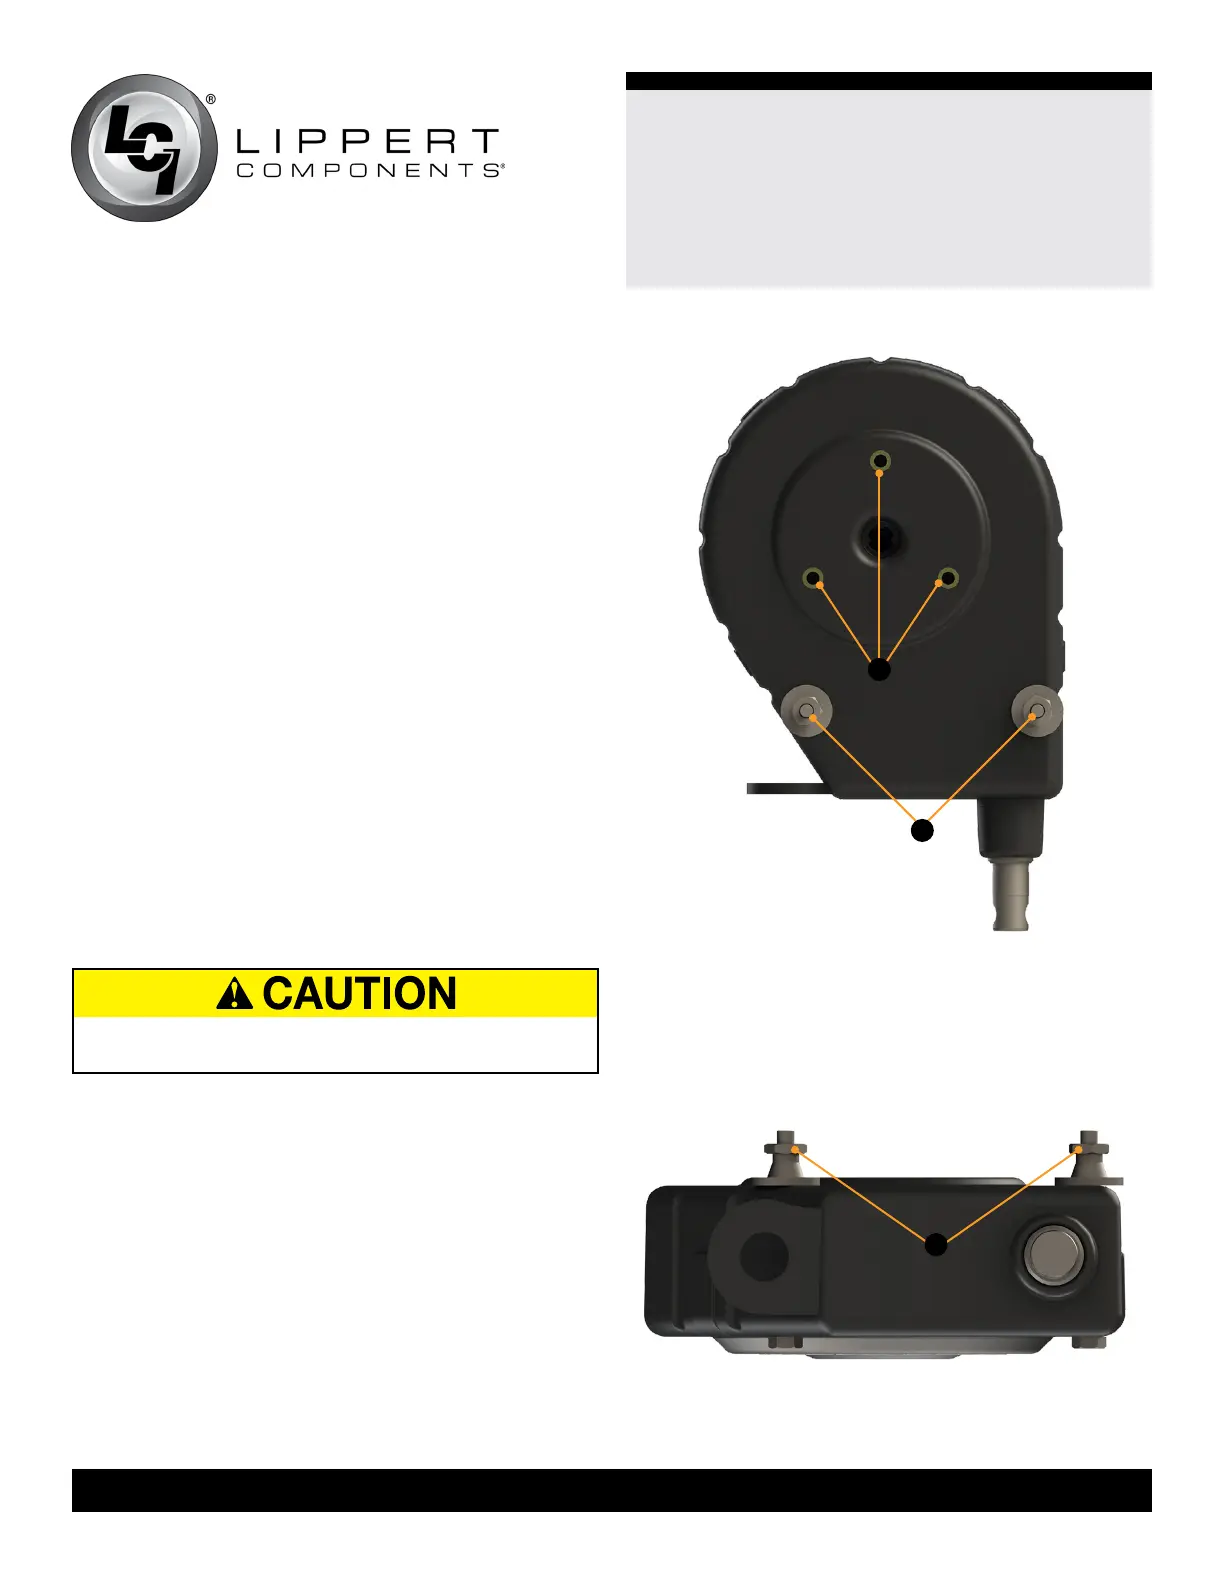
NOTE: If supported mounting hardware was purchased,
use three M8 - 1.25 bolts and refer to figure 1B for
mounting hole locations.
4. Use the two included ¼” - 20 x 3” bolts and ¼” - 20
breakaway nuts (Fig.2A) to secure the ToyLok to the
mounting surface.
5. Break the hex heads off of the two nuts to prevent
tampering in the future.
Operation
1. Pull cable out slowly to desired length.
A. When the desired length is reached, continue to extend
the cable until a clicking sound is heard.
B. Slowly release the cable until it stops near the desired
length.
MOVING PARTS CAN PINCH, CRUSH OR CUT. KEEP
CLEAR AND USE CAUTION.
2. To retract the cable, extend it until no clicking sound is
heard.
A. Allow the cable to retract back into the housing.
NOTE: ToyLok has a built-in safety feature which slows the
cable as it retracts.
B. It may be necessary to guide the cable into the housing
in some situations.
Fig.1
B
Fig.2
A
A
 Loading...