1
~
~
Getting
started
w
ith
Logit
ec
h Alert'
750i
Logitech
Ma
s
ter
Sy
stem
Install Software
(D
Int
ern
et
access
is
required
for
in
sta
llation
.
1)
Insert the Software
Install
CD
and
follow the instructions during the
instalL
•
The
installer will
che<k
for the latest
version
of the software.
Alternatively,
you
can
download the latest
version
at
www.logitech.com{downloads.
2)
You
may
be
asked
to reboot the
PC.
3)
Logitech Alert
Commal1der
software will open.
4)
The
First
Run
Wizard
wil
l guide
you
through the next
steps
of setup.
4 Choose Your Camera Location
On a
desk
or
table
OR
CD
10
c!J
Legal
Warning
Certainusesolsecuritycarnefa
productsandaudiodevices,suchas
employee
monitoring,
surreptitious
viewing
and
recording
of
images
and{oraudio,Oftheuse,public
ation
ordistributionolimageand{oraudiO
recordings,areprohibitedorrestricted
bycountry.stateandlocallaws.
,
~
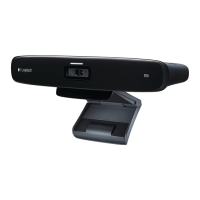
1 Logitech Alert came
ra
2
Software
install
CD
3
Power
suppty
cable
(yellow
tips)
4
microSD
'"
card
adapter
5
Desktop
stand
6Mountingaccessories
7
Camera
power
supply
8 Network adapter
9 Network adapter
cable
(blue
tips)
10
Suction
cup
2 Plug
in
Network
Adapter
When
prompted to plug
in
the network adapter:
11
Powersupplycableextender
12
System
Requirements
Guide
13
Getting to
Know
Guide
Be
sure
to
comply
with
the
laws
in
yourcountry,state.andlocalitywhen
using
Log1techAiertproductsand
1)
Plug
one
end
of the blue
cable
conne<tor into the network adapter. 1
a)
Then,
plug the network adapter into the power outleL
2)
Conne<t
the other blue
cable
conne<tor into
an
open port
on
your
router.
On a
window
lo
oki
ng
out
or
in
Oean
the window's
surface
and
the inside
area
of the suction cup before
applying it to the
windOVv'.
Periodically
press
the suction cup
against
the
glass
to strengthen its bond to the window.
0
I
Using In-the-box Accessories
You
can
use
the mini-suction cup
and
cable
wall
clips
to help route the power
supply
cable
(yellow
conne<tor) along the window's edge
and
provide
additional security to that camera.
Before you
begin
...
1)
Read
all
instructions before beginning the installation.
2)
During installation.
we
will
test
your
PCs
firewall settings.
If
prompted to
allow
logite<h Alert
access
to the network,
you
should
always
answer
"Yes"
or
"Allow."
Are you
going
to
run
Logitech
Wilife
&
logitech
Alert
Systems Simultaneously?
Read
special
notes at
\VINW.Iogite<h.comfsecurityflegacy
3 Plug in Your Camera
When
prompted to connect
your
camera:
Network
Adapter
f Power Supply Install
Note
Do
NOT
plug
the
network
adapter
Of
power
supply
into
a
surge
protectOf
or
power
strip
as
they
interfere
with
the
cameras.
Su
r
ge
protectors
are
built-in
to
the
network
adapter
andpowersupplyandprotectthecarnefas.
The
network
adapter
and
power
supply
must
be
plugged
directly
into
your
wall
outlet.
1)
Remove
the hatch from the
back
of the
camera.
la)
Plug
the yellow
cable
connector into the port. 1
b)
Use
the lock slider to lock the conne<tor
in
place.
2)
Plug
the yellow
cable
connector into the power
supply
port.
2a)
Plug
the power
supply
into
an
outlet
near
the
PC
where the software
is
installed.
Shortly after connecting, your
camera
will appear
in
Alert Commander software.
You
can
now
move
the
camera
to
its
desired
location.
Wall/Ceiling
Mounting
Instructions
The
wall
mount
allows
you
to
easily
fasten
your
camera
to a ceiling or
wall.
1)
Start
by
pre-drilling
holes
into the
wall
and
screwing
in
the mounting
base.
2)
Assemble
the mounting
arm
and
attach it to the
base.
3)
Attach the
camera
to the mounting arm,
-
;::;;;.·
·
-
<>"'";;;:
-
OR