5 ENGLISH
A battery short can cause a large current
ow, overheating, possible burns and even a
breakdown.
6. Do not store the tool and battery cartridge in
locations where the temperature may reach or
exceed 50 °C (122 °F).
7. Do not incinerate the battery cartridge even if
it is severely damaged or is completely worn
out. The battery cartridge can explode in a re.
8. Be careful not to drop or strike battery.
9. Do not use a damaged battery.
10. The contained lithium-ion batteries are subject
to the Dangerous Goods Legislation require-
ments.
Forcommercialtransportse.g.bythirdparties,
forwardingagents,specialrequirementonpack-
aging and labeling must be observed.
For preparation of the item being shipped, consult-
inganexpertforhazardousmaterialisrequired.
Pleasealsoobservepossiblymoredetailed
national regulations.
Tapeormaskoffopencontactsandpackupthe
batteryinsuchamannerthatitcannotmove
around in the packaging.
11. Follow your local regulations relating to dis-
posal of battery.
12. Use the batteries only with the products
specied by Makita. Installing the batteries to
non-compliantproductsmayresultinare,exces-
siveheat,explosion,orleakofelectrolyte.
SAVE THESE INSTRUCTIONS.
CAUTION: Only use genuine Makita batteries.
Use of non-genuine Makita batteries, or batteries that
havebeenaltered,mayresultinthebatterybursting
causingres,personalinjuryanddamage.Itwill
alsovoidtheMakitawarrantyfortheMakitatooland
charger.
Tips for maintaining maximum
battery life
1. Charge the battery cartridge before completely
discharged. Always stop tool operation and
charge the battery cartridge when you notice
less tool power.
2. Never recharge a fully charged battery car-
tridge. Overcharging shortens the battery
service life.
3. Charge the battery cartridge with room tem-
perature at 10 °C - 40 °C (50 °F - 104 °F). Let
a hot battery cartridge cool down before
charging it.
4. Charge the battery cartridge if you do not use
it for a long period (more than six months).
ASSEMBLY
WARNING: Always be sure that the lock key
and battery cartridge are removed before carrying
out any work on the mower. Failure to remove the
lockkeyandthebatterycartridgemayresultinseri-
ouspersonalinjuryfromaccidentalstart-up.
WARNING: Never start the mower unless it is
completely assembled. Operation of the tools in a
partiallyassembledstatemayresultinseriousper-
sonalinjuryfromaccidentalstart-up.
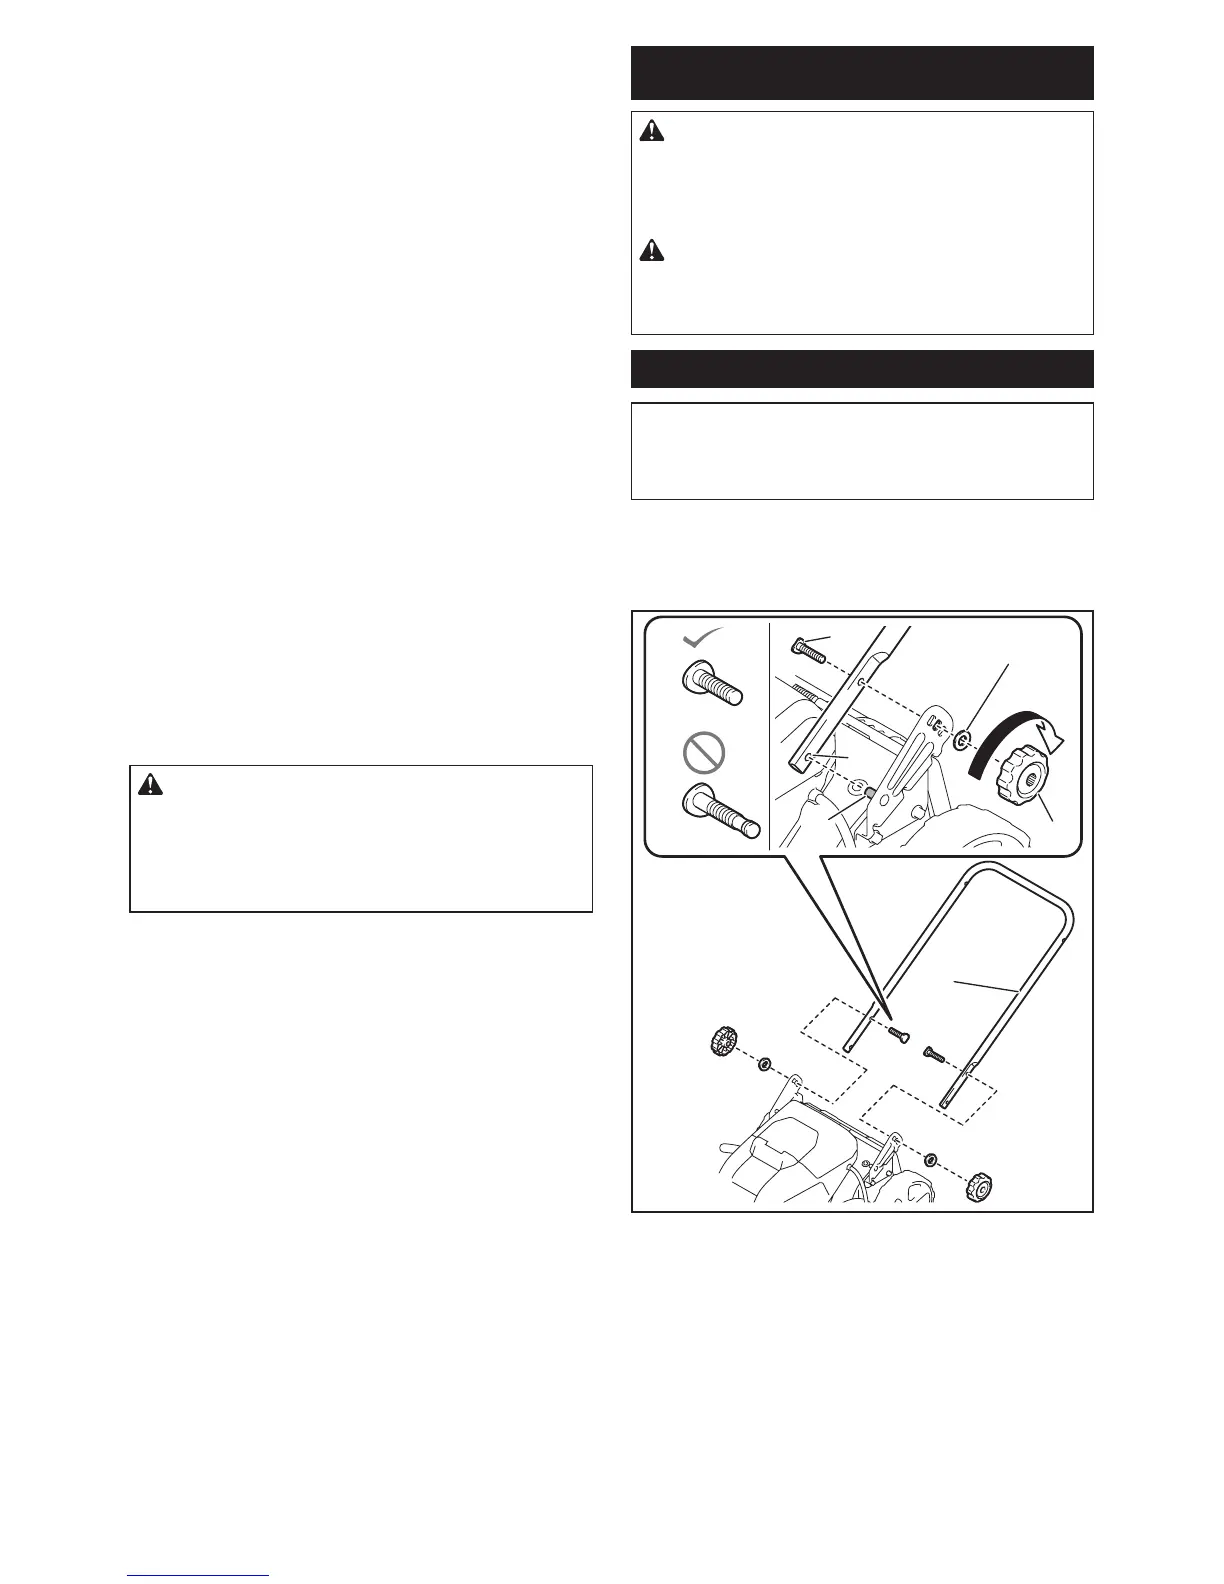
Installing the handle
NOTICE: When installing handles, position the
cords so that they are not caught by anything
between the handles. If the cord is damaged, the
mower switch may not work.
1. Attachthelowerhandlesothattheholesinthe
handletintheprotrusionsonthemowerbody.Insert
theboltsfrominside,thenattachwasherAfromoutside,
and then tighten the thumb nuts.
1
2
3
6
5
4
►1. Lower handle 2.WasherA3.Thumbnut
4. Protrusion 5. Hole 6. Bolt
 Loading...