9 ENGLISH
When you pull the switch trigger, the tool performs the next
sequential operations as follows, and the tool stops automatically.
1. Feed the wire.
2. Cut the wire.
3. The hook holds and twists the wire.
4. The hook returns to the original position.
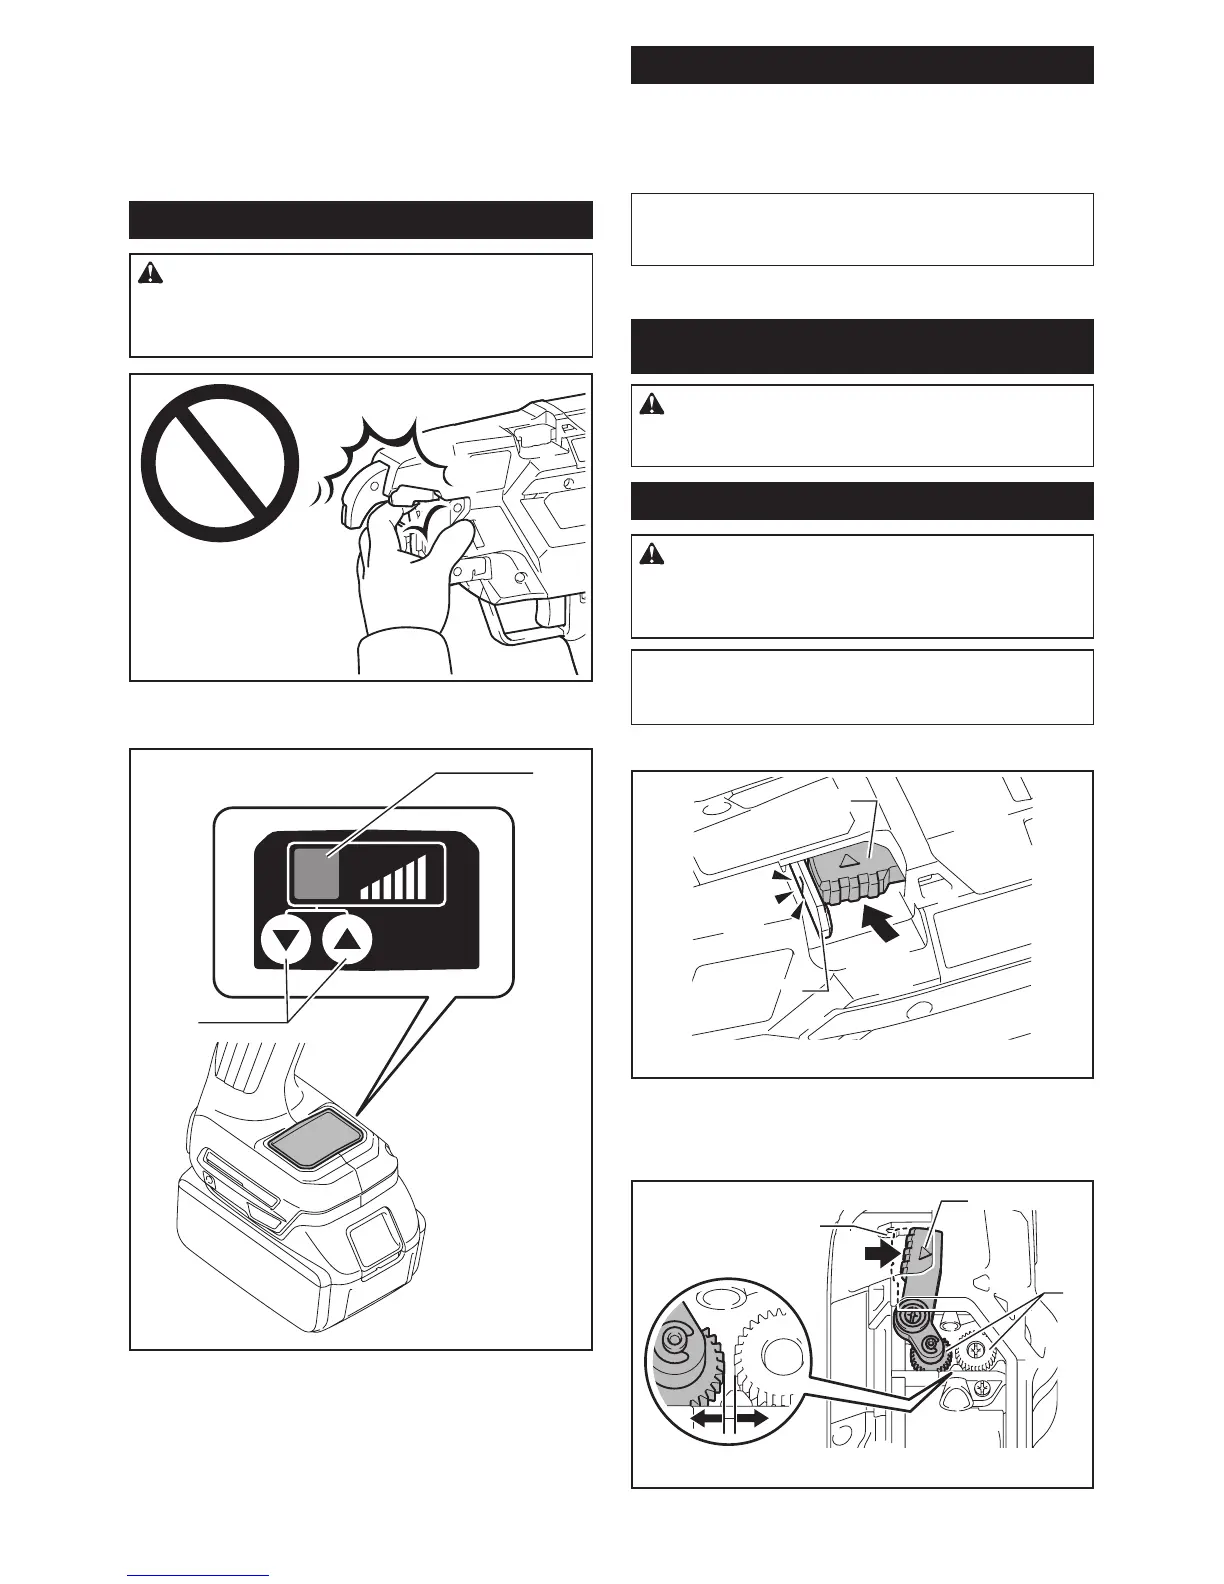
Tying strength setting
CAUTION:
Be sure to lock the trigger before start-
ing the adjustment. When you turn the power on, never
bring your limbs or face close to the binding or rotating
parts of the tool tip.Otherwise,youmaybeinjured.
Youcansetthetyingstrengthbyadjustingthetyingstrength
adjustingbutton.Tyingstrengthisshownonthedisplaypanel.
2
1
►1.Tyingstrengthadjustingbutton2. Display panel
If the wire is broken off, tying strength will be lost. After
tying, check the twisted portion for breakage.
Ifthewireisbrokenoff,adjustthetyingstrengthusing
thetyingstrengthadjustingbutton,andtietherebars
again.
Remaining battery notication
When the battery voltage drops below the required level,
the tool will stop operating, an error tone will sound, and
the number "4" will appear on the display panel. The error
tone will continue to sound until the power is turned off.
NOTE: If the ambient temperature is extremely low,
the error tone may sound even when the battery
containssufcientpower.
ASSEMBLY
CAUTION: Always be sure that the tool is
switched off and the battery cartridge is removed
before carrying out any work on the tool.
Loading the tie wire (wire reel)
CAUTION: Before mounting or dismounting
tie wires and accessories, be sure to turn the
power off, lock the trigger, and remove the battery
cartridge. Failure to do so may cause an accident.
NOTICE: Using wires other than Makita's genu-
ine tie wires (annealed wires) may cause the tool
to malfunction.
1.
Push the release lever, and lock it with the lock lever.
1
2
►1. Release lever 2. Lock lever
When you push the release lever, a gap is created
between the left and right feed gears.
1
2
3
►1. Release lever 2. Lock lever 3. Feed gears

 Loading...