8
ASSEMBLY
CAUTION:
• Always be sure that the tool is switched off and
unplugged before carrying out any work on the tool.
Removing or installing planer blades
CAUTION:
• Tighten the blade installation bolts carefully when
attaching the blades to the tool. A loose installation bolt
can be dangerous. Always check to see they are
tightened securely.
• Handle the blades very carefully. Use gloves or rags to
protect your fingers or hands when removing or installing
the blades.
• Use only the Makita wrench provided to remove or install
the blades. Failure to do so may result in overtightening
or insufficient tightening of the installation bolts. This
could cause an injury.
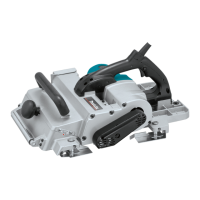
To remove planer blades from the drum, loosen the eight
installation bolts by only one full turn with the socket wrench.
Then push and slide a planer blade sideways from the belt
side using the helm of the socket wrench.
To remove another planer blade, follow the same procedure
as above.
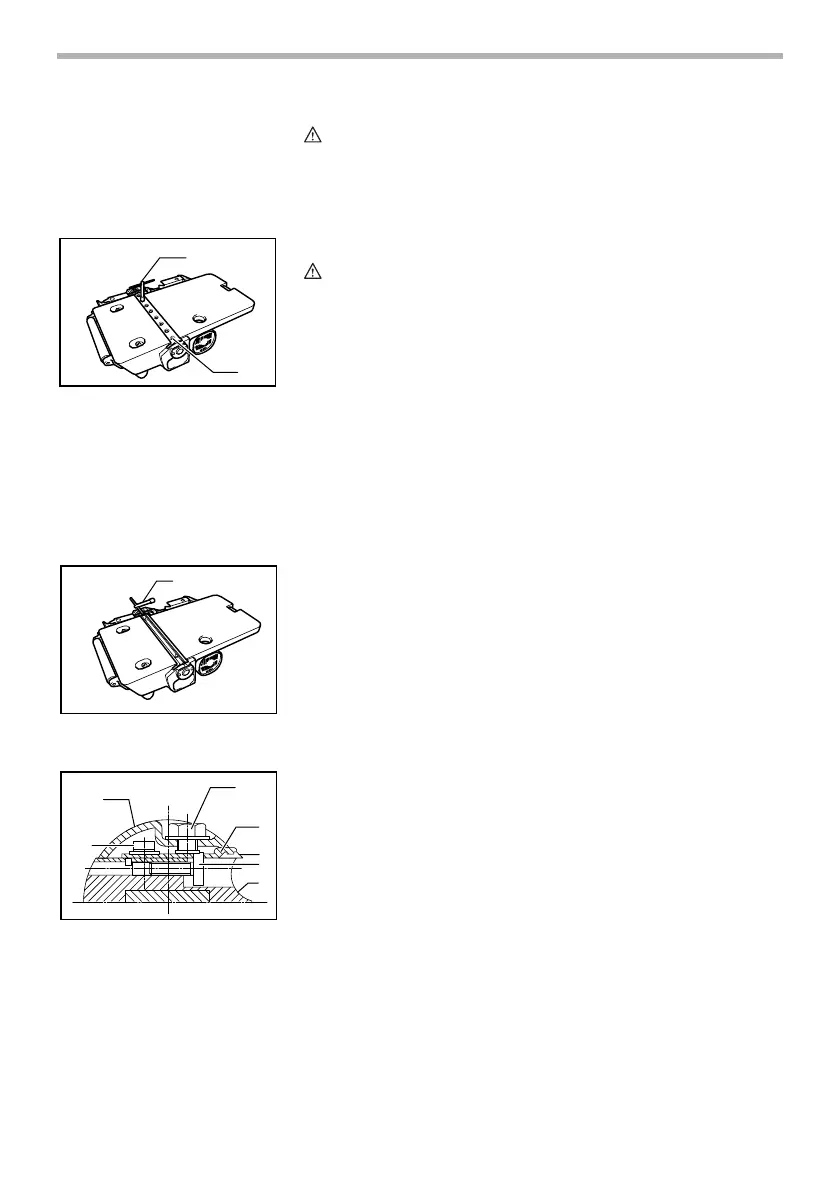
To install the blades, first clean out all chips or foreign matter
adhering to the drum or blades.
1. Socket wrench
2. Installation bolt
1
2
003876
1. Socket wrench
1. Drum plate
2. Installation bolt
3. Set plate screw
4. Set plate
5. Planer blade
6. Adjusting screw
7. Drum
1
003878
1
3
2
4
5
6
7
003879
 Loading...