27 ENGLISH
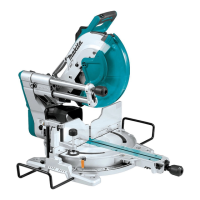
For a dado type cut, perform as follows:
1. Adjust the lower limit position of the saw blade
using the adjusting screw and the stopper arm to limit
the cutting depth of the saw blade. Refer to the section
for stopper arm.
2. After adjusting the lower limit position of the saw
blade, cut parallel grooves across the width of the work-
piece using a slide (push) cut.
1
► 1. Cut grooves with blade
3. Remove the workpiece material between the
grooves with a chisel.
Special Max Width Cutting
Capacities Technique
The maximum cutting capacity of width can be achieved
by following the steps below:
For the maximum cutting width of this tool, refer
to the cutting capacities for special cuttings in the
SPECIFICATIONS section.
1. Set the tool at 0° or 45° miter angle and make sure
that the turn base is locked. (Refer to the section for
miter angle adjustment.)
2. Remove both right and left upper fences temporar-
ily and set aside them.
3. Cut a platform to the dimensions indicated in the
gure using a 38 mm thick, at stock material such as
wood, plywood or particle board.
1
2
3
4
► 1. 0° Miter angle: Over 450 mm 2. 45° Miter angle:
Over 325 mm 3. 38 mm 4. Over 760 mm
WARNING: Be sure to use at stock as a
platform. Stock that is not at may move during the
cutting operation which may result in kickback and
serious personal injury.
NOTE: The maximum cutting capacity in height will
be reduced by the same amount as the platform
thickness.
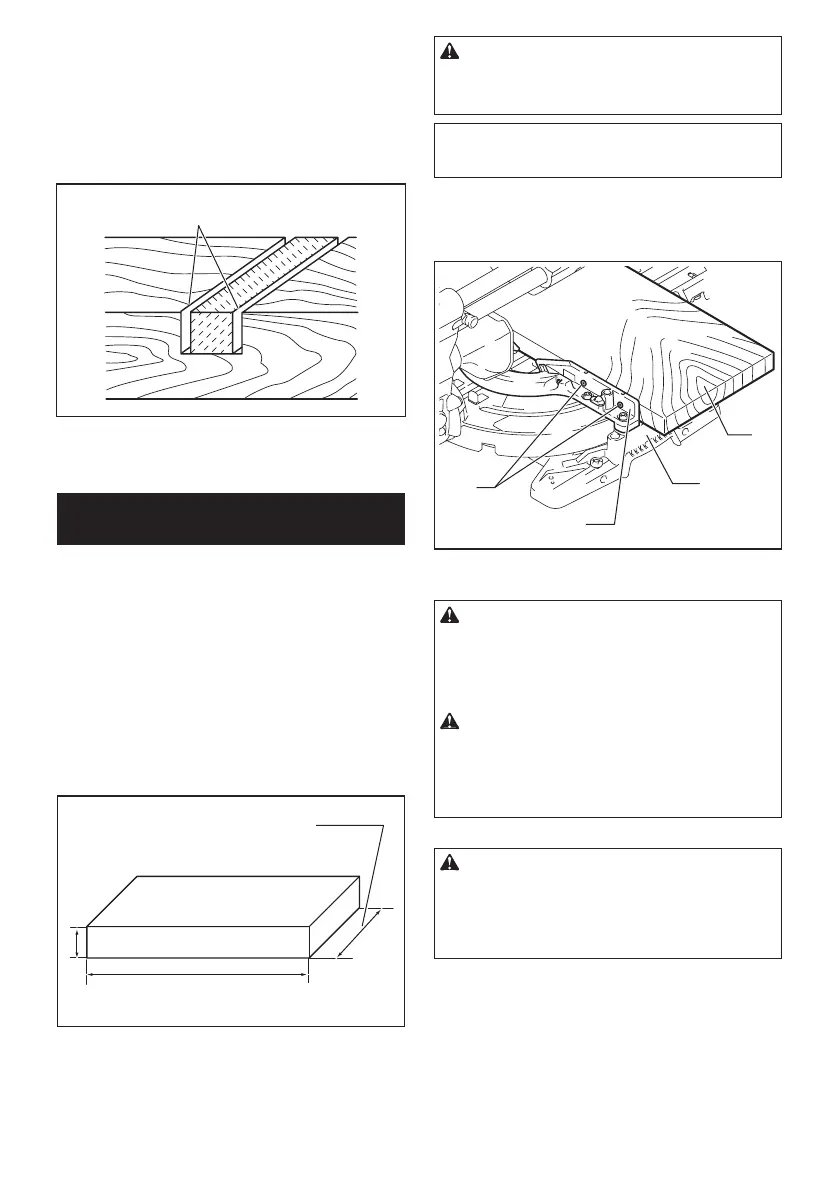
4. Place the platform on the tool so that it extends
equally over each side of the tool base.
Secure the platform to the tool using four 6 mm wood
screws through four holes in the lower fences.
2
3
4
1
► 1. Screws (two each side) 2. Lower fence 3. Base
4. Platform
WARNING: Make sure that the platform is lay-
ing at against the tool base and secured rmly
to the lower fences using the four screw holes
provided. Failure to properly secure the platform may
result in movement and possible kickback resulting in
serious personal injury.
WARNING: Ensure that the tool is rmly
mounted to a stable and at surface. Failure to
properly mount and secure the tool could cause the
tool to be unstable resulting in a loss of control and/
or the tool falling which may result in serious personal
injury.
5. Install the upper fences on the tool.
WARNING: Do not use the tool without upper
fences installed. The upper fences provide the ade-
quate support required to cut the workpiece.
If the workpiece is not supported properly, it may
move resulting in possible loss of control, kickback
and serious personal injury.
6. Place the workpiece to be cut on the platform
secured to the tool.
 Loading...