END CAP OPTIMAX AIR COMPRESSOR
Page 4 of 6 99-6 JUNE 1999
Reassembly
• Lubricate end cap O-ring and O-ring contact area in compressor body with two cycle oil.
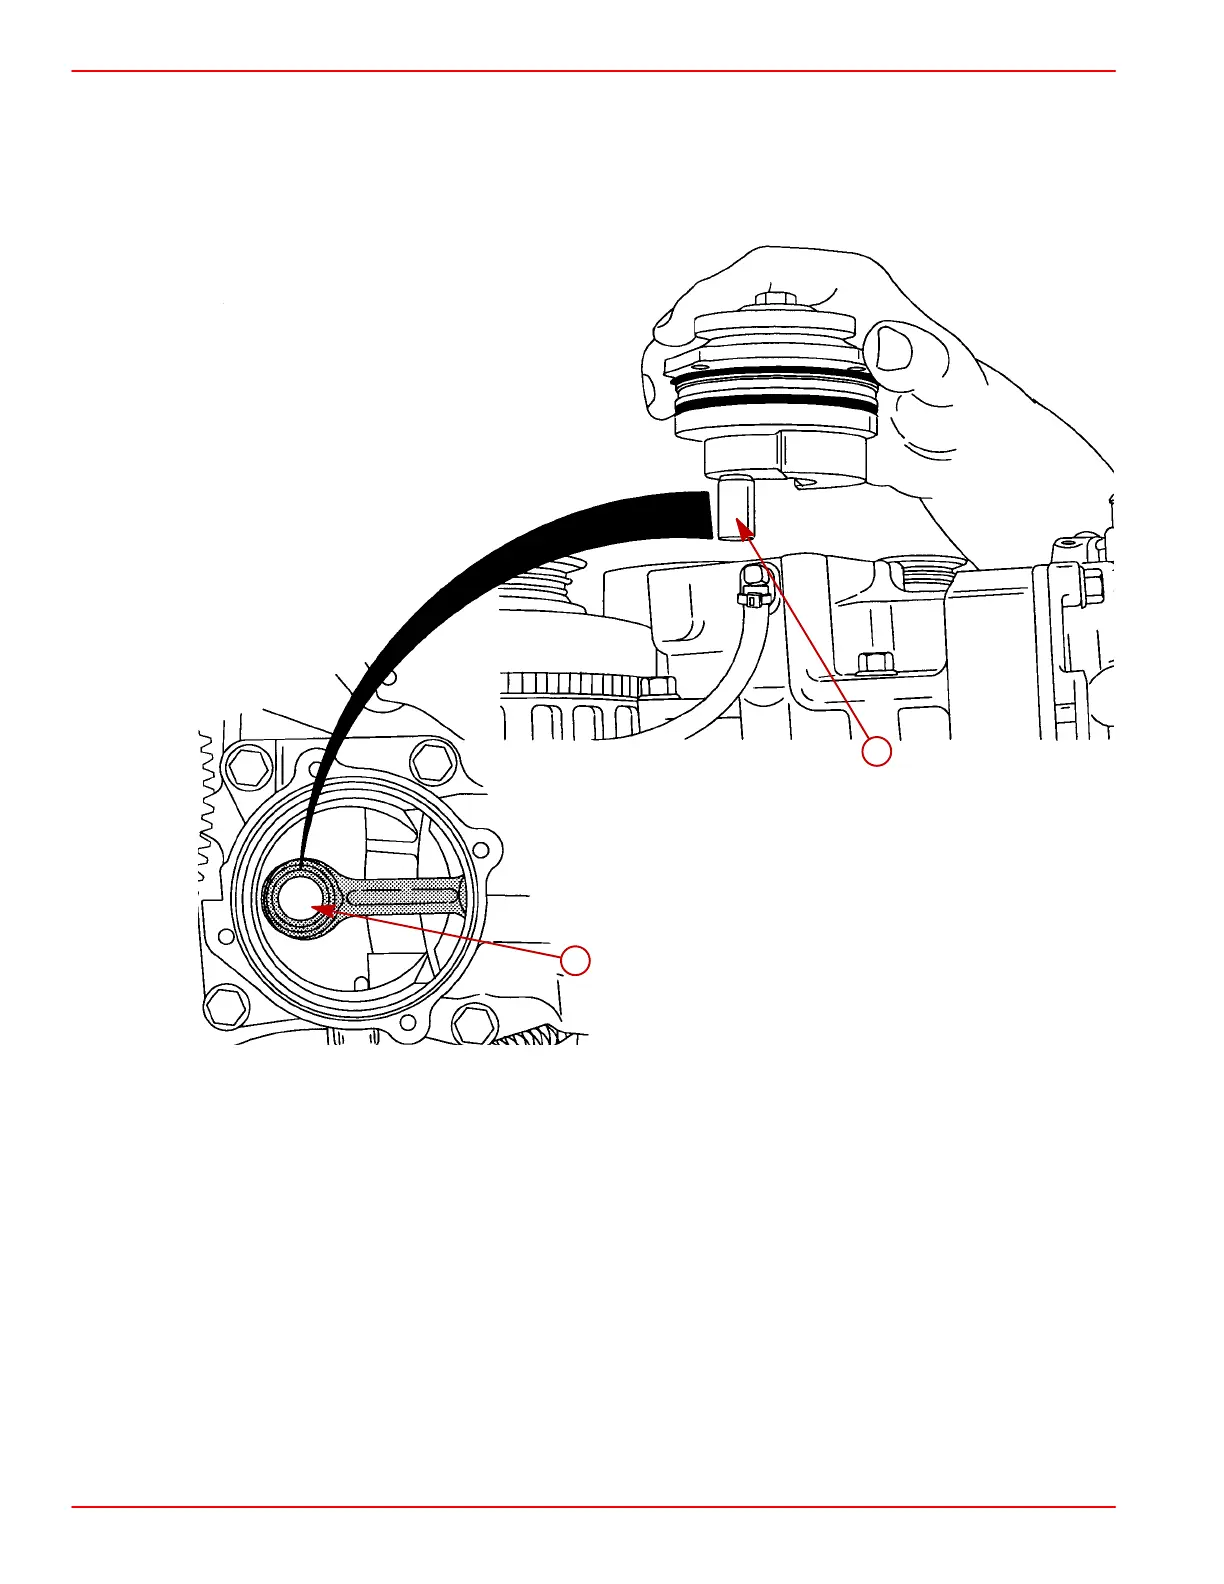
• Slide the new end cap assembly into the compressor body, keeping the connecting rod
journal lined up with the open end of the connecting rod, until the crankshaft just enters
the open end of the connecting rod.
a
b
a-Connecting rod open end
b-Crankshaft connecting rod Journal
• While rotating the pulley flange clockwise and counterclockwise, push the end cap into
the compressor. Continue rotating the flange until the end cap is all the way down
against the compressor body.
• To confirm that the connecting rod journal has properly engaged with the connecting rod,
rotate the flange until you feel resistance from the piston trying to compress air in the
cylinder.
• Apply Loctite 271 (P/N 92-809820) to the threads of the end cap retaining bolts and
torque to 100 lb. in. (11.5 Nm).
• Apply Loctite 271 (P/N 92-809820) to the pulley retaining bolts and torque to 100 lb. in.
(11.5 Nm).
• Install compressor/alternator belt.
• Run engine to confirm that compressor is functioning correctly.

 Loading...