Step 3. Charge the handset
• Placethehandsetonthebase
andchargeforatleast24
hours.Whenthehandsetis
fullycharged,the
iconis
displayed.
IMPORTANT
Youcannotaccessthebatteryin
thehandset.Donotattemptto
removethebattery,asyoumay
damagethephone.Ifyouneed
toreplacethebattery,contact
customerservice.
Step 1. Set up the base
• Plugthepoweradapterinto
thesocketmarked onthe
undersideofthebaseandplug
theotherendintotheelectrical
outlet.
NOTE
Positionthebaseatleast6
feetawayfromotherelectrical
appliancestoavoidinterference.
Puttingitashighaspossible
ensuresthebestsignal.
IMPORTANT
Onlyusethepowerandtelephone
cablessuppliedwiththeproduct.
Step 2. Connect the charger
(Multi-pack only)
• Plugthepoweradapterinto
thesocketmarked
onthe
undersideofthechargerand
plugtheotherendintothe
electricaloutlet.
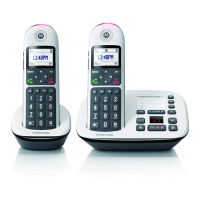
IfyouhavepurchasedaIT6-2
youwillalsohavethefollowing
additionalitems:
• Additionalhandsetandcharger.
• Poweradapterforcharger.
• Telephonelinecord
IMPORTANT
Onlyusethetelephonelinecord
supplied.Thisequipmentisnot
designedformakingemergency
telephonecallswhenthepower
fails.Alternativearrangements
shouldbemadeforaccessto
emergencyservices.
Warning!Youcannotaccessthe
batteryinthehandset.
BATTERY LOW WARNING
Ifyouhearawarningbeepevery2
minutesduringacall,youwillneed
torechargethehandsetbeforeyou
canuseitagain.
Whencharging, iconwillscroll
onthedisplay.
BATTERY PERFORMANCE
Inidealconditions,afullycharged
batteryshouldgiveupto7hours
talktimeorupto130hoursstandby
timeonasinglecharge.
1
Notethatthenewbatterydoesnot
reachthefullcapacityuntilithas
beenputtonormaluseforseveral
days.
Tokeepthebatteryinthebest
condition,leavethehandsetothe
baseforafewhoursatatime.
1
Alltalkandstandbytimesare
approximateanddependon
featuresselectedandusage
pattern.
INTELLIGENT CHARGING
YourIT6supportsIntelligent
Charging,thismeanswhenthe
handsetisfullycharged,thebase
willautomaticallydetectthis
andstopdrawingpowerfrom
theelectricaloutlettocharge
thehandset,savingunnecessary
powerusage.
Box Contents Box Contents Getting started
Display icons
Menu navigation
ONwhenthelineisinuse.
Flasheswhenthereisanincomingcall.
Flasheswhenyouhavemissedcallsandanewnumber(s)areinthe
Callslist.
HandsetringerisOFF.
Steadywhenthehandsetisregisteredandwithinrangeofthebase.Disappears
whenthehandsetisoutofrangeandflasheswhensearchingforthebase.
Flasheswhenyouhavenewvoicemailmessages.
Owhenyouhavenovoicemailmessages.
Phonebookisopen.
Thealarmclockhasbeenset.
Hands-freemodeisactivated.
AnsweringmachineisON.
Theapproximatepowerlevelsofyourbatteryareindicatedas
below:
Batteryisfullycharged.
Batteryispartiallycharged.
Batteryisrunninglow.
Batteryisalmostempty.Thebatteryiconwillflashandemitawarning
beepevery2minutesduringcall.
Handset
Display
Call Log / Scroll Up /
Volume up
OpentheCalllog.Pressu
toenterCallLogmenuand
thenpressdtoselect
Call
List
or
Answ machine
menu.
Scrollupthroughlistsand
settings.
Menu / OK
Enterthemainmenu.
Selecttheoptiondisplayed
onscreen.
Conrmmenuoption–OK
isdisplayedonscreen.
Redial
Opentherediallist.
Talk / Hands-free key
Makeoransweracall.
Activateanddeactivate
hands-freeduringacall.
IMPORTANT
Hands-freeactivationcan
suddenlyincreasethe
volumeintheearpiecetoa
veryhighlevel.Makesure
thehandsetisnottooclose
toyourear.
Pulse to Tone Dialling / * /
Keypad lock
Duringacall,pressandhold
toswitchfrompulsedialling
totonedialling.
Diala*.
Instandbymodepressand
holdtolock/unlockthe
keypad.
Scroll right / Clear / Mute
/ Back
Scrolltotheright.
Deletecharactersonscreen
whenenteringnamesand
numbers.
Mute/unmutethe
microphoneduringacall.
Gobacktopreviousmenu
level isdisplayedon
thescreen.
End call / Switch handset
on/o
Endacall.
Wheninamenu,gobackto
standbymode.
Pressandholdtoswitch
handseto(whenin
standby)oron.
Intercom
Presstomakeaninternalcall.
Phonebook / Scroll Down /
Volume down
Openthephonebook.
Scrolldownthroughlistsand
menus.
Decreasetheearpiecevolume.
Ringer o / Flash / # /
Change case
Pressandholdtoswitch
handsetringeronoro.
Useflash(F)functions.
Diala#.
Whenenteringletters
/editing,shortpressto
changethecasefromAbcto
abcorABCmode.
Pulse / Space
Whendiallingorstoringa
number,pressandholdto
enterapause(P).
Microphone
DigitalCordlessTelephonewith
AnsweringMachine
IT6 Quick Start Guide
ForIT6andIT6-2
ThisQuickStartGuideprovidesalltheinformation
youneedtogetyoustarted.Ifyouneedmoredetailed
instructions,pleaserefertothefulluserguideavailable
intheIT6box.
Alternatively,contactCustomerServiceat:
1-888-331-3383.
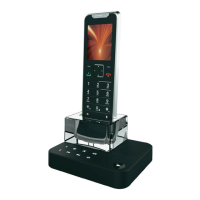
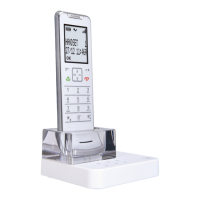
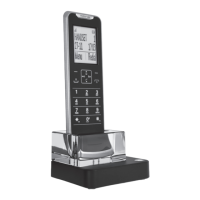
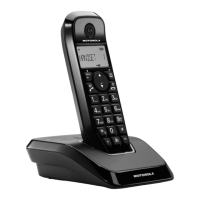
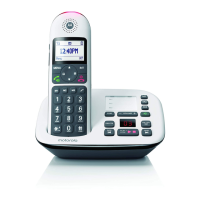
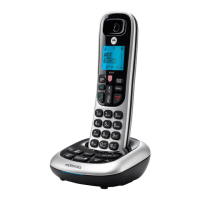
IT6 base
IT6 handset
Power adapter for phone
base to electrical outlet
Guides
Telephone line cord
Warning: Charge the handset for 24 hours before use.
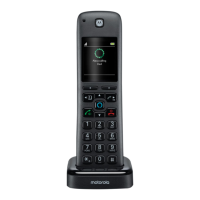
Motorola IT6
For IT6 and IT6-2
Digital Cordless Telephone
with Answering Machine
A
• Whenthehandsetisfully
charged,plugthetelephone
linecordintothesocketmarked
ontheundersideofthebase
andplugtheotherendintothe
telephonewallsocket.
Step 4. Setting the date and
time:
IfyouhavesubscribedtoaCallerID
ServiceandAutoClockissettoonthe
dateandtimeissetautomatically
forallhandsetswhenyoureceive
yourrstcall.
IfyoudonothaveaCallerID
service,youcansetthedateand
timemanually.
• Pressandscrolldto
Clock/Alarm
.
PressM.Displayshows
Date &
Time
,thenpressM.
• Enterthedateusingtheformat
MM/DD
e.g.08/04forAugust4th.
• Enterthetimeusingthe12hour
format
HH:MM
,e.g.02:45.
• Pressuordtochangefrom
A
(am)to
P
(pm)andpressM.
• Pressetoreturntostandby.
Earpiece
Navigating the menus
Thebasicstepsofnavigatingthroughthemenuandon-screenoptions.
• Fromthestandbyscreen,pressM.
Themainmenuisopened.
• Usethe (u)or (d)keystoscrollthroughthemenu.
• Softkeyoptions
OK
and aredisplayed.
PressMtoselect
OK
andopenasub-menuorvalidateanoption.
Pressbtogobacktopreviousmenulevel,correctacharacteror
cancelanaction.
• Pressetoreturntostandby.
NOTE
Ifyoudonotpressanybuttononthehandsetfor30secondsthedisplay
willautomaticallyreturntostandby.Itwillalsoreturntostandbywhenthe
handsetisplacedonthebaseorcharger.