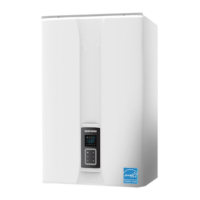
Model
NHB-055/080/110/150
Read the Installation & Operation Manual before
installing
installed and serviced by a licensed
plumber, a licensed gas fitter, or a professional service
technician. Navien is not liable for any damages or defects
resulting from improper installation.
DO NOT install the boiler in areas with excessively high humidity.
Location Requirements
Select the best location on “Choosing an Installation” in the installation
Manual.
Allowable minimum clearances
STEP 2 Installing
Unpacking
Checking the Rating Plate
This boiler is configured for Natural Gas
from the factory. If conversion to Propane
Gas i
s required, the conversion kit supplied
the boiler must be used.
Mounting on the Wall
Removing the Front Cover
Drill in the supplied anchor bolts
after considering where the vent
termination will be located.
Do not install the boiler on dry walls without proper reinforcement.
WARNING
• Before connecting the gas supply, determine the gas type and
pressure for the boiler by referring to the rating plate. Use only the
same gas type indicated on the rating plate. Using a different gas
type will result in abnormal combustion and malfunction of the
boiler. Gas supplies should be connected by a licensed professional
only.
• The appliance and its gas connection must be leak tested before
placing the appliance in operation.
• This boiler cannot be converted from natural gas to propane or vice
versa without a Navien gas conversion kit. Do not attempt a field
conversion of this boiler without a Navien gas conversion kit. Doing
so will result in dangerous operating conditions and will void the
warranty.
Navien America Inc. is not liable for any property damage and/or
personal injury resulting from improper conversions.
WARNING
Follow all local codes and/or the most recent edition of the National Fuel Gas Code
(ANSI Z223.1/NFPA 54) in the USA, or the Natural Gas and Propane Installation Code in
Installation & Operation Manual
User’s Information Manual
Tapping screws and anchors
Pressure Relief Valve (Heating)
Outdoor Temperature Sensor
and Cable
Air Vent Bushing (3/4” to 1/2”)
Lift up the boiler, rest the unit on the hooks
provided on the wall bracket on the wall.
n, install 2 fix screws through the bottom
bracket to secure the boiler to the wall.
Secure the mounting
bracket to the wall with
the tapping screws and
anchors.

 Loading...