English-7
English
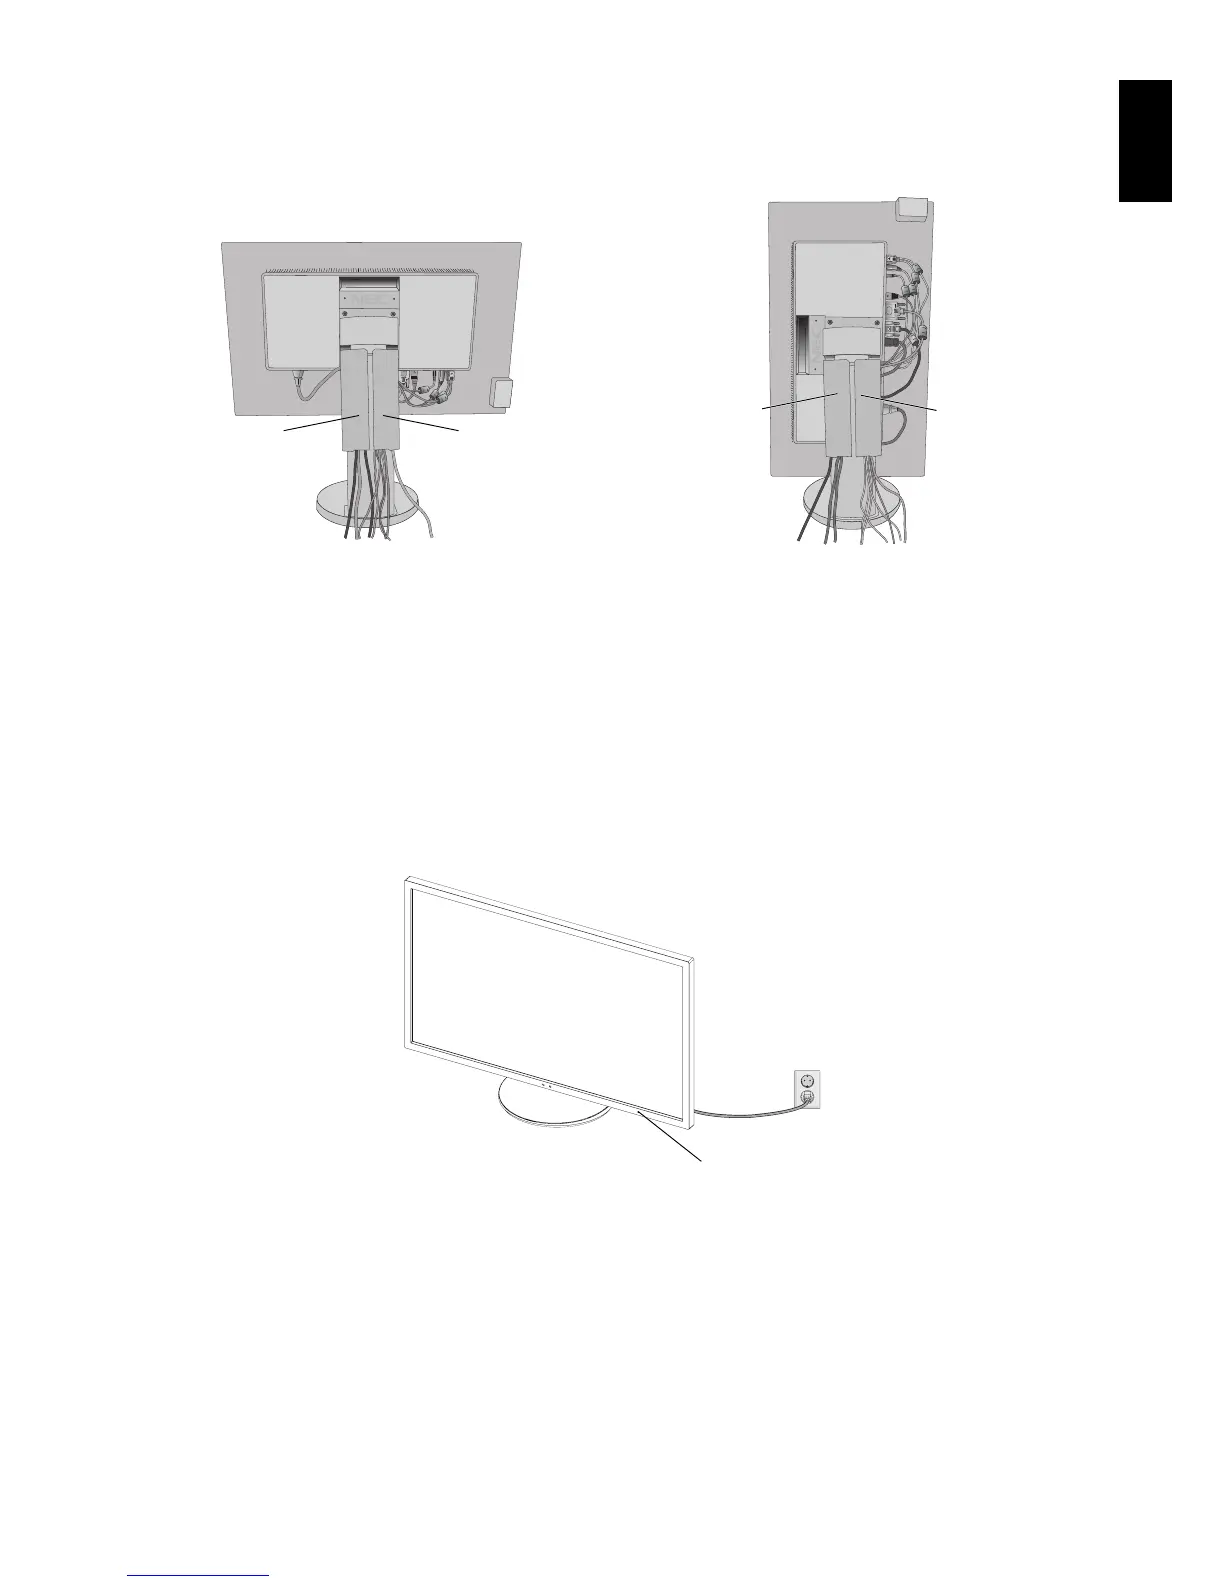
5. To keep the cables neatly organized, place them into the cable management system that is built into the stand.
Place the cables in the hooks fi rmly and evenly (Figure C.2 and Figure C.3).
NOTE: Cable cover is not removable.
6. Please check that you can still rotate, raise and lower the monitor screen after you have installed the cables.
Figure C.2 Figure C.3
Power Cord
DisplayPort Cable*
D-SUB Cable
DVI Cable
HDMI Cable*
Audio Cable
ControlSync Cables
USB Cables
Power Cord
DisplayPort Cable*
D-SUB Cable
DVI Cable
HDMI Cable*
Audio Cable
ControlSync Cables
USB Cables
* Cable not included.
7. Connect one end of the power cord to the AC inlet on the back of the monitor and the other end to the power outlet.
NOTE: Please refer to Caution section of this manual for proper selection of AC power cord.
8. Turn on the computer and the monitor by pressing the power key on the front bezel (Figure E.1).
9. No Touch Auto Adjust automatically adjusts the monitor to optimal settings upon initial setup. For further adjustments, use
the following OSD controls:
• Auto Contrast (Analog input only)
• Auto Adjust (Analog input only)
Refer to the Controls section of this User’s Manual for a full description of these OSD controls.
NOTE: If you have any problems, please refer to the Troubleshooting section of this User’s Manual.
Figure E.1
Power Sign
 Loading...