Installation
Connect the Switch to Your Network
During initial setup, you must connect the switch to a network that you can
access with a local WiFi connection to use the Insight mobile app, or to the
Internet to use the Insight Cloud Portal.
For Gigabit connections, use Category 5e (Cat 5e) or higher-rated Ethernet
cables terminated with RJ-45 connectors.
To use an SFP port, you must insert a 1G SFP transceiver module, which is
available from NETGEAR.
¾ To connect the switch:
1. Connect devices to the network ports on the switch.
2. Connect the switch to the network.
3. Power on the switch and wait for two or three minutes.
The Power LED lights green, indicating that switch completed its
startup process and is available on the network.
The switch receives an IP address from a DHCP server (or a router that
functions as a DHCP server) in your network. If your network does not
include a DHCP server, the switch uses 192.168.0.239 as its default IP
address.
4. To check the port connections from the switch to the powered-on
devices that you connected, do the following:
• Make sure that the Ethernet cables are plugged in correctly.
• Check the le LED for each port on the switch.
The le port LED lights solid green to indicate a valid connection
to a powered-on device and blinks green to indicate trac on this
port.
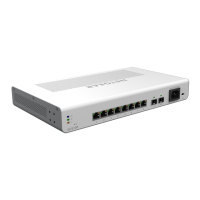
NETGEAR Insight Managed
8-Port Gigabit Ethernet Smart Cloud Switch
with 2 SFP Fiber Ports (GC110)
8-Port Gigabit Ethernet PoE Smart Cloud Switch
with 2 SFP Fiber Ports (GC110P)
Package Contents
Unpack the box and verify the contents:
• Switch model GC110 or GC110P
• Power adapter (localized to the country of sale)
• Wall-mount screw kit for wall installation
• Four rubber footpads for tabletop installation
• Installation guide
Access the Switch for Configuration
The NETGEAR Insight app lets you use your mobile device to discover,
configure, manage, and monitor your switch. You can use this app to access the
switch with a local WiFi connection or you can log in to the Insight Cloud Portal.
The Cloud Portal lets you configure, manage, and monitor the switch from your
Windows-based computer, Mac, or tablet for a larger-screen experience.
Local WiFi access. When you use the Insight mobile app for initial
configuration, the switch must be connected to a WiFi access point (because
the switch does not provide WiFi capacity). Connect your mobile device to that
access point’s WiFi network.
Cloud access from a mobile device. Aer initial configuration, as long as your
switch is on a network with an Internet connection, you can access the switch
through the cloud using the Insight mobile app.
Insight Cloud Portal. The Insight Smart Cloud Portal is available for Insight
Premium subscribers to set up, manage, and monitor their Insight devices.
Visit https://insight.netgear.com/#/login.
Rear panel model GC110P
Cloud access
Local WiFi access
Sample connections
Network
Internet
Switch
Router or
gateway
PoE WiFi access points
PoE VoIP phone
Front panel models GC110 and GC110P
Insight