Installation
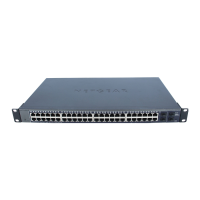
NETGEAR ProSAFE® Smart Switch
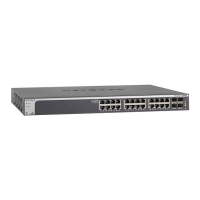
XS728T
Package Contents
• NETGEARProSafeSmartSwitchXS728T
• Rubberfootpadsfortabletopinstallation
• ACpowercord
• 19-inchrack-mountkitforrackinstallation
• SmartSwitchresourceCD
Configure the Switch
InstalltheSmartControlCenterUtilityanduseittoconguretheswitch.
¾ To install the Smart Control Center Utility on a computer:
1. InserttheresourceCDintoyourCDdrive.
2. RuntheSetupprogramtoinstalltheSmartControlCenterUtility.
TheInstallationWizardguidesyouthoughtheinstallation.
Connect Your Switch
IfyouhaveaDHCPserverinyournetworkseeConnect the Switch to Your
Network.
IfyouareusingstaticIPaddressesinyounetwork,rstseeConfigure the
Switch with a Static IP Address,andthenseeConnect the Switch to Your
Network.
Configure the Switch with a Static IP Address
IfyouareusingastaticIPaddressinyounetwork,conguretheswitch
IPaddressbeforeconnectingtheswitchtoyournetwork.ThedefaultIP
addressoftheswitchis192.168.0.239.
Note: IfyouareusingaDHCPserverinyournetwork,thisprocedure
doesnotapplytoyou;instead,godirectlytoConnect the Switch to Your
Network.
¾ To configure the switch with a static IP address:
1. SetupthecomputerwithastaticIPaddressinthe192.168.0.xsubnet.
2. ConnectthecomputertotheswitchusinganEthernetcable.
3. Inabrowser,enterthedefaultIPaddressofyourswitch.ThedefaultIP
addressis192.168.0.239.
Aloginscreendisplays.
4. Enterpasswordforthepassword.
5. SelectSystem > Management > IP Configuration.
6. EnterthestaticIPaddressyouwanttoassigntheswitch.
7. ClicktheApplybutton.
Connect the Switch to Your Network
¾ To connect the switch to your network:
1. ConnecteachcomputertoanRJ-45networkportontheswitchfront
panel.
UseCategory5e(Cat5e)orbetterEthernetcable(Cat6,Cat6a,orCat7)
terminatedwithanRJ-45connectortomake10Gconnections.
Note: Cat6aorCat7cablesarerecommendedifcabledistanceisgreater
than45m(148).
2. Connecttheswitchtoyournetwork.
3. Powerontheswitch.
4. VerifythatthecomputerwiththeSmartControlCenterUtilityisonthe
samesubnetastheswitch.
Configure the Switch with the Smart Control Center
Utility
¾ To configure the switch with the Smart Control Center Utility:
1. Double-clicktheSmartControlCenterUtilityicononyourdesktoporinthe
WindowsStartmenutoruntheutility.
TheSmartControlCenterdisplays.
2. ClicktheDiscoverbutton.