Mercury 310 / SolarBOX / TITAN 912L
Quick Start Installation Guide
11
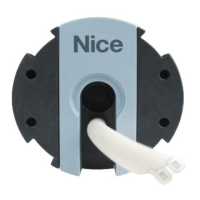
912L Actuator
Ensure
Level
Pivot Arm
2
4
Pull-To-Open:
Fully open gate,
then locate bracket
on gate support.
Push-To-Open:
Fully close gate, then
locate bracket on
gate support.
Ensure actuator arm is fully retracted, then position gate
bracket on gate structural support per Detail A or Detail B:
Gate Closed
Gate Open
Wall
Wall
Ax Gate
Bracket to
gate struc-
tural support
by welding or
using bolt &
nut.
5
7 8
9
10
and minimum 6 feet away from
pivot arm (See Fig-2).
Pass cable through
rubber grommets in
bottom of control box
and wire per diagram
at right.
For dual gate install, dig
trench across drive and
run 2nd actuator cable
through conduit.
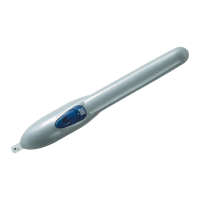
Open mechanical release on actuator.
2 31
6
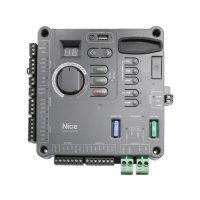
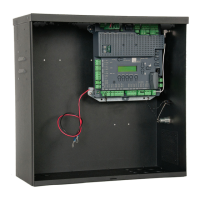
Mount Control Box same
side as primary actuator
Wire TITAN 912L
to control board:
Place Battery inside con-
trol box with terminals
facing toward the front.
Attach Actuator
to Pivot Arm
Attach Gate Bracket
to Actuator Arm
1/2”x 3.5” Bolt
Pivot Arm
Actuator
Lock Nut
2
1st Washer
Gate Bracket
Install actuator
to pivot arm
with bolt and
lock nut as
shown.
Gate
Bracket
Lock Nut
2nd Washer
3
Install gate bracket to
actuator arm, as shown
(w/ x2 washers, bolt, lock
nut). Do not attach brack-
et to gate until Step 5.
Actuator Arm
Weld or clamp pivot arm onto hinge post. For Pull-to-Open installation, use Detail A. For Push-to-Open, use Detail B:
Actuator And Control Box Installation (perform ALL steps in numerical order):
FRONT VIEW FRONT VIEW
IMPORTANT!
Read entire
manual before
attempting the
installation.
This is NOT a
“do-it-yourself”
project. Use
a qualied
contractor
to install this
system. Read
all safety
information!
1
Gate Bracket
Centerline
Top of
Pivot Arm
1/2”
Pivot
Arm
Hinge
Post
Gate
Gate Bracket
Centerline
Top of
Pivot Arm
1/2”
Pivot
Arm
Hinge
Post
Gate
Or
11”
PIVOT ARM
Hinge
Post
Hinge
Gate
6”
6”
13”
PIVOT ARM
Hinge
Post
Hinge
Gate
CAUTION! Do not mount the control box where the person
using the push button on box can come in contact with the gate!
Fig-1: Pivot Arm, Actuator, & Gate Bracket Install
TOP VIEW TOP VIEW
A
B
A
B
CAUTION! Do NOT weld while control board is powered!
1/2”x 2-7/8”Bolt
PULL
PUSH
Closed
Closed
limits by manually pushing
gate to desired close limit,
then to desired open limit,
then to halfway open posi-
tion. Close release, but do
not lock.
With actuator release
open, set mechanical
Push-To-Open
Pull-to-Open
Bracket
Bracket
Pull-To-Open
Push-To-Open
www.ApolloGateOpeners.com | (800) 878-7829 | Sales@ApolloGateOpeners.com