Do you have a question about the Nikon COOLSHOT PRO II STABILIZED and is the answer not in the manual?
Essential initial reading for safe and proper use of the Nikon Laser Rangefinder.
Disclaimers on manual content accuracy, reproduction, and product specification changes.
Details FCC and EU compliance regarding radio interference for the device.
Explains the meaning of WARNING and CAUTION symbols for potential hazards and injuries.
Safety guidelines for the invisible laser beam, emphasizing eye protection and avoiding accidental emission.
Warnings for users, including sun exposure, pacemaker interference, and magnetic effects on media.
Instructions on turning off, storing, handling malfunctions, and avoiding unsafe usage scenarios.
Guidelines for safe handling, use, charging, disposal, and leakage of the lithium battery.
Precautions against physical shock, water, extreme temperatures, and leaving the product in hot environments.
Step-by-step guide on how to clean the lens surface carefully to avoid damage.
Guidance on cleaning the main body, especially after seaside use, and avoiding solvents.
Recommendations for storing the product in a cool, dry place to prevent condensation and mold.
Explains symbols indicating separate collection for batteries and the product in European countries.
Lists the main features of the product like STABILIZED function, First Target Priority, and optics.
Explains how measurements are taken and factors affecting accuracy and potential inaccuracies.
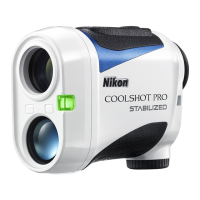
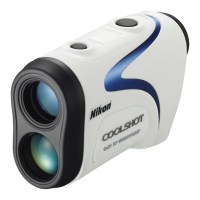
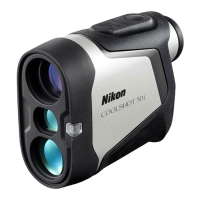
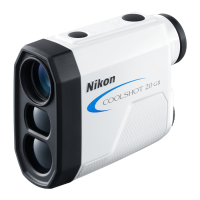
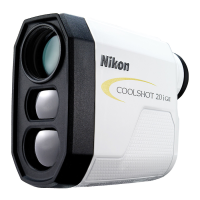
Identifies and labels the parts of the Nikon COOLSHOT PRO II STABILIZED laser rangefinder.
Lists the included items: Body, Lithium battery (CR2), and Case.
Displays compliance marks and standards for laser products and radio interference.
Details the meaning of various indicators in the internal display like target mark, distance unit, and LOCKED ON sign.
Clarifies that dust in the display does not affect measurement accuracy.
Explains that the STABILIZED function activates automatically when the rangefinder is ON.
Describes how this algorithm prioritizes the closest subject when measuring overlapping subjects.
Explains the LOCKED ON sign and electronic sound indicating the closest subject is displayed.
Notes that this indicator blinks when the rangefinder is ON and the inclinometer is not used.
Specifies the battery type as 3V CR2 lithium battery for the device.
Step-by-step guide on how to open the cover, insert the battery correctly, and secure the cover.
Describes the different displays for battery status and their meanings for the user.
Explains the two ways to press the MODE button: 'Press and hold' and 'Press'.
Details how to switch between four measurement display modes based on golf playstyle.
Notes that the selected display mode setting is saved even when the rangefinder is turned OFF.
Explains how to adjust the internal display brightness to Auto (A) or levels 1 to 5.
States that luminance settings are saved upon exiting the menu or after inactivity.
Guides on selecting the distance unit between yards (YD) and meters (m).
Confirms that the selected distance unit is saved even when the rangefinder is turned OFF.
Instructions on how to turn the electronic sound for the LOCKED ON sign ON or OFF.
Notes that the electronic sound setting is saved when the rangefinder is turned OFF.
Visual representation of how to access and change settings like display luminance, unit, and sound.
Lists the different measurement display modes available for selection.
Warns that deviations from specified procedures may cause adverse effects or health damage from laser radiation.
Step-by-step guide to adjust the focus using the diopter adjustment ring for clear viewing.
Outlines the steps for measuring, including aiming at the target and pressing the PWR button.
Explains how to perform a single measurement by pressing the PWR button once.
Describes how to start continuous measurement by pressing and holding the PWR button.
Advises using continuous measurement for flagsticks to minimize handshake effects.
Lists detailed technical specifications like measurement range, accuracy, magnification, dimensions, and weight.
Provides specifications related to environment, laser classification, wavelength, output, and beam divergence.
Details waterproof capabilities, resistance to humidity/dust/rain, and estimates battery life.
Lists common problems like 'Does not turn on' or 'Unable to measure' with their causes and solutions.
Addresses issues related to the STABILIZED function, normal sounds, and error indications.
Advises contacting the local dealer for repairs and warns against self-repair or disassembly.
Discusses the repairable period, availability of parts, and conditions under which repair is not possible.
Essential initial reading for safe and proper use of the Nikon Laser Rangefinder.
Disclaimers on manual content accuracy, reproduction, and product specification changes.
Details FCC and EU compliance regarding radio interference for the device.
Explains the meaning of WARNING and CAUTION symbols for potential hazards and injuries.
Safety guidelines for the invisible laser beam, emphasizing eye protection and avoiding accidental emission.
Warnings for users, including sun exposure, pacemaker interference, and magnetic effects on media.
Instructions on turning off, storing, handling malfunctions, and avoiding unsafe usage scenarios.
Guidelines for safe handling, use, charging, disposal, and leakage of the lithium battery.
Precautions against physical shock, water, extreme temperatures, and leaving the product in hot environments.
Step-by-step guide on how to clean the lens surface carefully to avoid damage.
Guidance on cleaning the main body, especially after seaside use, and avoiding solvents.
Recommendations for storing the product in a cool, dry place to prevent condensation and mold.
Explains symbols indicating separate collection for batteries and the product in European countries.
Lists the main features of the product like STABILIZED function, First Target Priority, and optics.
Explains how measurements are taken and factors affecting accuracy and potential inaccuracies.
Identifies and labels the parts of the Nikon COOLSHOT PRO II STABILIZED laser rangefinder.
Lists the included items: Body, Lithium battery (CR2), and Case.
Displays compliance marks and standards for laser products and radio interference.
Details the meaning of various indicators in the internal display like target mark, distance unit, and LOCKED ON sign.
Clarifies that dust in the display does not affect measurement accuracy.
Explains that the STABILIZED function activates automatically when the rangefinder is ON.
Describes how this algorithm prioritizes the closest subject when measuring overlapping subjects.
Explains the LOCKED ON sign and electronic sound indicating the closest subject is displayed.
Notes that this indicator blinks when the rangefinder is ON and the inclinometer is not used.
Specifies the battery type as 3V CR2 lithium battery for the device.
Step-by-step guide on how to open the cover, insert the battery correctly, and secure the cover.
Describes the different displays for battery status and their meanings for the user.
Explains the two ways to press the MODE button: 'Press and hold' and 'Press'.
Details how to switch between four measurement display modes based on golf playstyle.
Notes that the selected display mode setting is saved even when the rangefinder is turned OFF.
Explains how to adjust the internal display brightness to Auto (A) or levels 1 to 5.
States that luminance settings are saved upon exiting the menu or after inactivity.
Guides on selecting the distance unit between yards (YD) and meters (m).
Confirms that the selected distance unit is saved even when the rangefinder is turned OFF.
Instructions on how to turn the electronic sound for the LOCKED ON sign ON or OFF.
Notes that the electronic sound setting is saved when the rangefinder is turned OFF.
Visual representation of how to access and change settings like display luminance, unit, and sound.
Lists the different measurement display modes available for selection.
Warns that deviations from specified procedures may cause adverse effects or health damage from laser radiation.
Step-by-step guide to adjust the focus using the diopter adjustment ring for clear viewing.
Outlines the steps for measuring, including aiming at the target and pressing the PWR button.
Explains how to perform a single measurement by pressing the PWR button once.
Describes how to start continuous measurement by pressing and holding the PWR button.
Advises using continuous measurement for flagsticks to minimize handshake effects.
Lists detailed technical specifications like measurement range, accuracy, magnification, dimensions, and weight.
Provides specifications related to environment, laser classification, wavelength, output, and beam divergence.
Details waterproof capabilities, resistance to humidity/dust/rain, and estimates battery life.
Lists common problems like 'Does not turn on' or 'Unable to measure' with their causes and solutions.
Addresses issues related to the STABILIZED function, normal sounds, and error indications.
Advises contacting the local dealer for repairs and warns against self-repair or disassembly.
Discusses the repairable period, availability of parts, and conditions under which repair is not possible.
The Nikon COOLSHOT PRO II STABILIZED is a laser rangefinder designed for golf and other outdoor activities, offering precise distance measurements and enhanced stability. Its primary function is to measure the distance to a target using an invisible laser beam, calculating the time it takes for the beam to travel to the target and back. This device is equipped with several features that make it user-friendly and highly effective in various conditions.
The core function of the COOLSHOT PRO II STABILIZED is distance measurement. It utilizes a laser to determine the range to objects, displaying the results in either yards or meters. The device offers four measurement display modes tailored for different golf playstyles:
A key feature of this rangefinder is its STABILIZED function, which is activated automatically when the device is turned on. This function significantly reduces vibrations caused by hand movement, ensuring a steady view and more accurate measurements, especially over longer distances or when targeting smaller objects.
The device incorporates a First Target Priority algorithm, which is highly beneficial when measuring overlapping subjects, such as a flagstick with trees in the background. This algorithm ensures that the distance to the closest subject is displayed, making it easier to pinpoint the flagstick. To enhance this, the Dual LOCKED ON feature provides a visual confirmation (LOCKED ON sign) in the viewfinder along with an electronic sound (if enabled) when the distance to the closest subject is successfully detected and displayed. This is particularly useful for single measurements and continuous measurements, where the LOCKED ON sign appears when figures shift to a closer subject.
An Actual Distance Indicator is also built-in, which blinks when the measurement display mode is set to actual distance mode and the rangefinder is ON. This provides a quick visual cue that the inclinometer function is not being used.
The COOLSHOT PRO II STABILIZED is designed for ease of use with a high-quality 6x finder and multilayer coating for bright, clear images. A larger ocular further enhances viewing comfort. The internal display is red, making it easy to read in various lighting conditions.
Operating the device involves simple button presses. The PWR button serves multiple purposes:
The MODE button allows users to navigate through various settings and display modes:
The device features an automatic power shut-off function, turning off after approximately 8 seconds of inactivity from the standby screen, which helps conserve battery life.
The COOLSHOT PRO II STABILIZED is built to be durable and resistant to environmental factors. It is waterproof (up to 1m/3.3ft for 10 minutes) and fogproof, meaning it can be used in conditions of high humidity, dust, and rain without risk of damage to internal functions. The nitrogen-filled design helps prevent condensation and mold. However, it is not designed for underwater usage, and users should avoid operating or holding the product in running water. If moisture is found on movable parts, it should be wiped off.
The battery chamber is rainproof, but not waterproof. If water enters the battery chamber, it should be wiped out, and the chamber allowed to dry.
For general cleaning:
For storage, the product should be kept in a cool, dry place to prevent water condensation or mold on lens surfaces. After use on rainy days or at night, it should be thoroughly dried at room temperature before storage.
The device uses a 3V CR2 lithium battery. Instructions for inserting and replacing the battery are provided, emphasizing correct orientation and secure attachment of the battery-chamber cover to maintain waterproof capabilities. A battery level indicator in the internal display provides clear information on battery status, from sufficient power to needing replacement or being empty. For extended periods of non-use, the battery should be removed.
The manual also emphasizes safety precautions, including not aiming the laser at eyes or people, avoiding looking at lasers with other optical instruments, and removing the battery when not in use. Users of medical devices like cardiac pacemakers are advised not to use the product due to built-in magnets.
| Magnification | 6x |
|---|---|
| Objective Diameter | 21 mm |
| Field of View | 7.5° |
| Eye Relief | 18 mm |
| Power Source | CR2 lithium battery |
| Waterproof | Yes |
| Stabilization | Yes |
| Exit Pupil | 3.5 mm |
| Diopter Adjustment Range | ±4 m-1 |
| First Target Priority Mode | Yes |
| Distant Target Priority Mode | Yes |
| Fogproof | Yes |
| Measurement Range | 8-1, 200 yd. |
| Continuous Measurement | Yes |
| Accuracy | ±0.75m/yd. (shorter than 700m/yd), ±1.25m/yd. (700m/yd. and over, shorter than 1, 000m/yd.), ±1.75m/yd. (1, 000m/yd. and over) |