- A ・ -
logo_Q0650_forGraphic
071004_Gdesign_ito
VBA21001-R.3753.A
㧍
内部に高電圧部あり。カバーを外す時は感電に注意すること。
カバーを外した後は、修理指針の指示に従ってメインコンデン
サーの放電を必ず行うこと。
警告
Adjustment of AE CCD positioning
WARNING
Take extra care not to get an electric shock when detaching
covers.
After removing covers, b
e
sure to discharge the main
condenser according to the instructions of repair manuals
.
*
Under the environment where the AE-CCD positioning is adjusted, use the reference body (and change the
environment depending on measured results).
・
In case the measured value is out of standard, check if there is no misalignment of the focus areas.
・
In case the measured value is out of standard, change the environment of measurements. (e.g. setting place/
direction, room brightness, etc)
Procedure
①
Only solder the four wires (connected from the top cover) on the SB-PCB. Assemble temporarily withoutolder the four wires (connected from the top cover) on the SB-PCB. Assemble temporarily without
attaching the screws (for xing the top cover) and mounting the rubber eyecap (#B271), then make a
temporary assembly of the front cover unit (#B24) and rear cover with four screws (#6690).
②
Mount "AF50/1.4D" on the camera, and x them on the tripod horizontally.
③
Connect the camera and PC via USB cable (UC-E4).
Provide power by AC adapter (EH-5) and power connector (EP-5).
**
Be careful NOT to cause a short-circuit at uncovered portions.
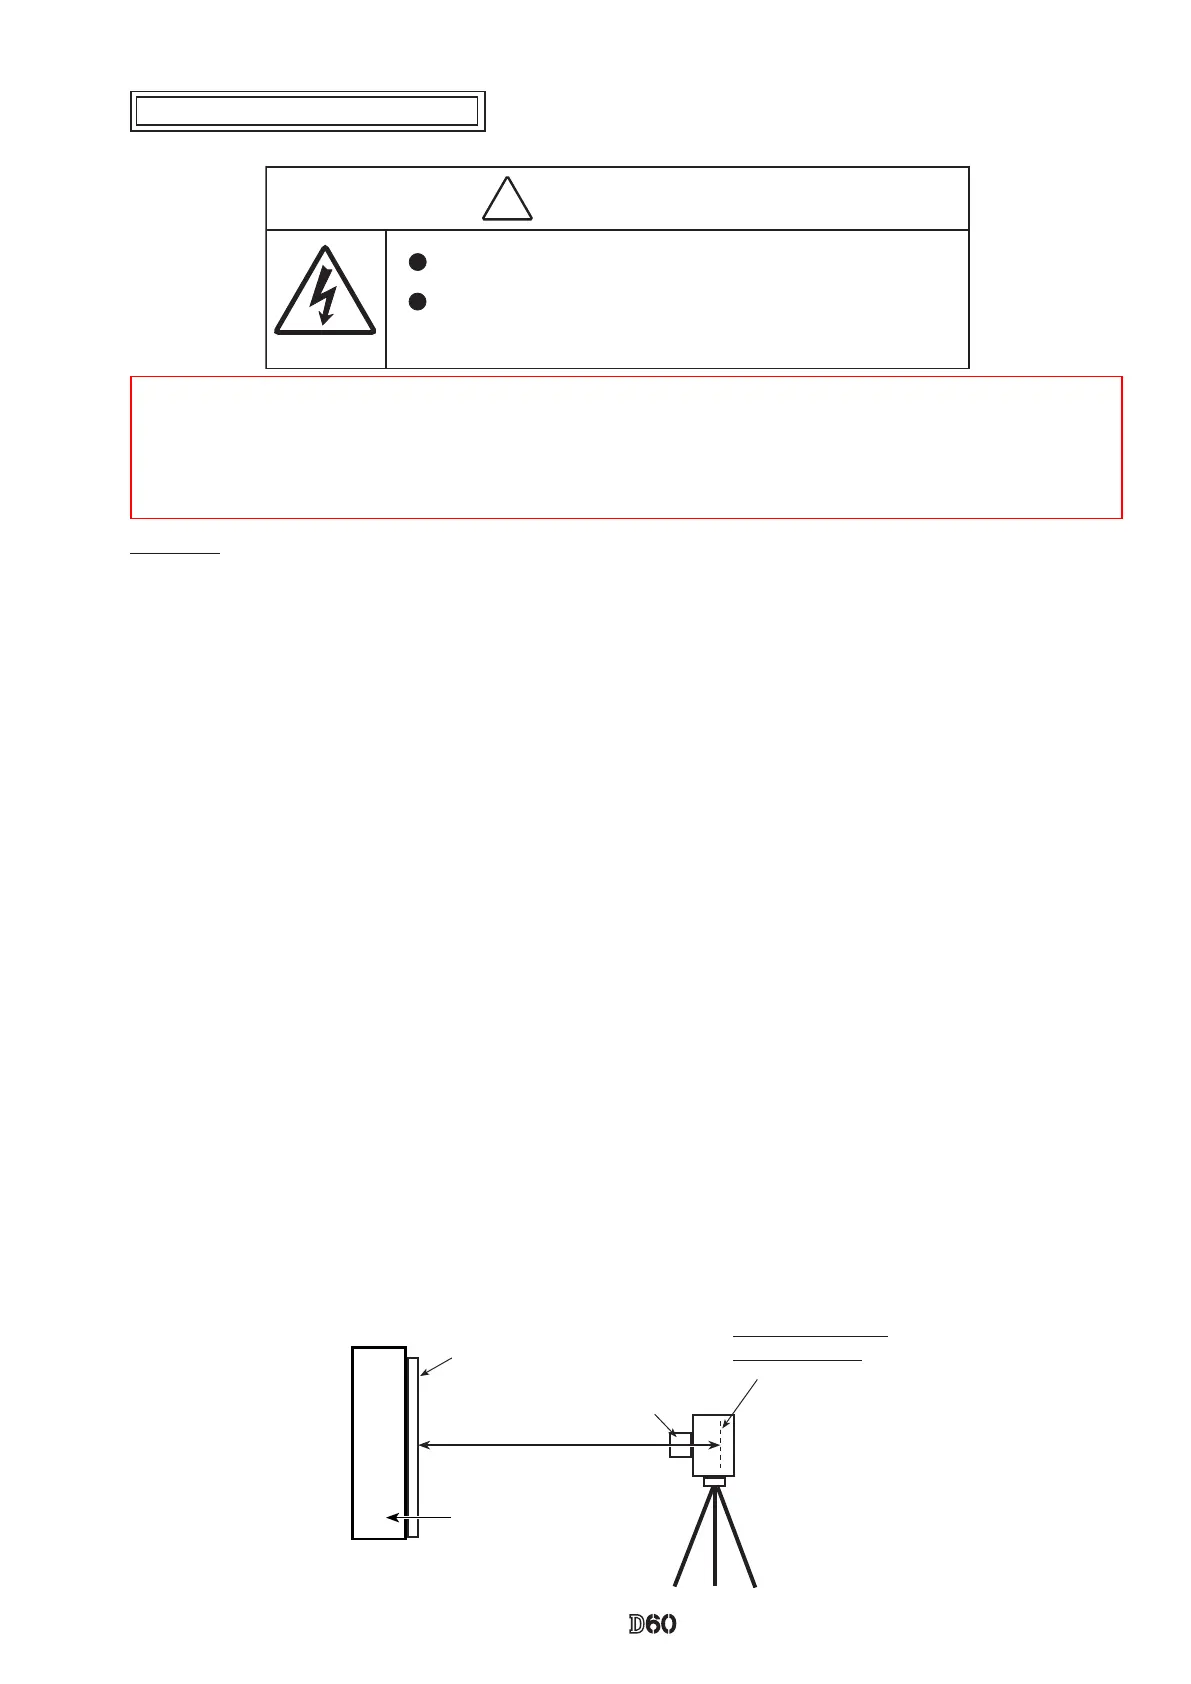
Attach the AE-CCD positioning tool (J15428) in the color viewer (J63070), and turn power ON.
Keep the 0.7-m distance between the front face of the AE-CCD positioning tool and the reference surface
of the camera. Set the camera AF to manual, and the focus ring to "0.7 m" by rotating it.
⑦
Start up the inspection and adjustment software for D60 (J18443), and select "Inspection and Adjustment
for AE CCD POSITION" then "Set Camera for AE CCD POSITION".
Looking through the viewnder, move the camera so that the focus areas of the camera coincide with the
circular holes of the AE-CCD positioning tool.
*
Set the camera and AE-CCD positioning tool horizontally.
⑧
Select "Inspection and Adjustment for AE CCD POSITION".
*
Cover the camera with a black cloth, etc, when measured.
⑨
Attach the metering FPC unit without tightening three screws (#291-1). Then give each screw two and half
turns counterclockwise.
By following instructions on PC, make the position adjustment of AE-CCD by the
screws (a:#741, b:#291-1).
⑩
Fix the two screws with screwlock.
⑪
Fix the four locations of the AE CCD sensor-base with screwlock. (ref. Page A29 for the adhering29 for the adhering for the adhering
positions.)
AF 50/1.4
D
AE-CCD positioning
tool (J15428)
Attaching surface of
the imaging-PCB
Approx. 0.7
m
Color viewer (J63070)
 Loading...